This guide will walk you through the steps to create a new file on Policy Passport.
Video:
Steps:
File Creation & Upload
1. Log in to your Policy Passport profile
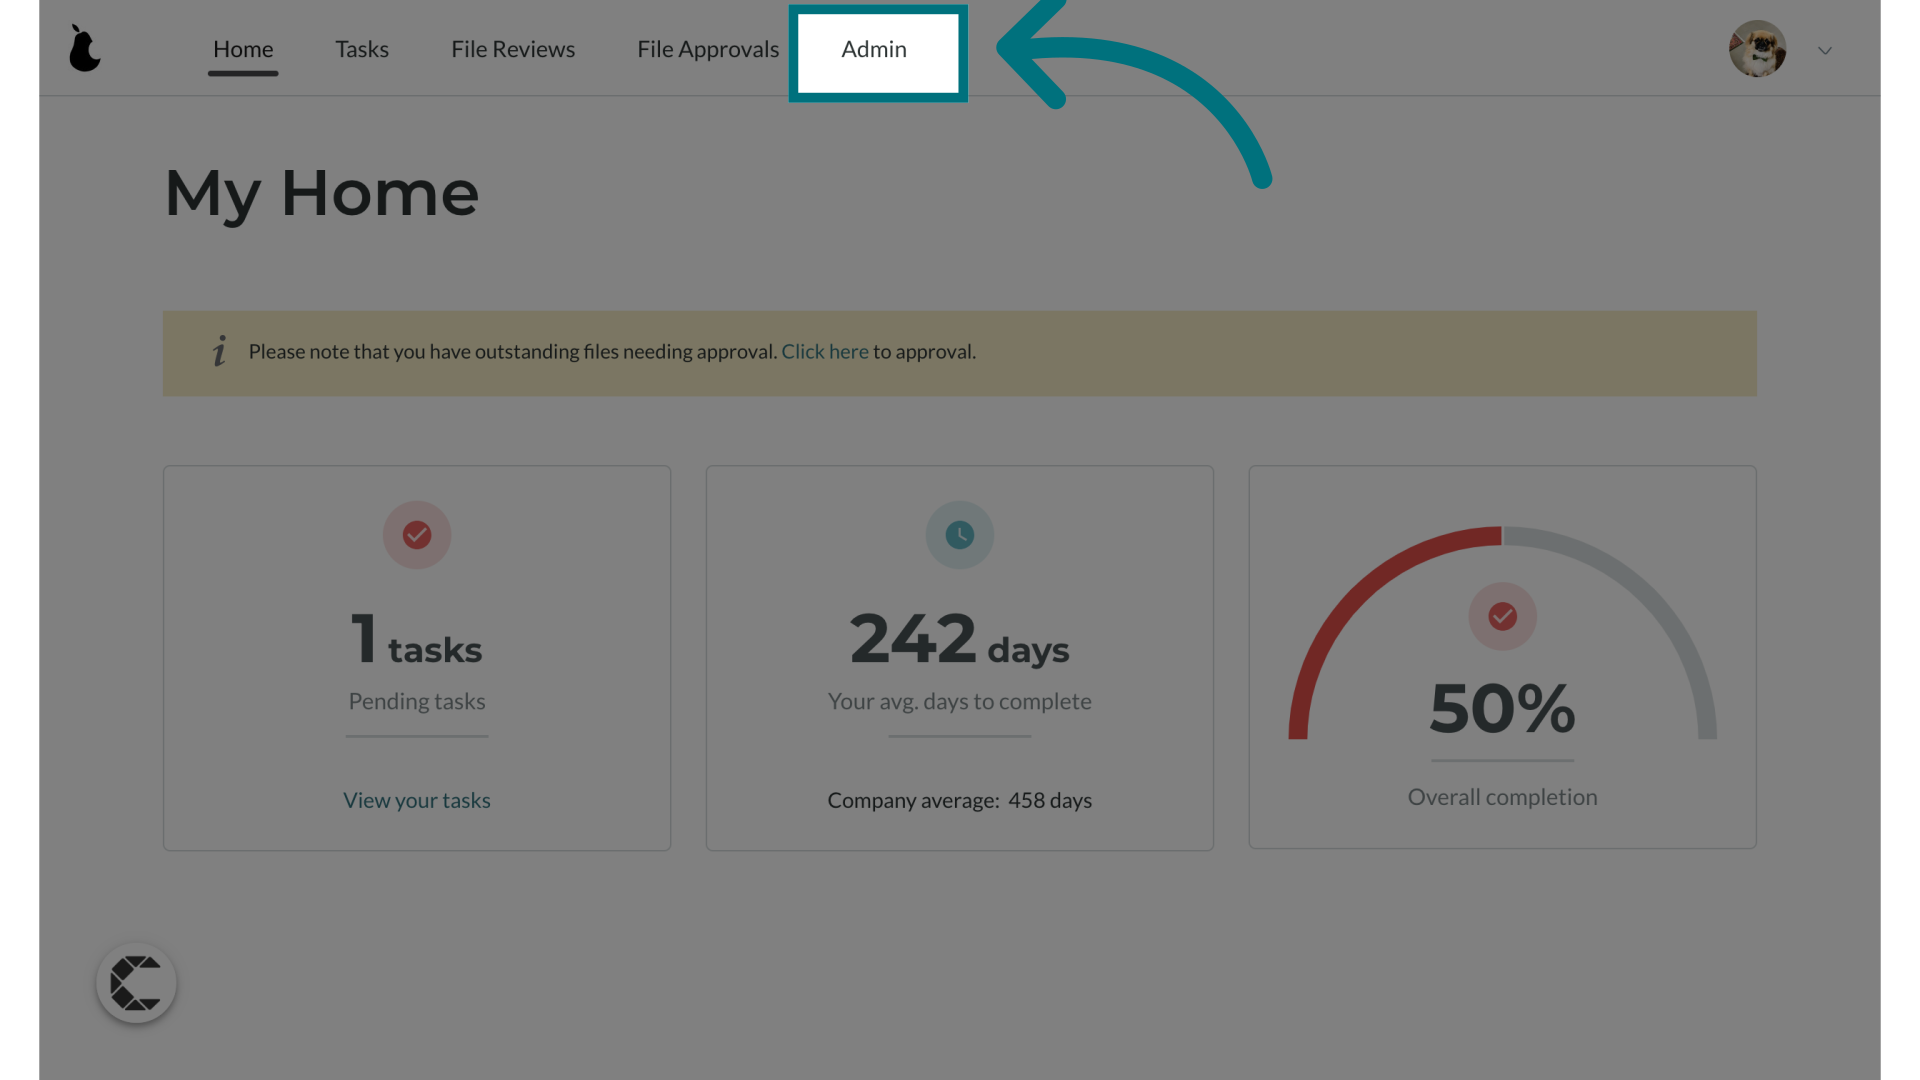
2. Click the "Admin" tab
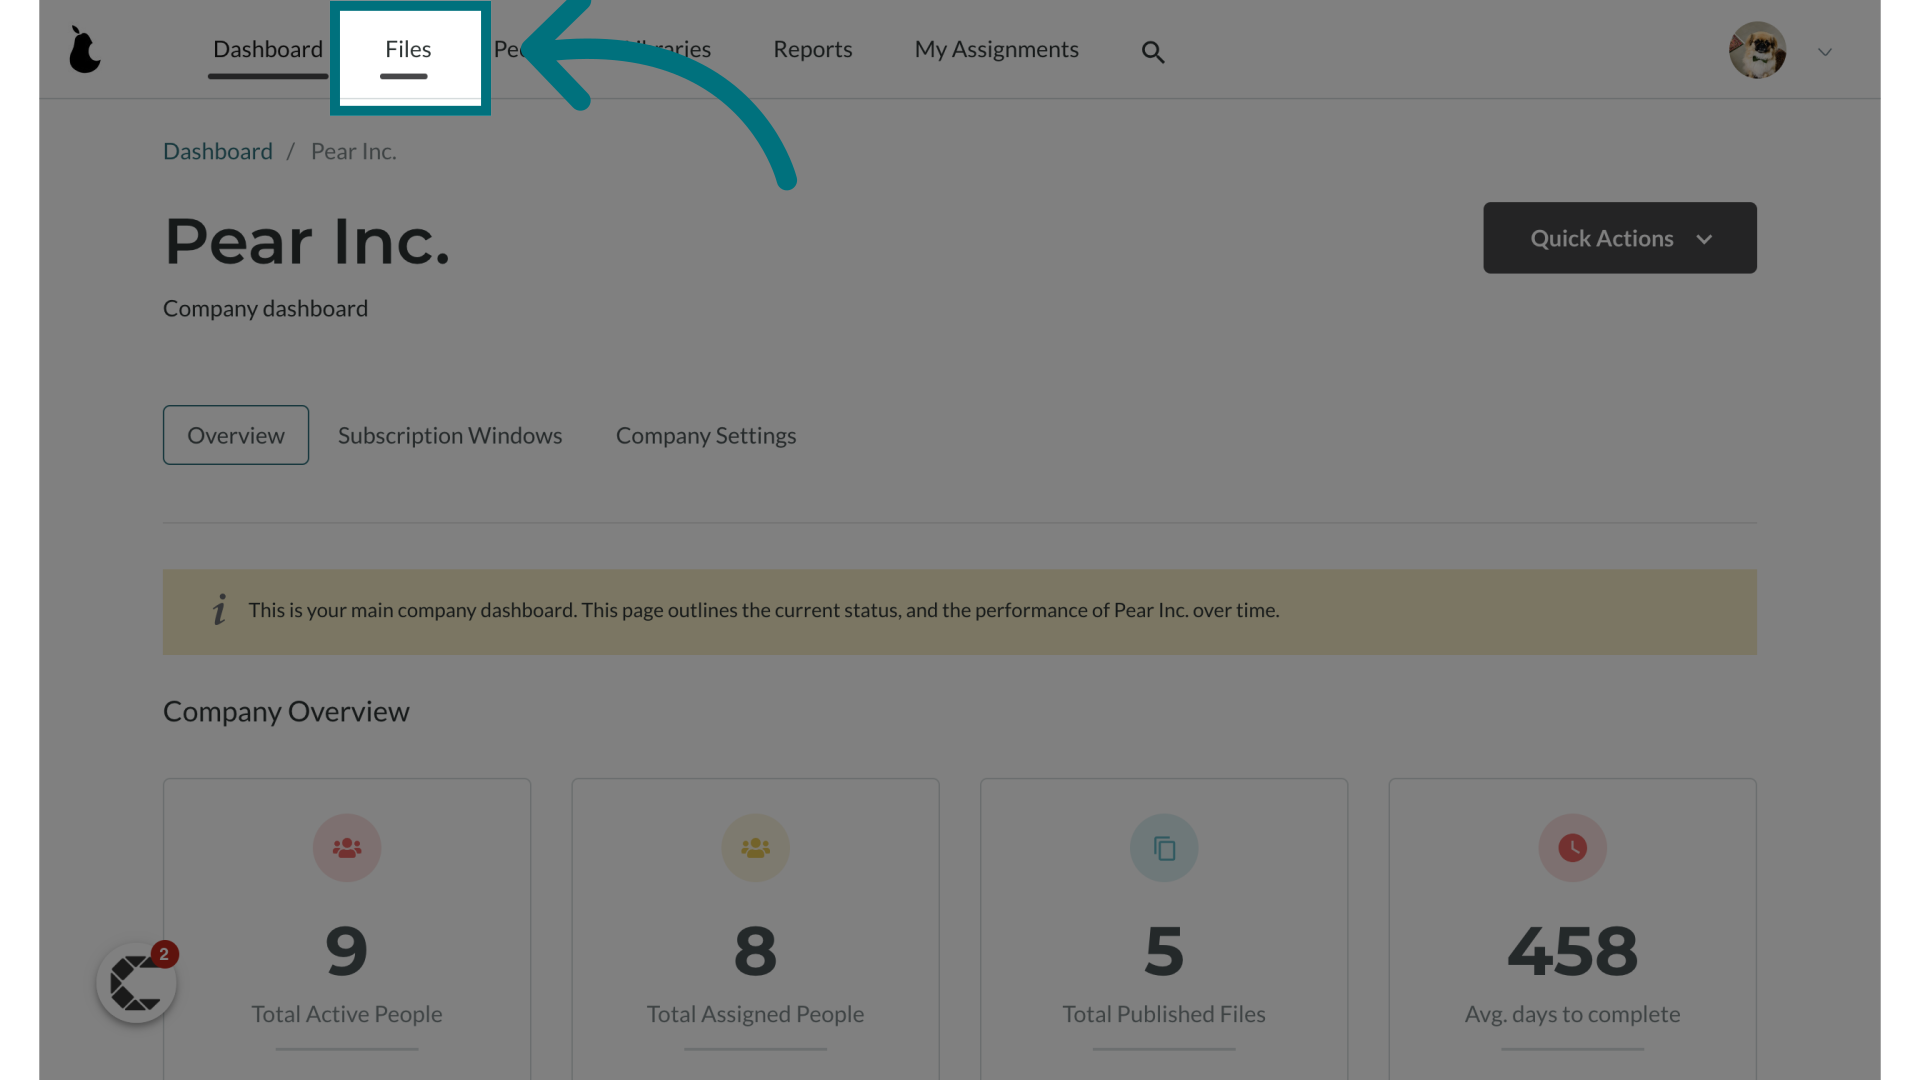
3. Click "Files"
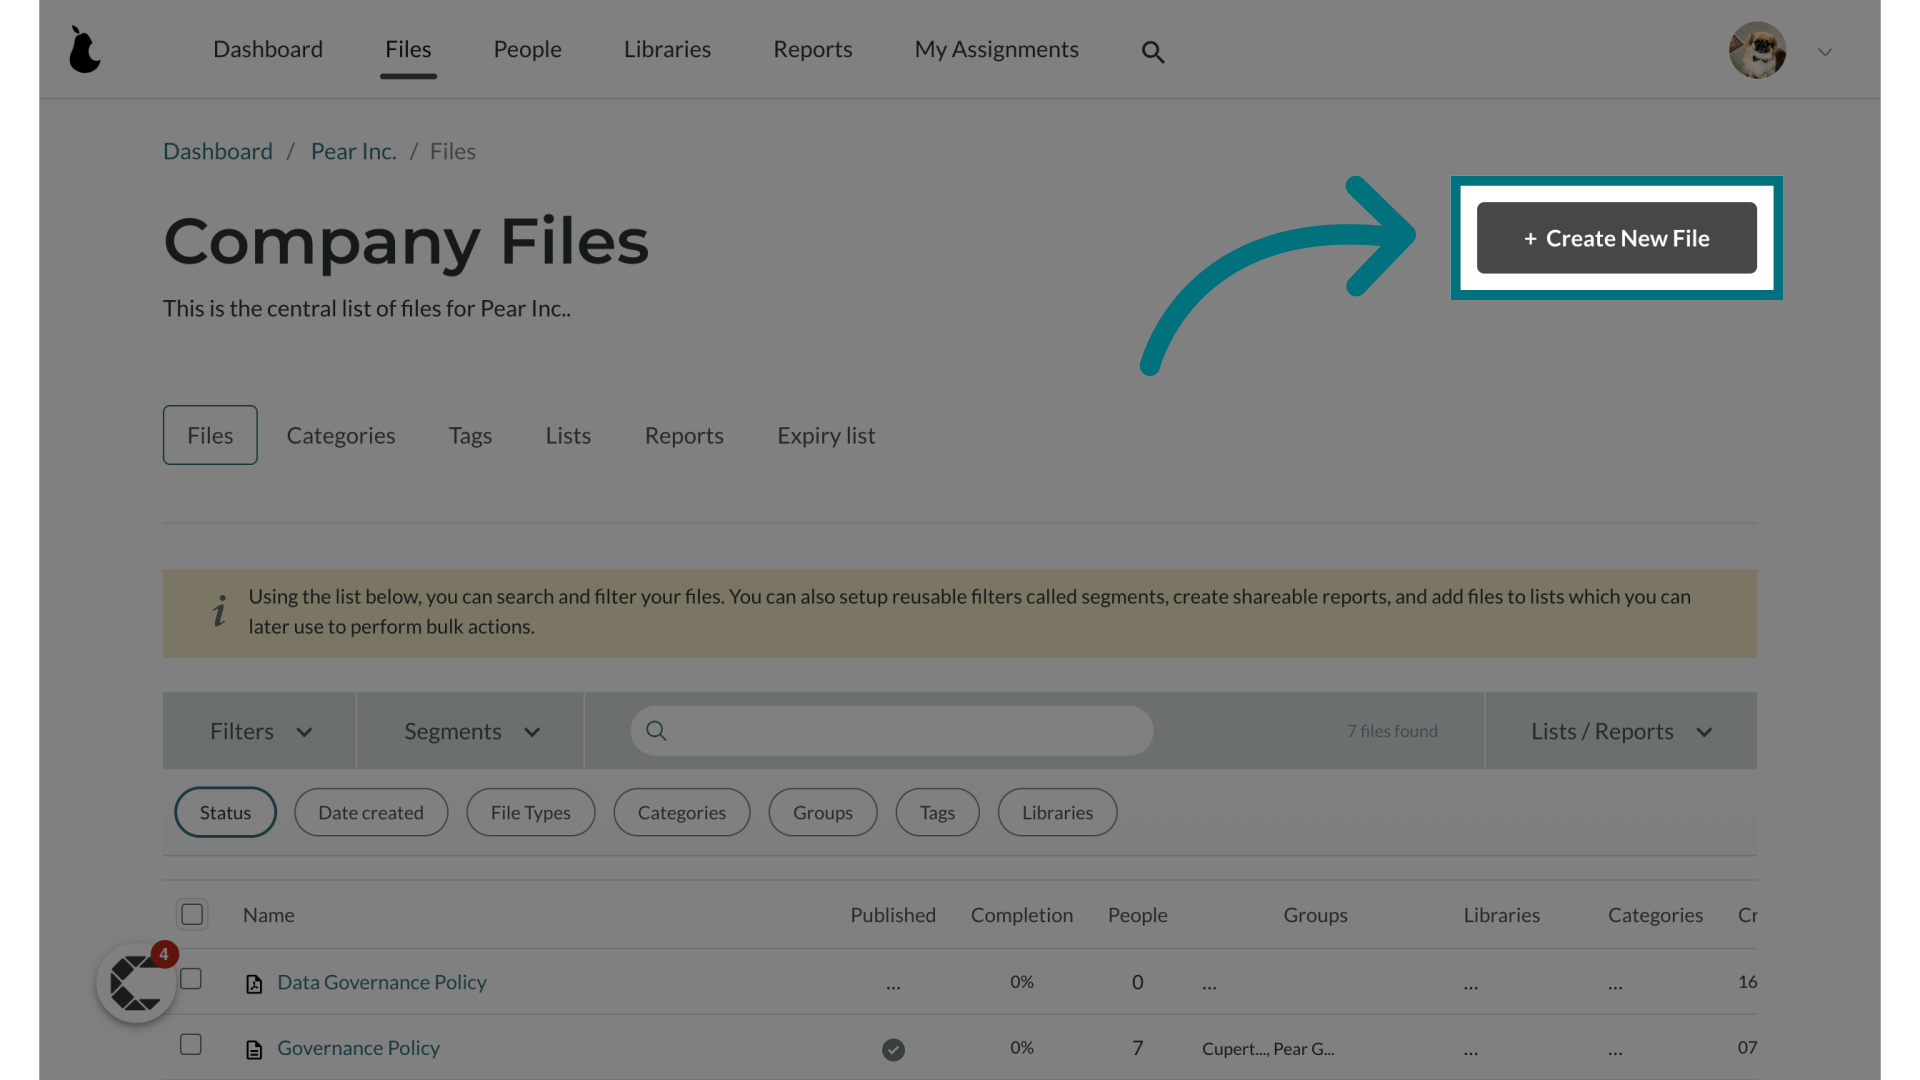
4. Click "+ Create New File"
5. Provide a name for the file
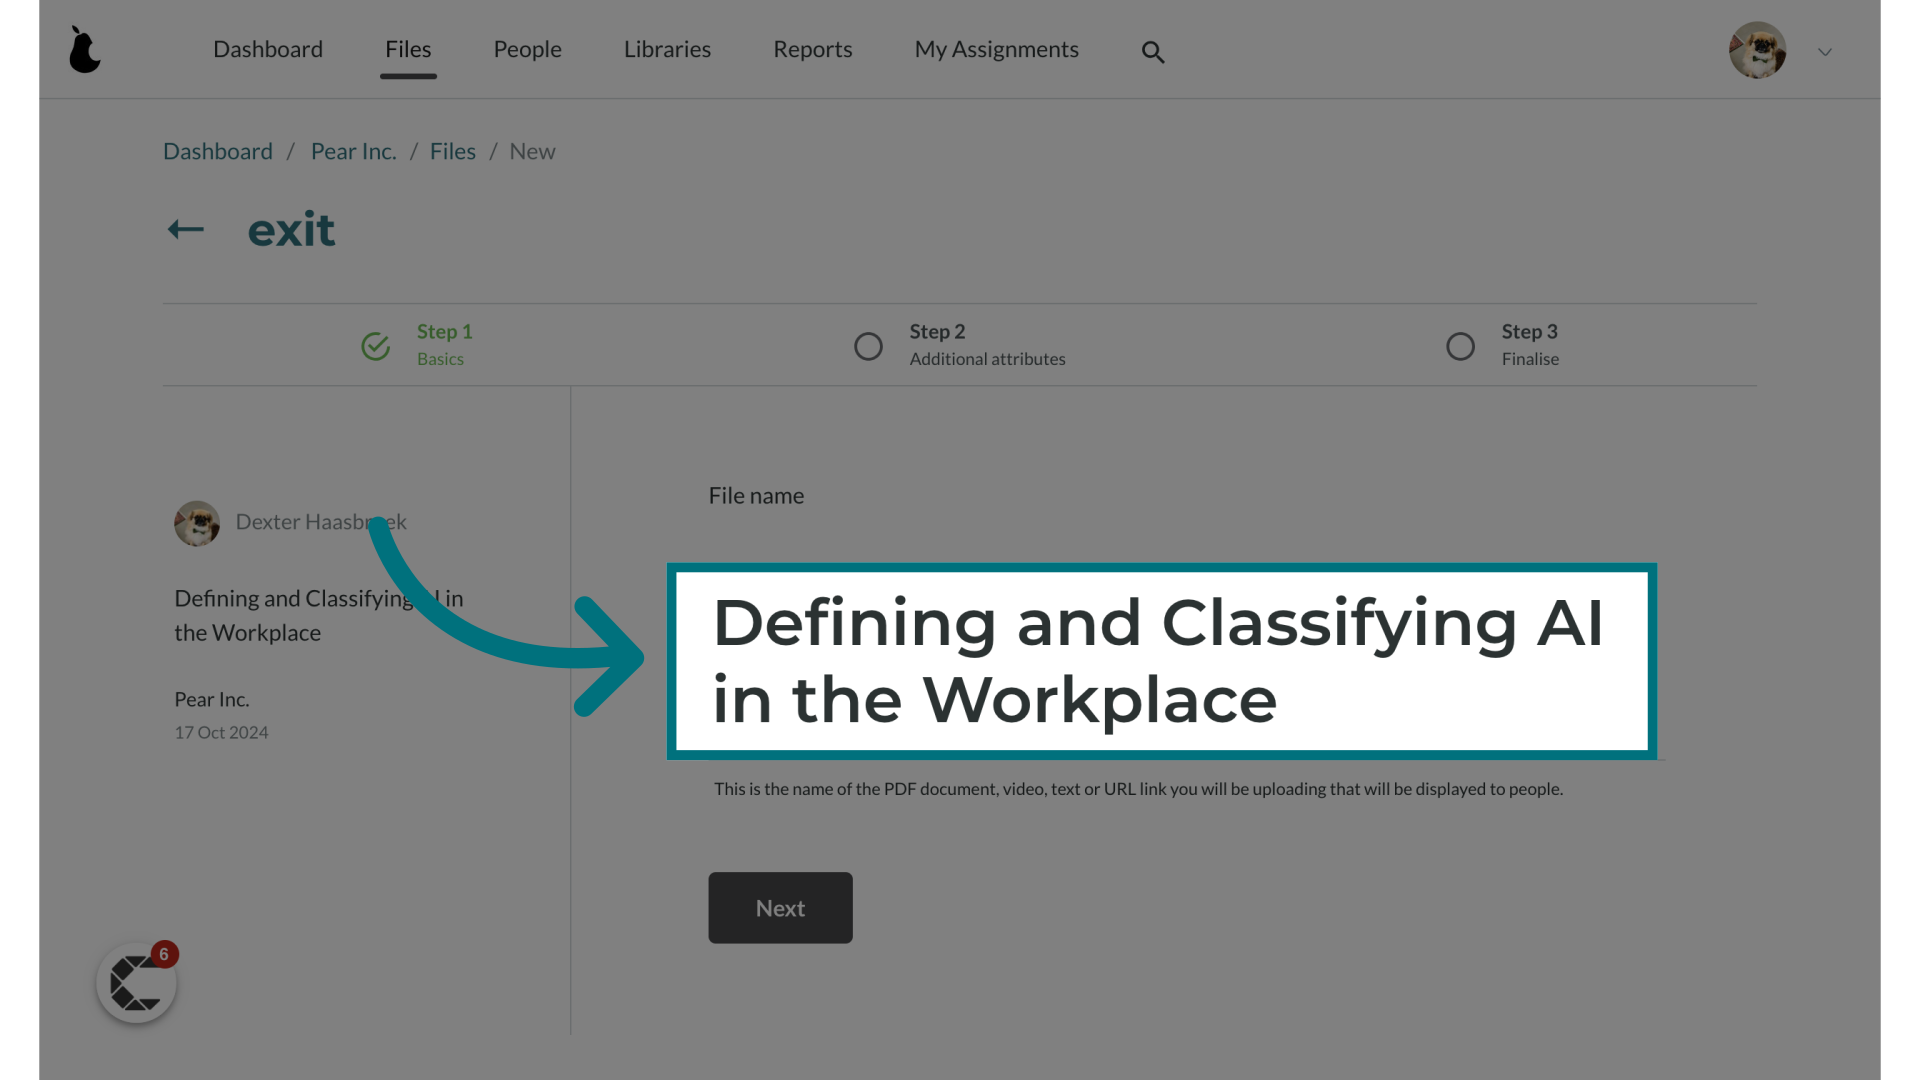
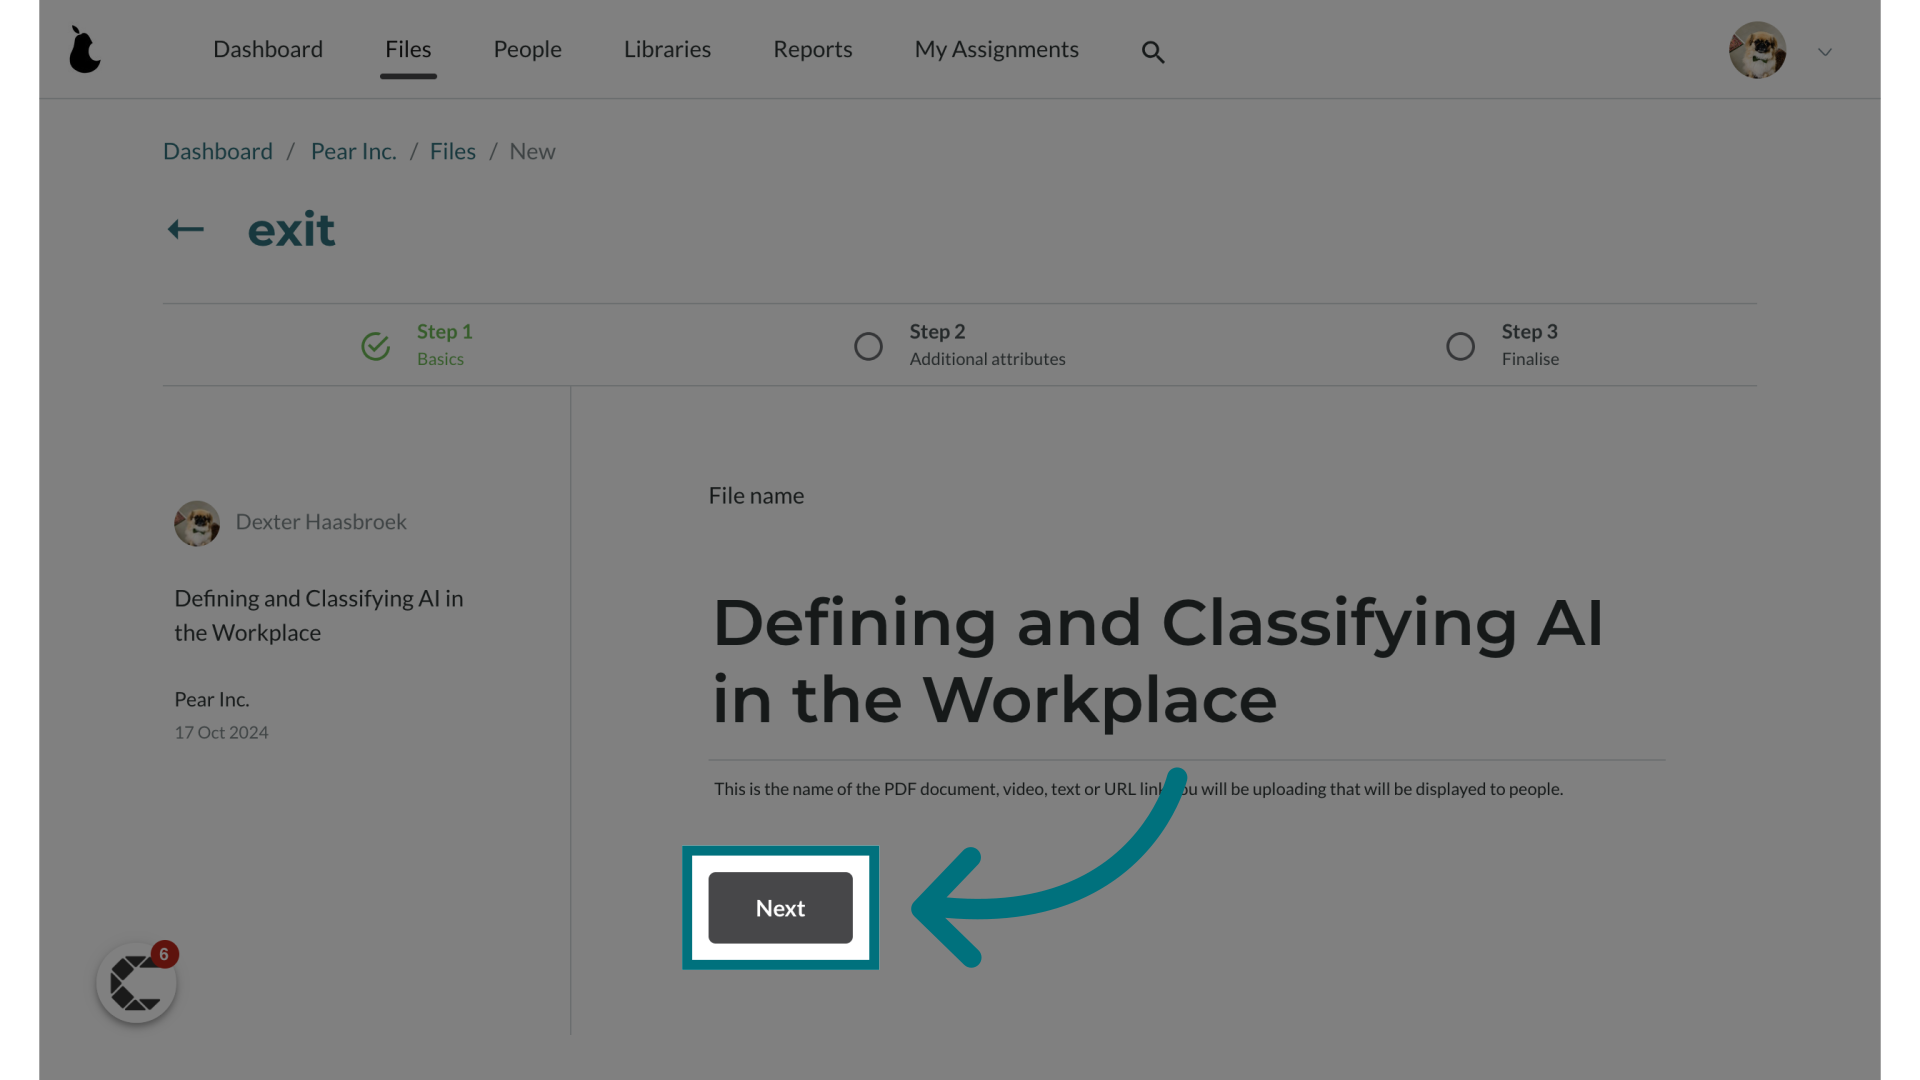
6. Click "Next"
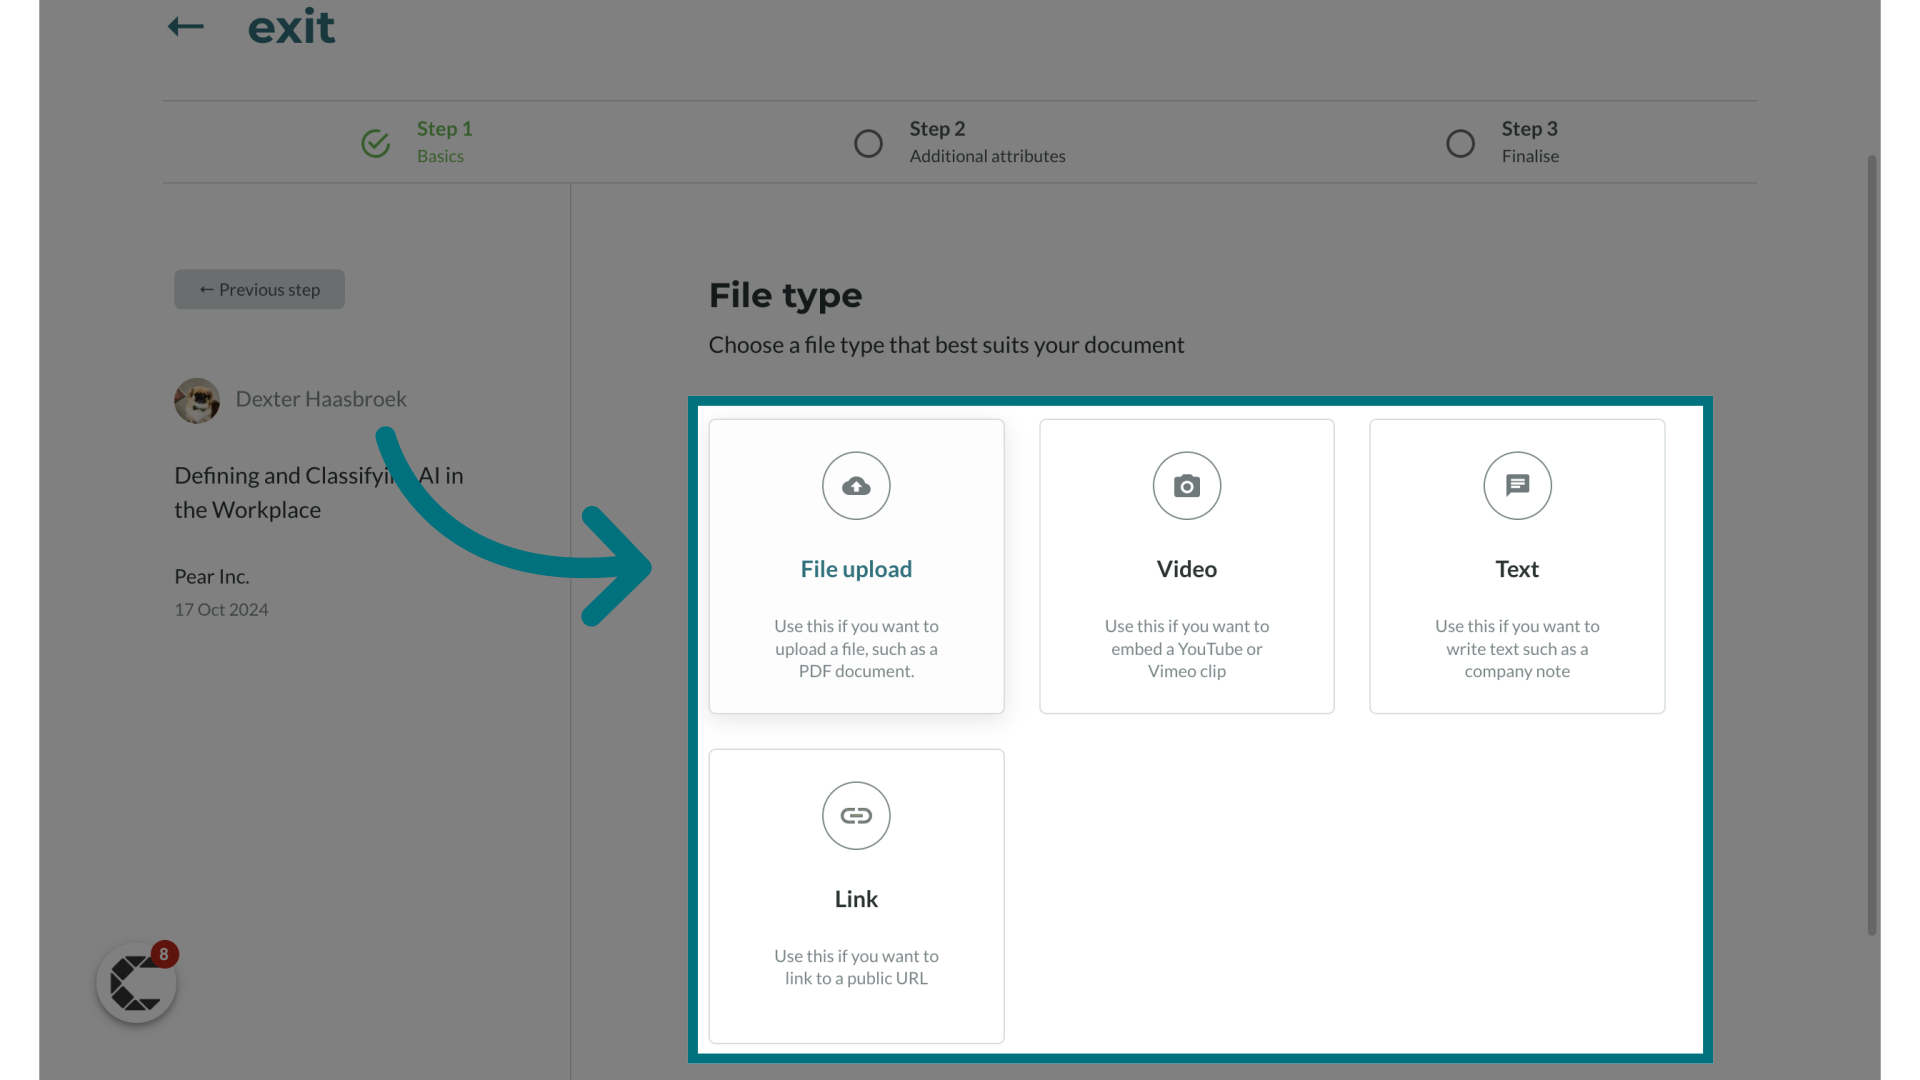
7. Select the file type you would like to upload
- There are multiple content types that you can choose from including:
- File upload
- Video
- Text
- Link (ideal for directing to a public URL)
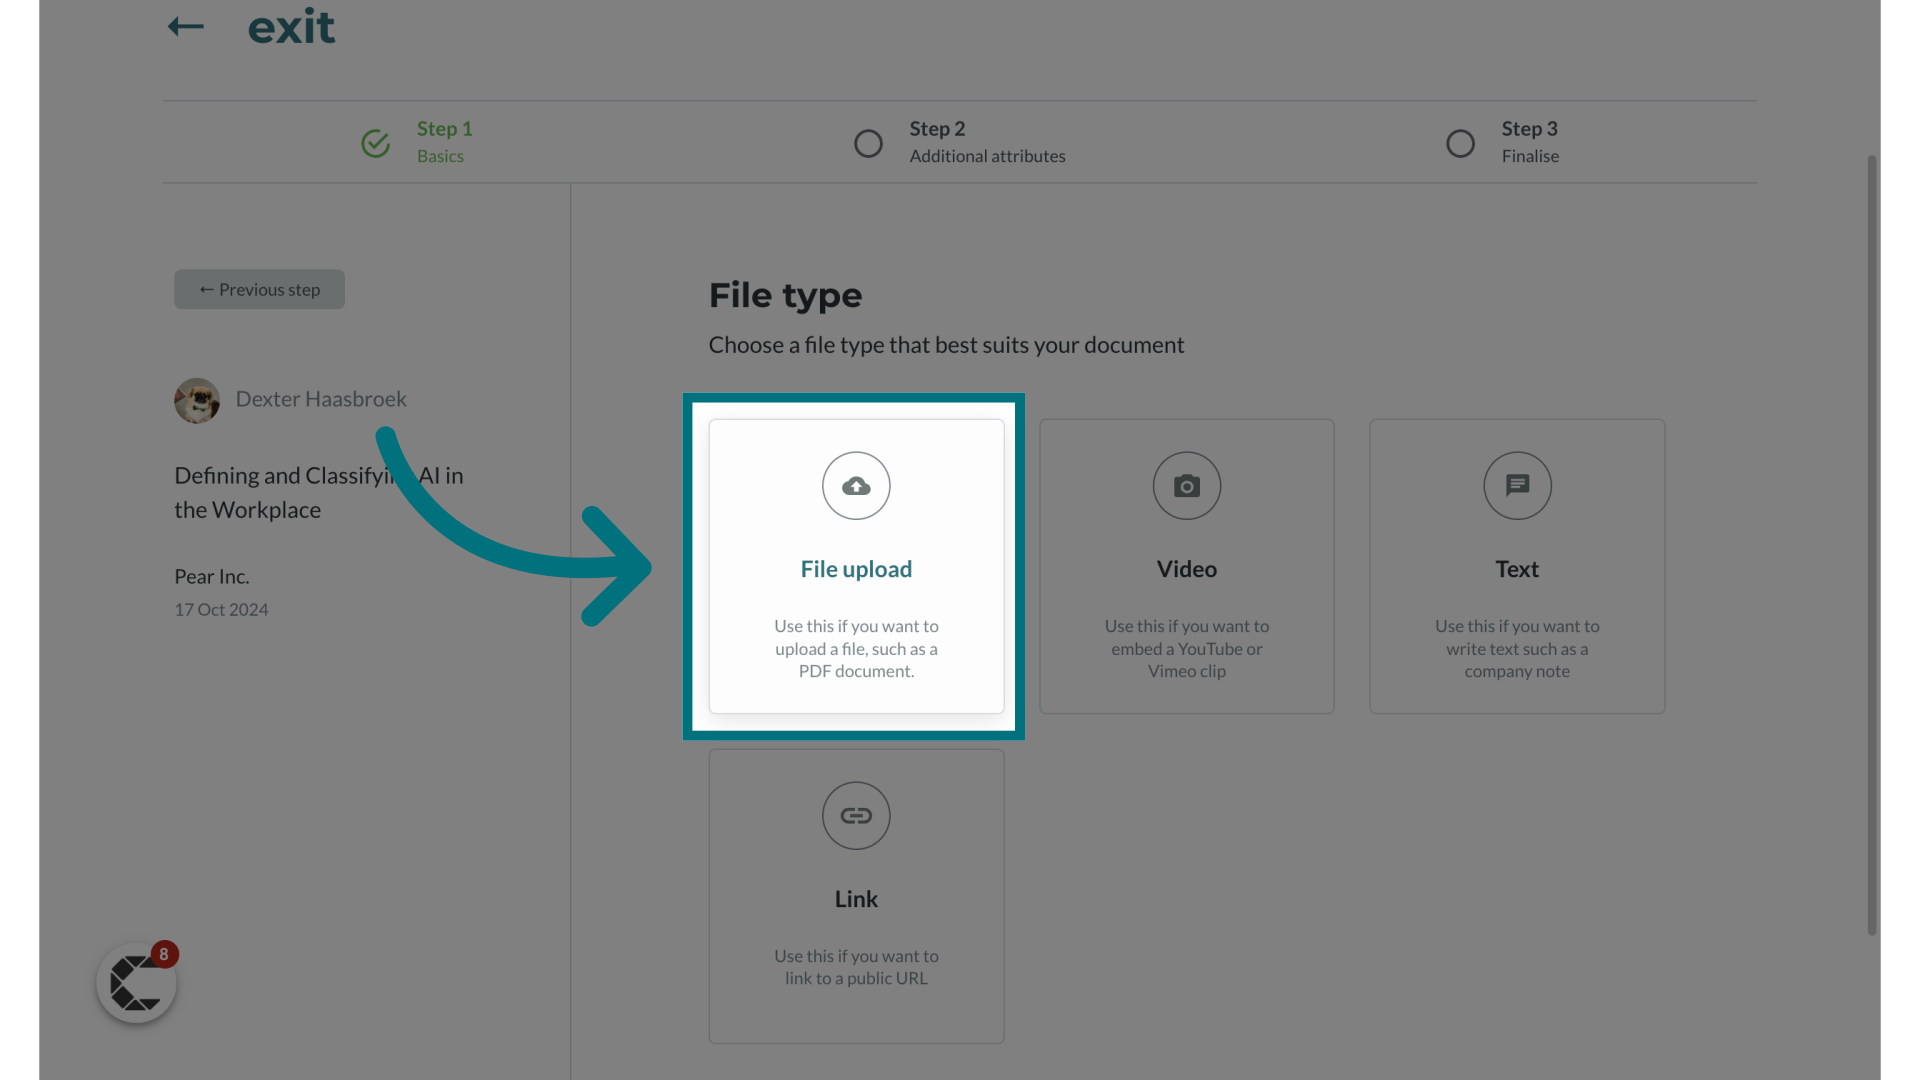
8. Click "File upload"
- For this example, we'll select "File upload" to upload a document.
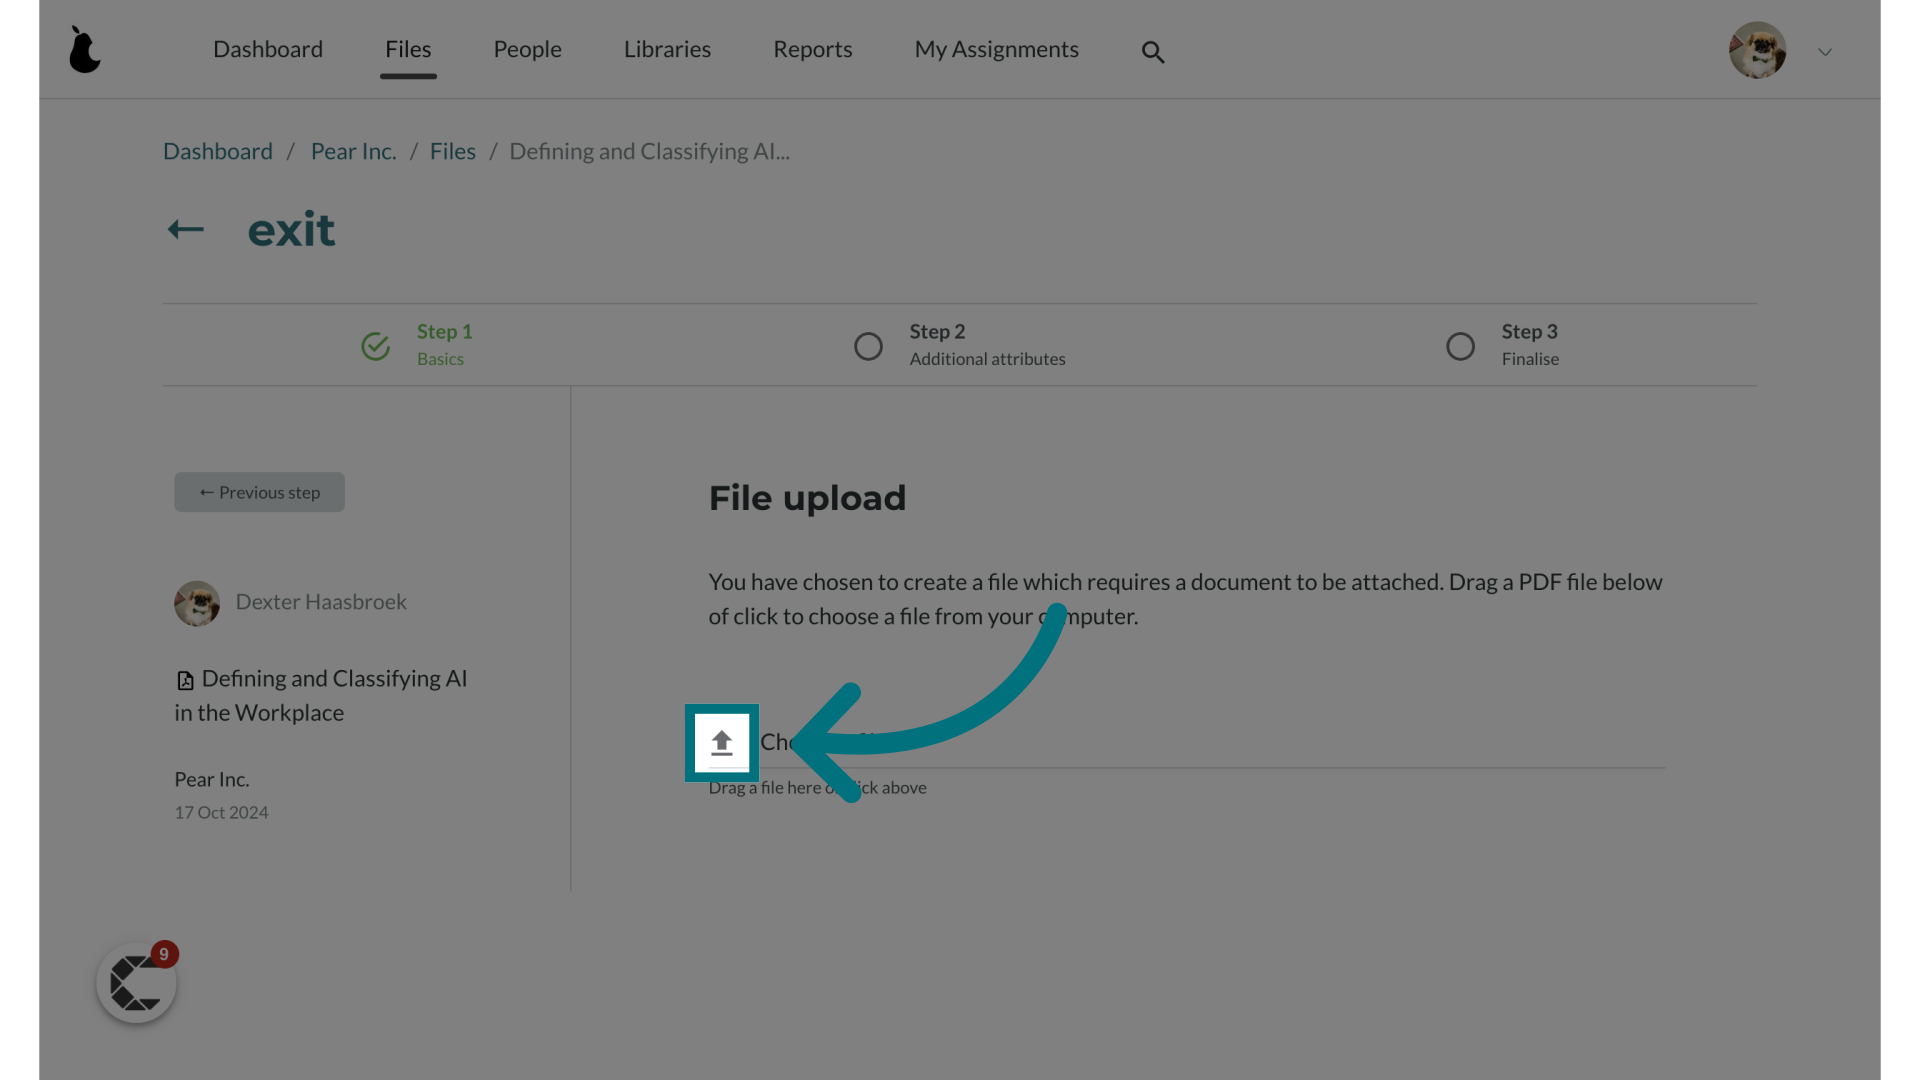
9. Upload a file
- Simply drag and drop your file into this area or click on "Choose a file" to browse your computer and select the file you wish to upload. The file must be in PDF format and smaller than 9MB.
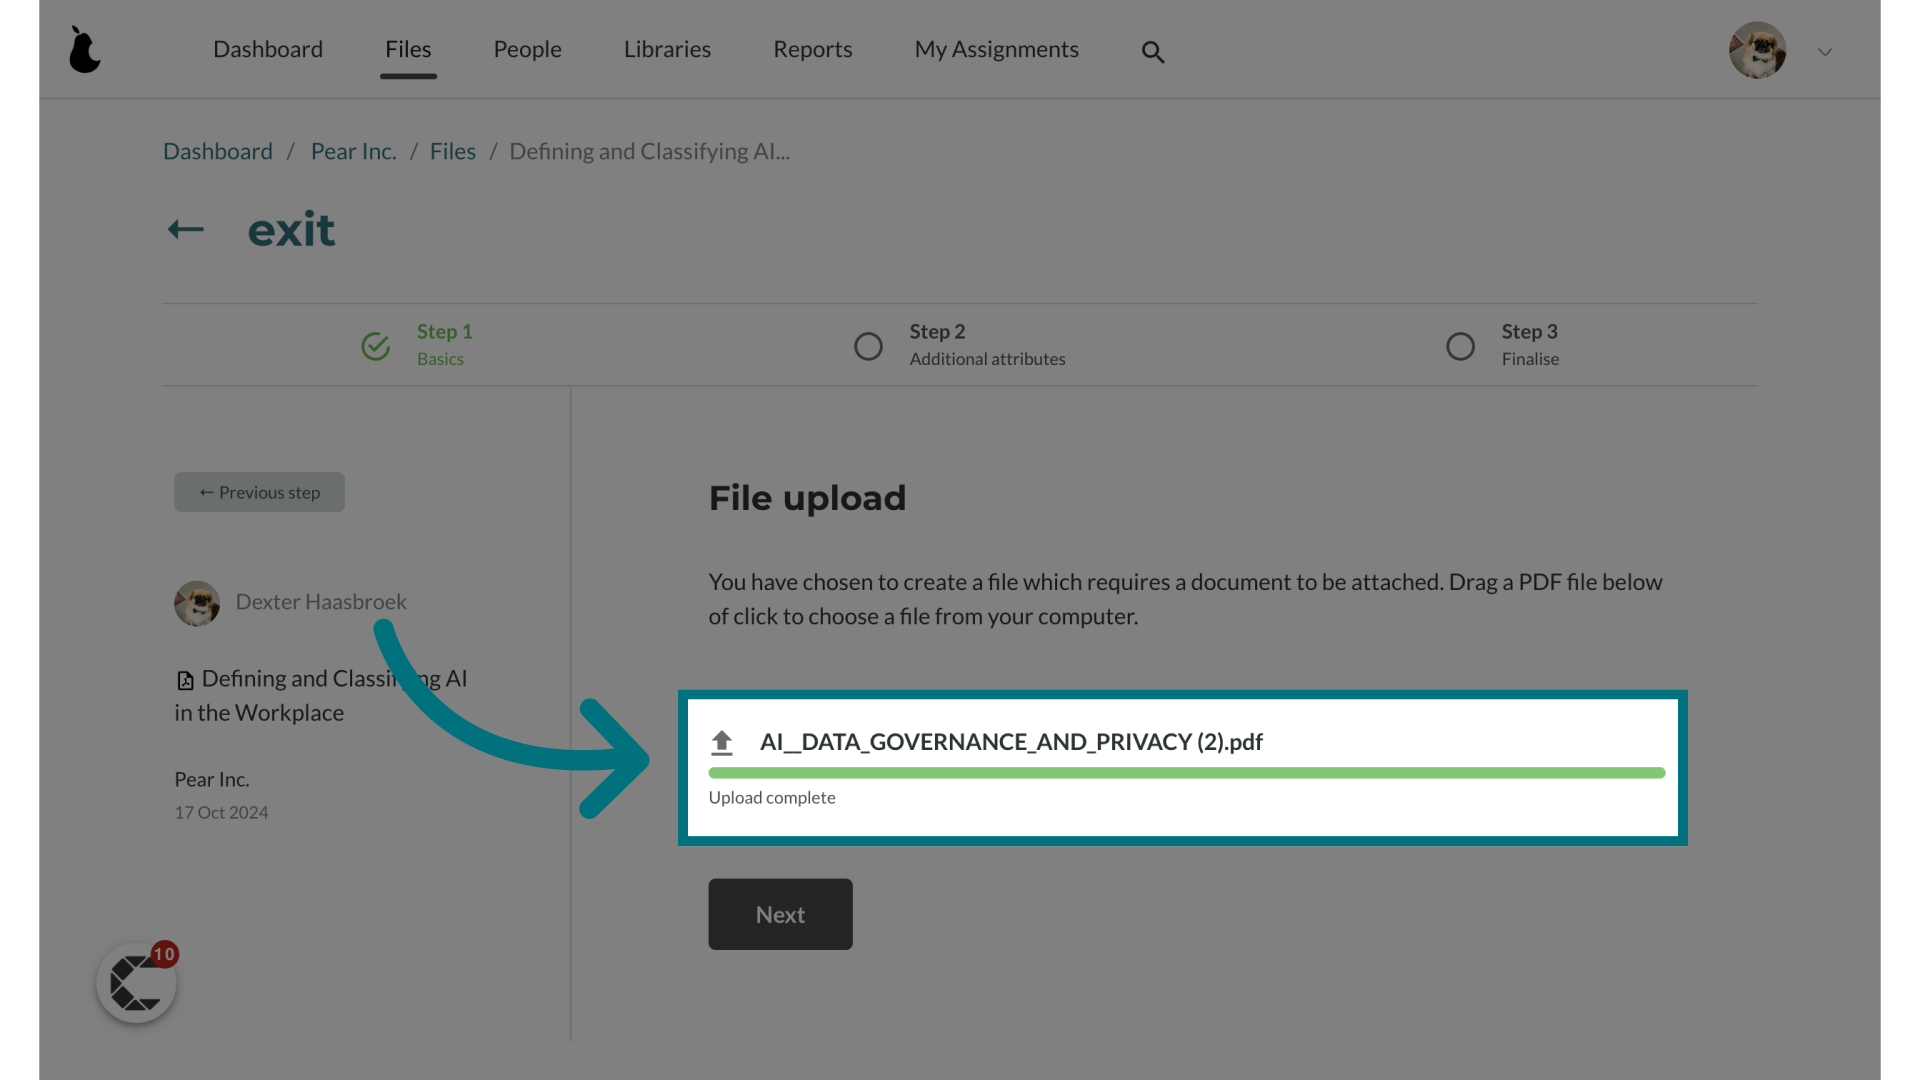
10. Wait for the file to upload
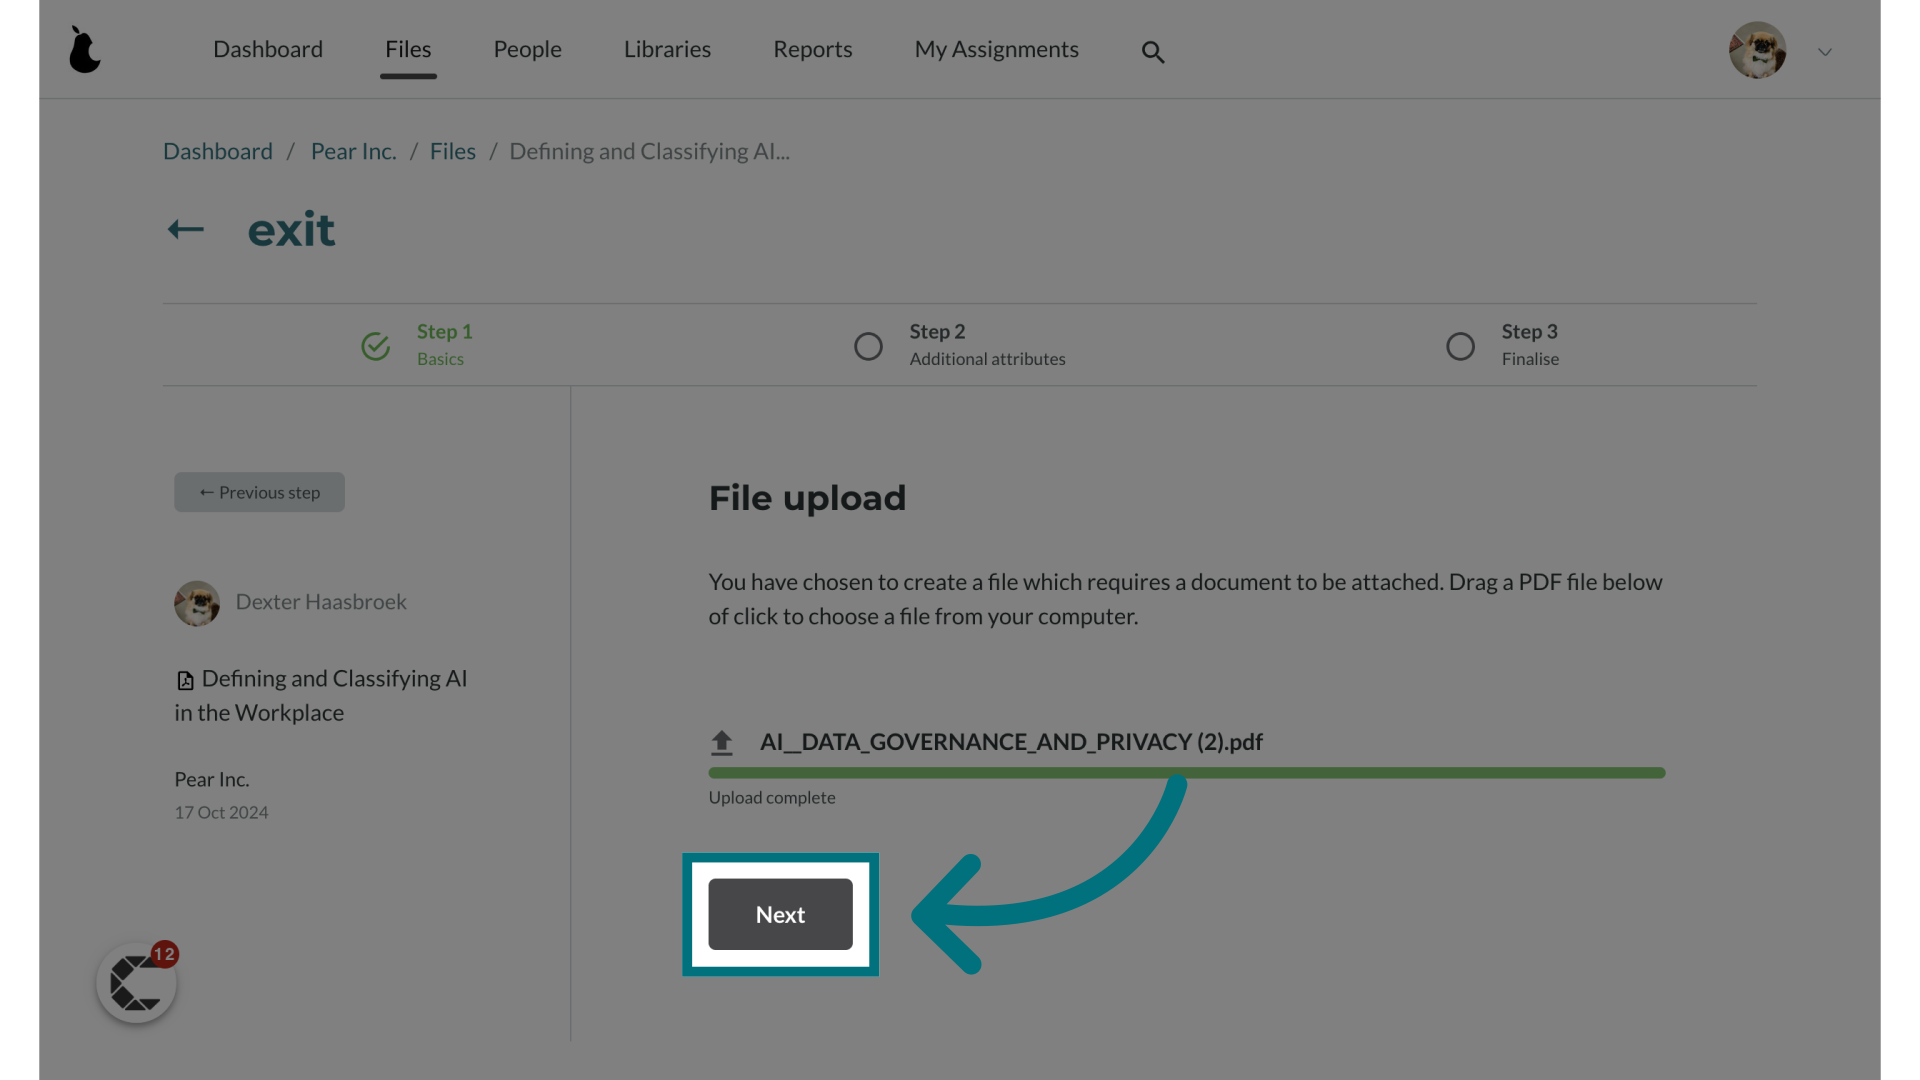
11. Click "Next"
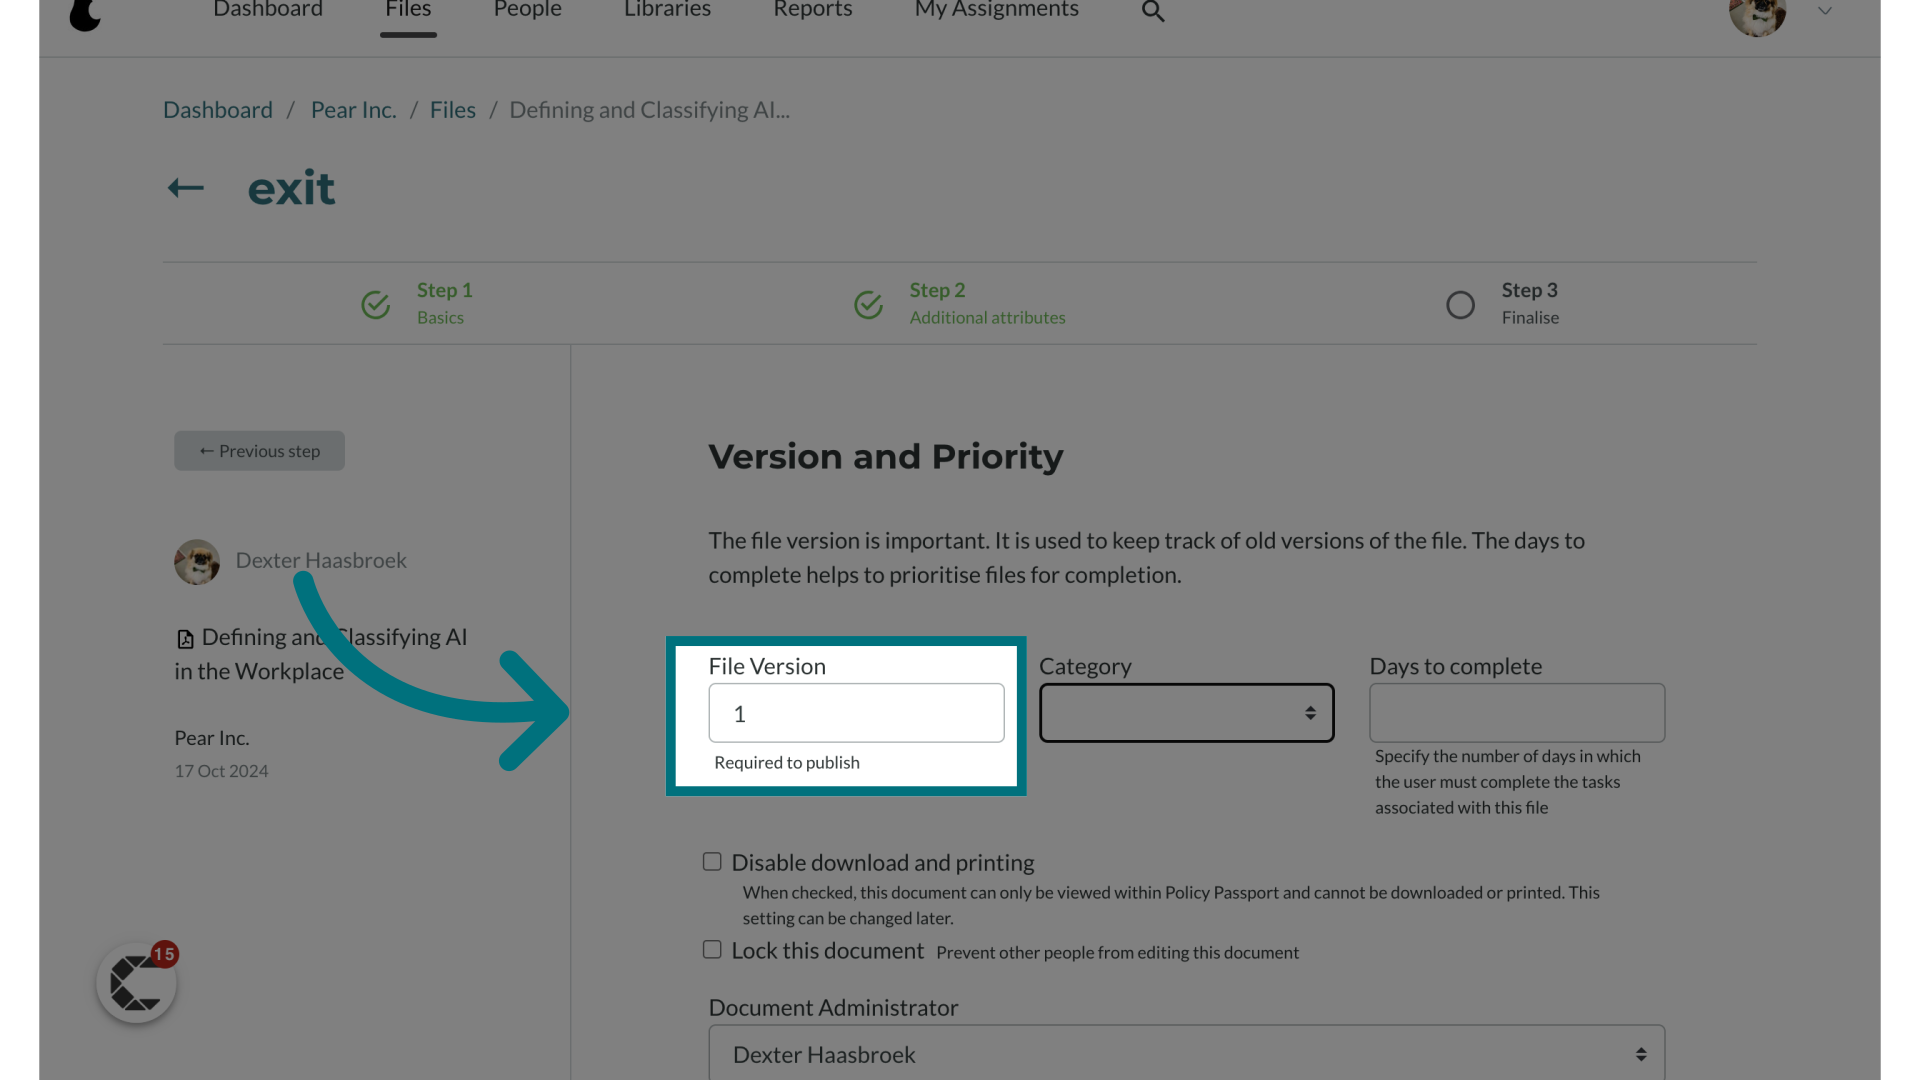
Version & Priority
1. Enter a version number for the file in the "File Version" field
- Assign a version number to efficiently track and manage future revisions of the file.
2. Assign a category to the file
- Assign a category to organize and manage your files more effectively.
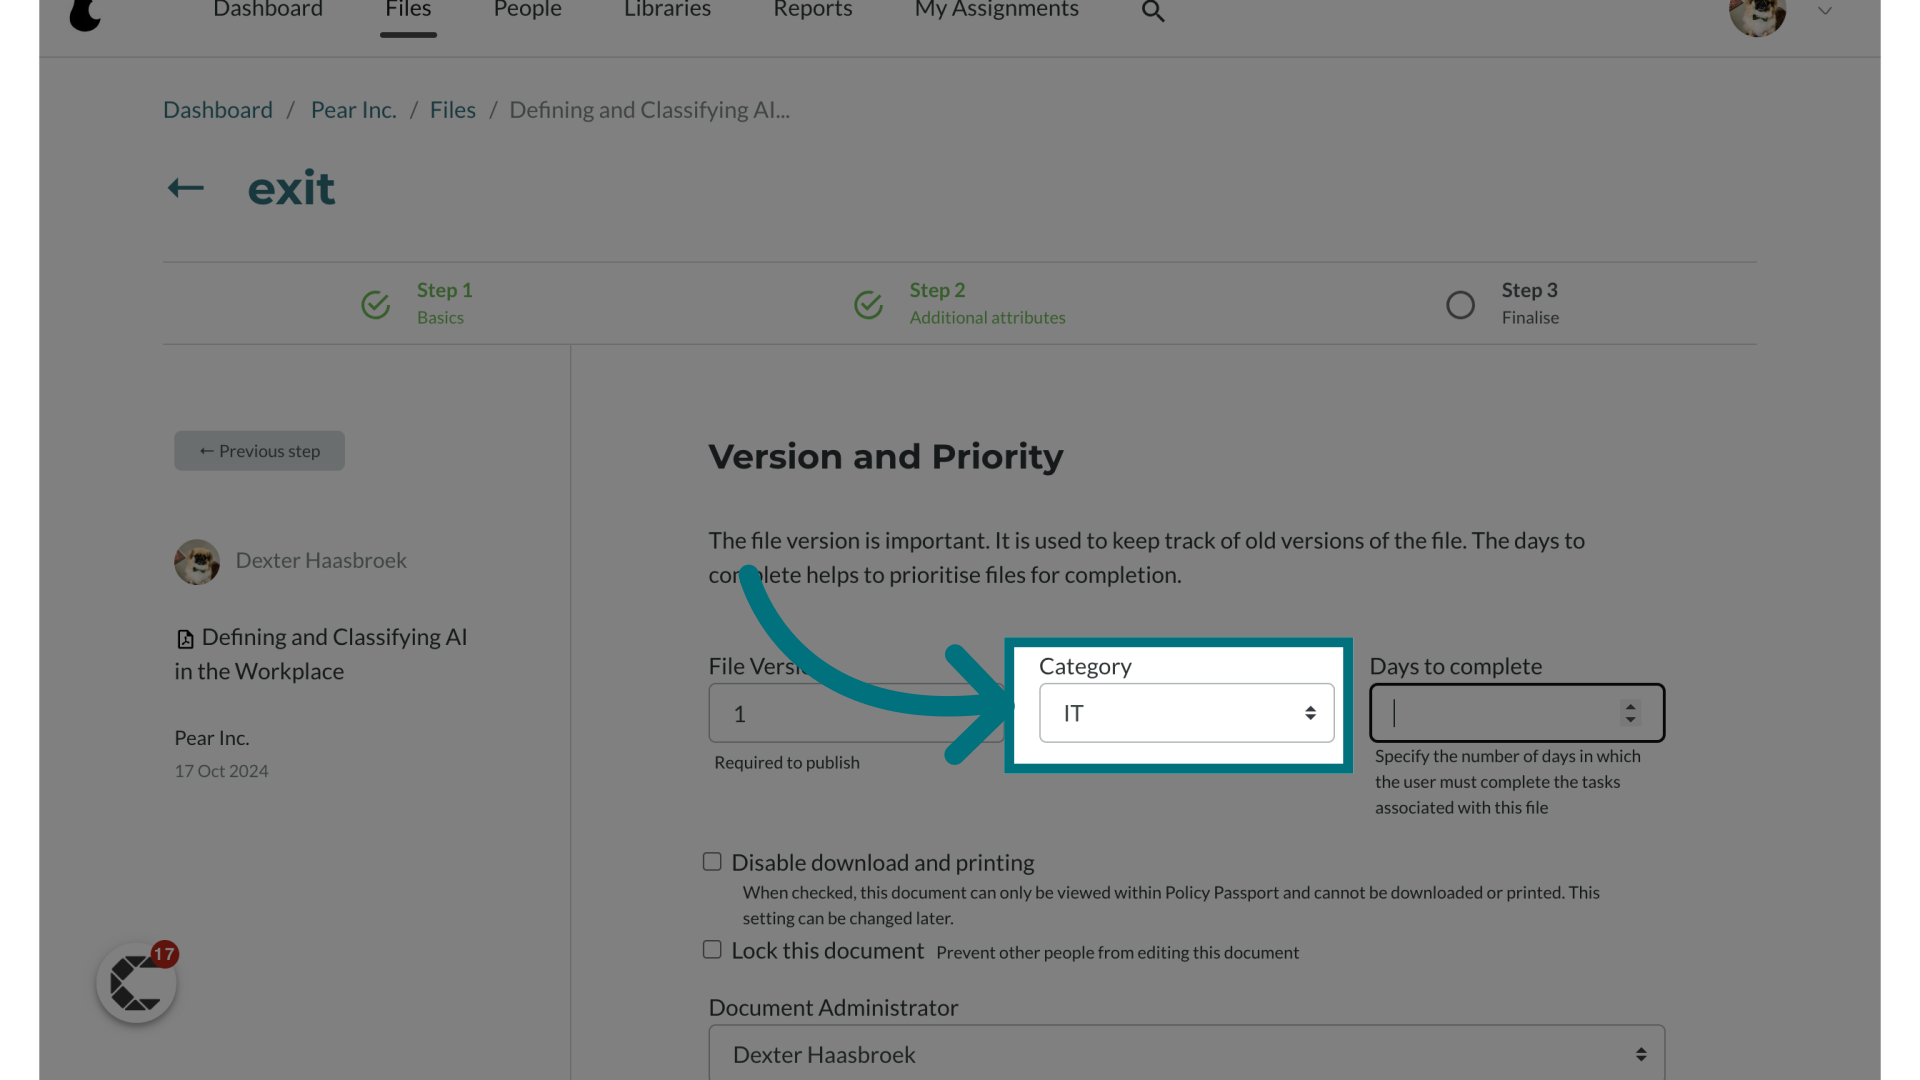
3. Enter the number of days users have to complete the file
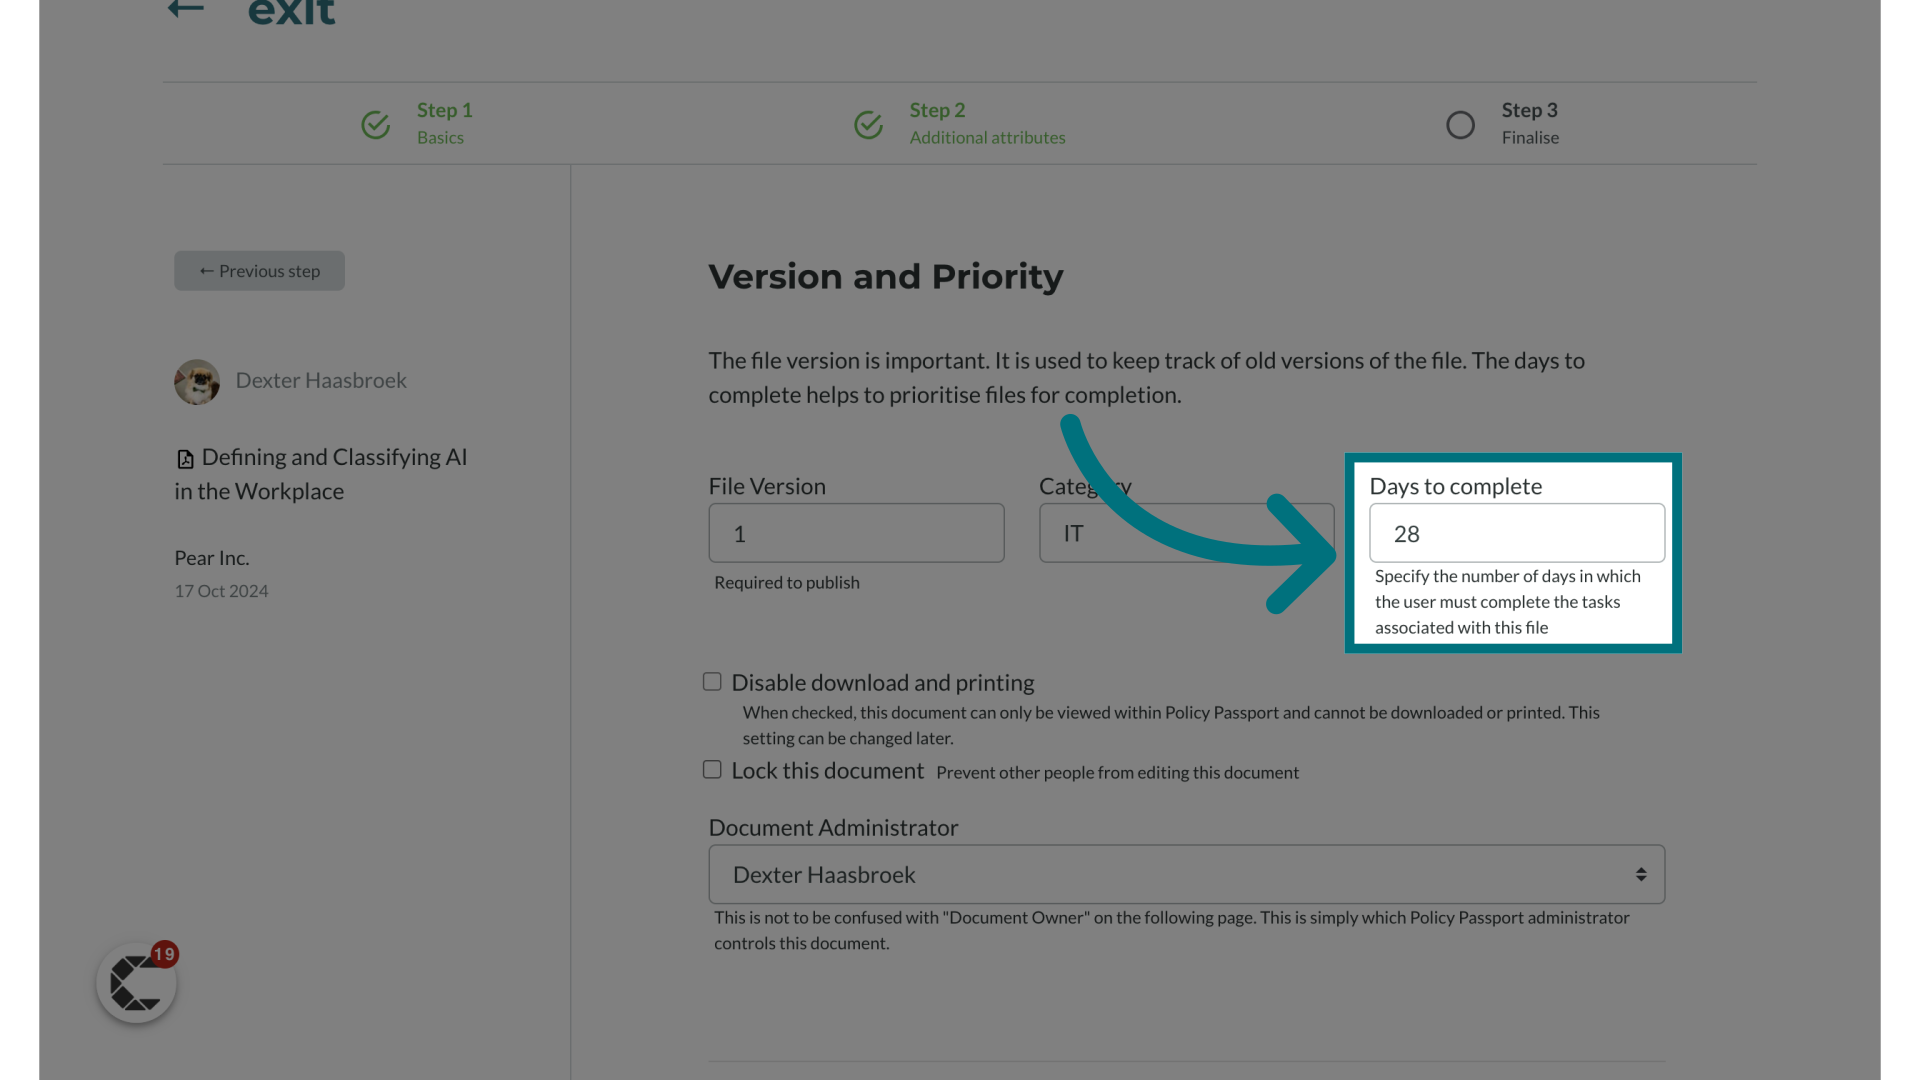
4. Optional: Enable "Disable download and printing"
This new feature enhances document security by preventing users from downloading or printing the file. It's useful for sensitive information that should only be viewed within the platform.
While download and print options are restricted within the platform, please note that individuals may still reproduce content through alternative means, such as screenshots, screen recordings, or photos.
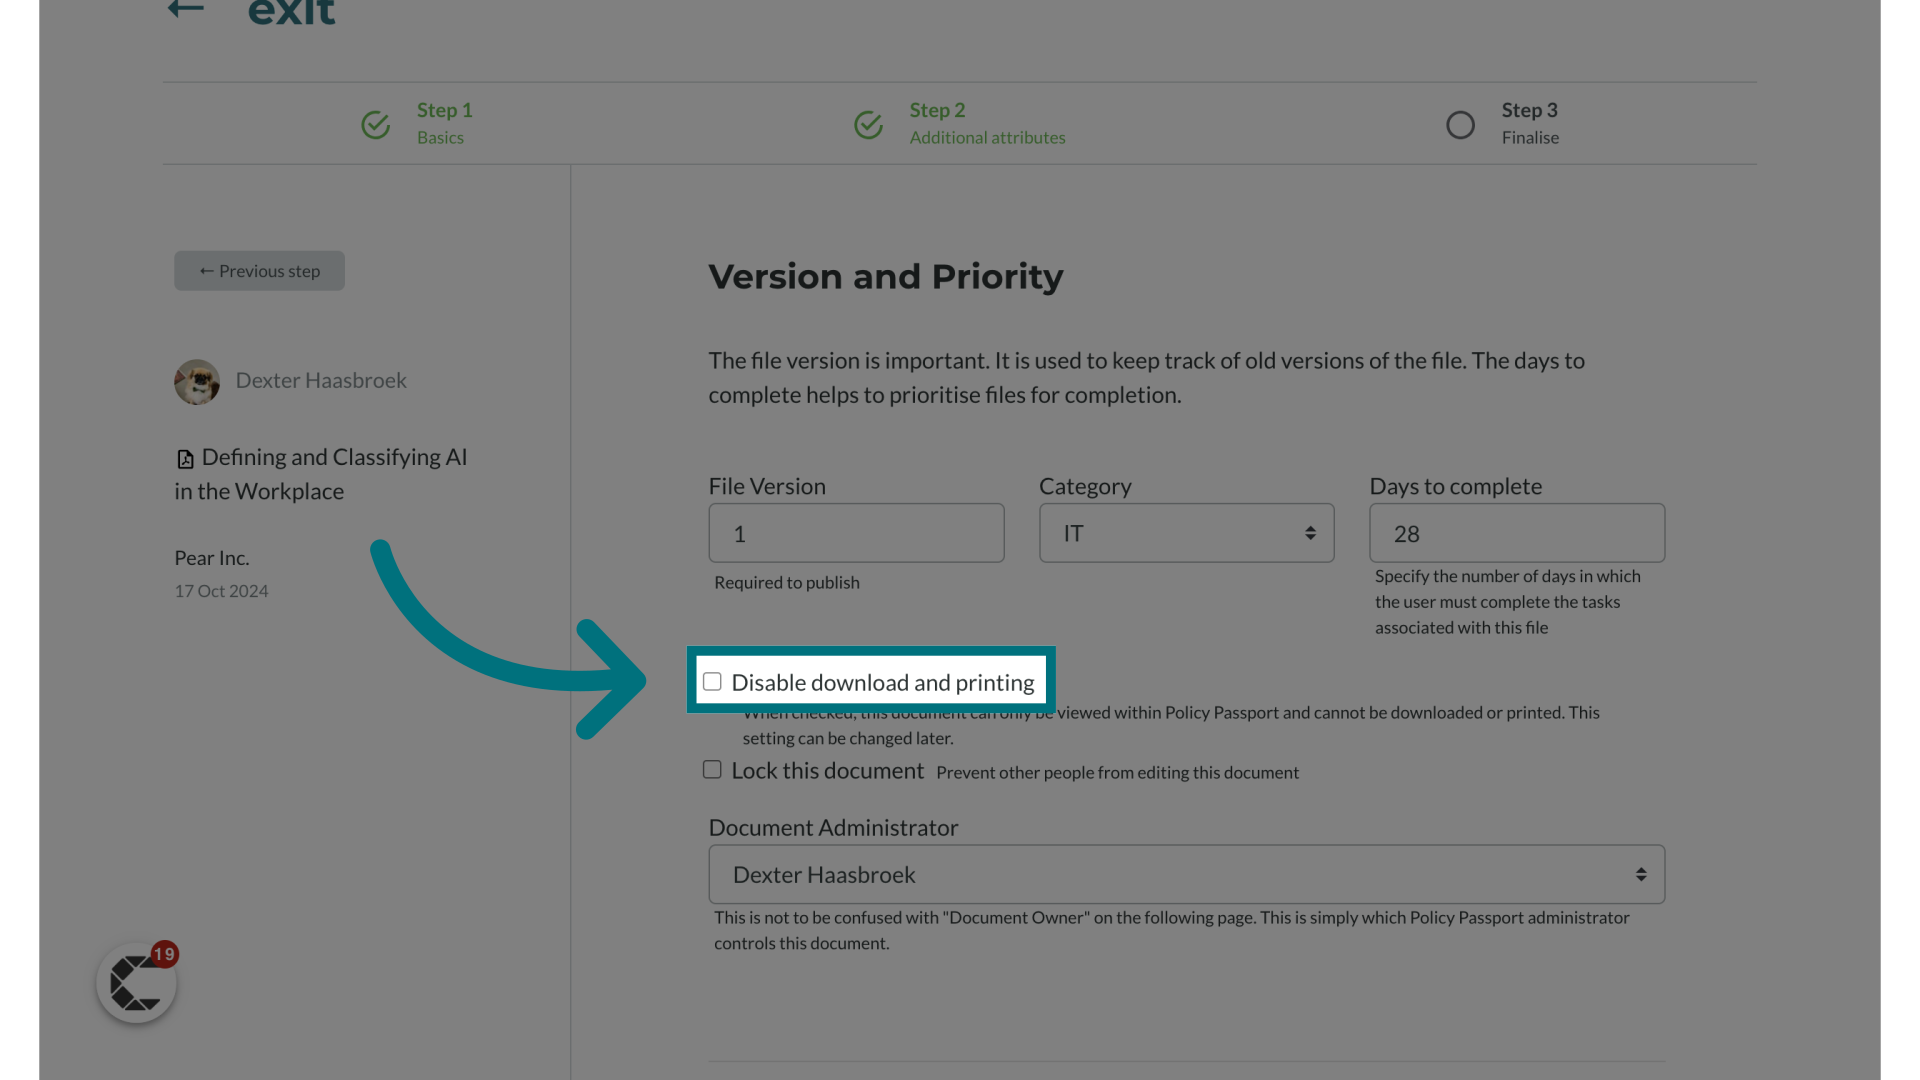
5. Optional: Enable "Lock this document"
- If enabled, this feature restricts editing of the document , ensuring its integrity.
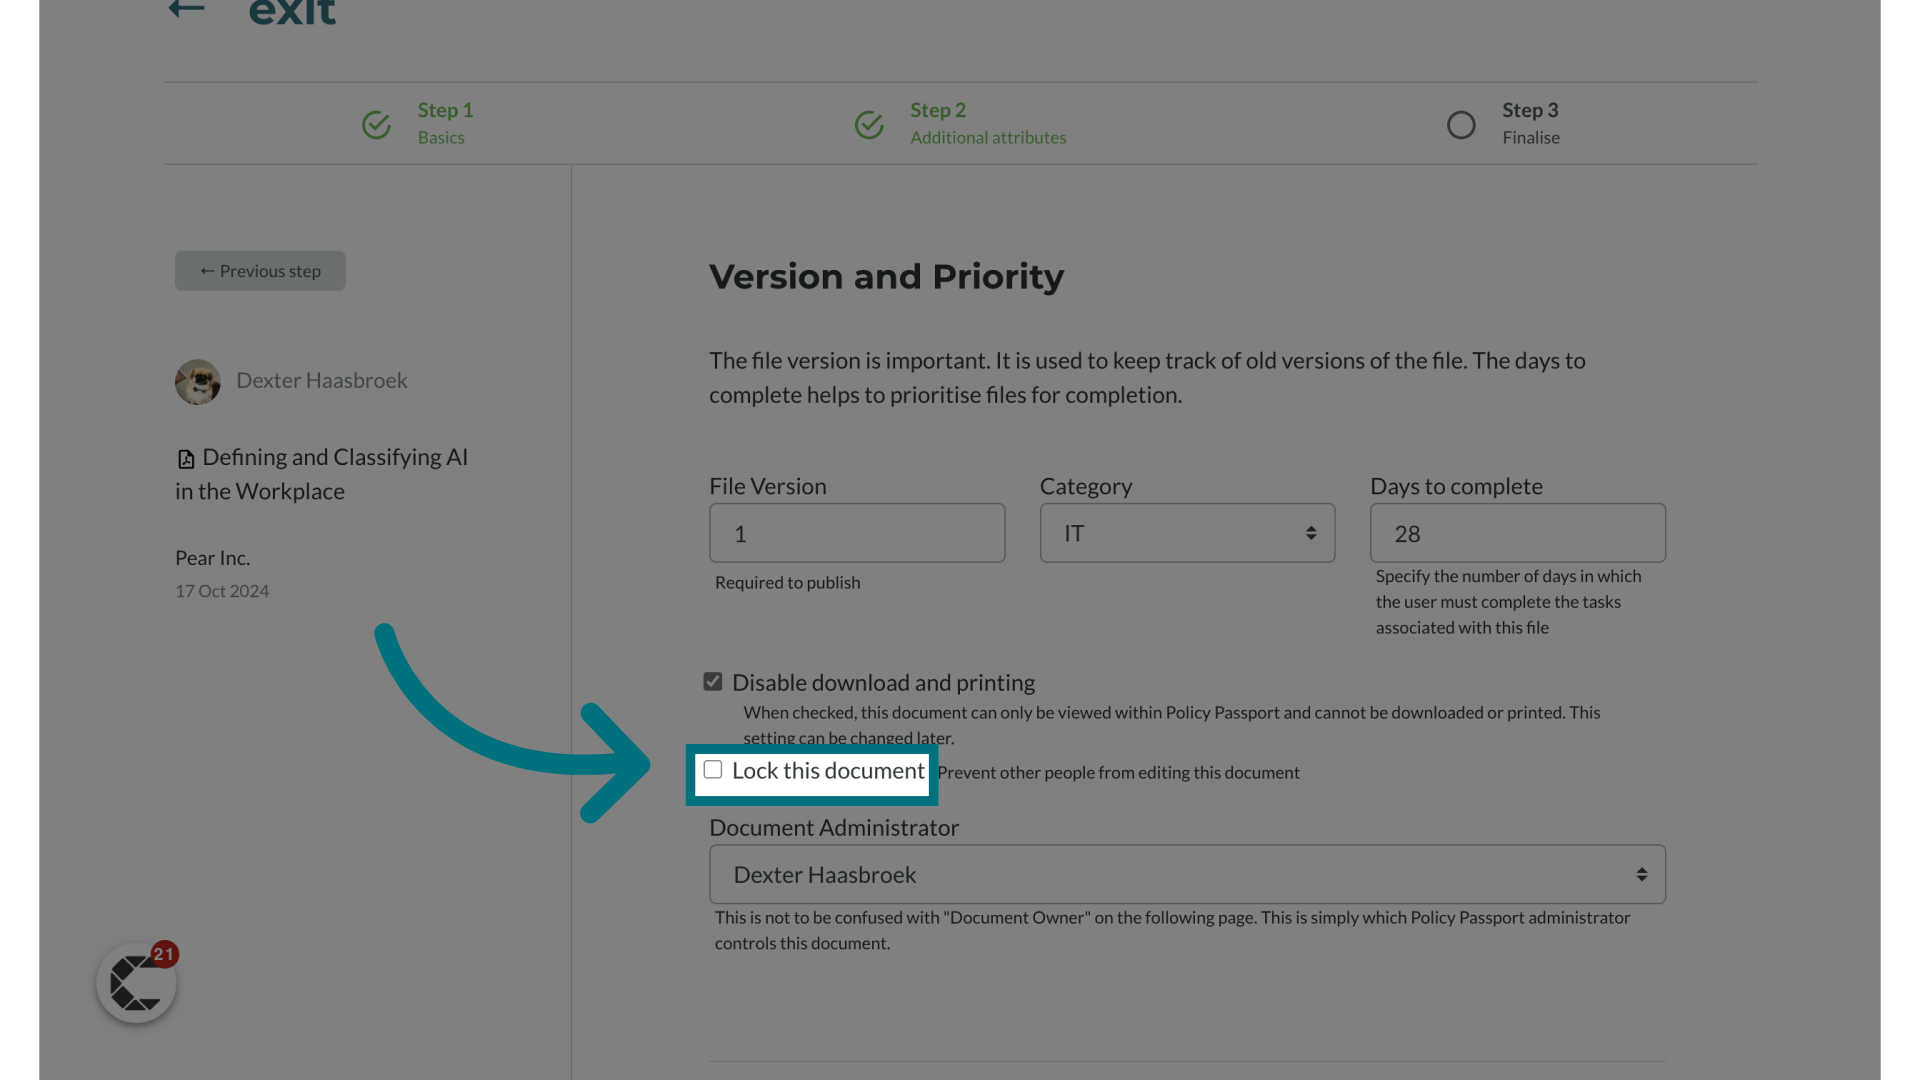
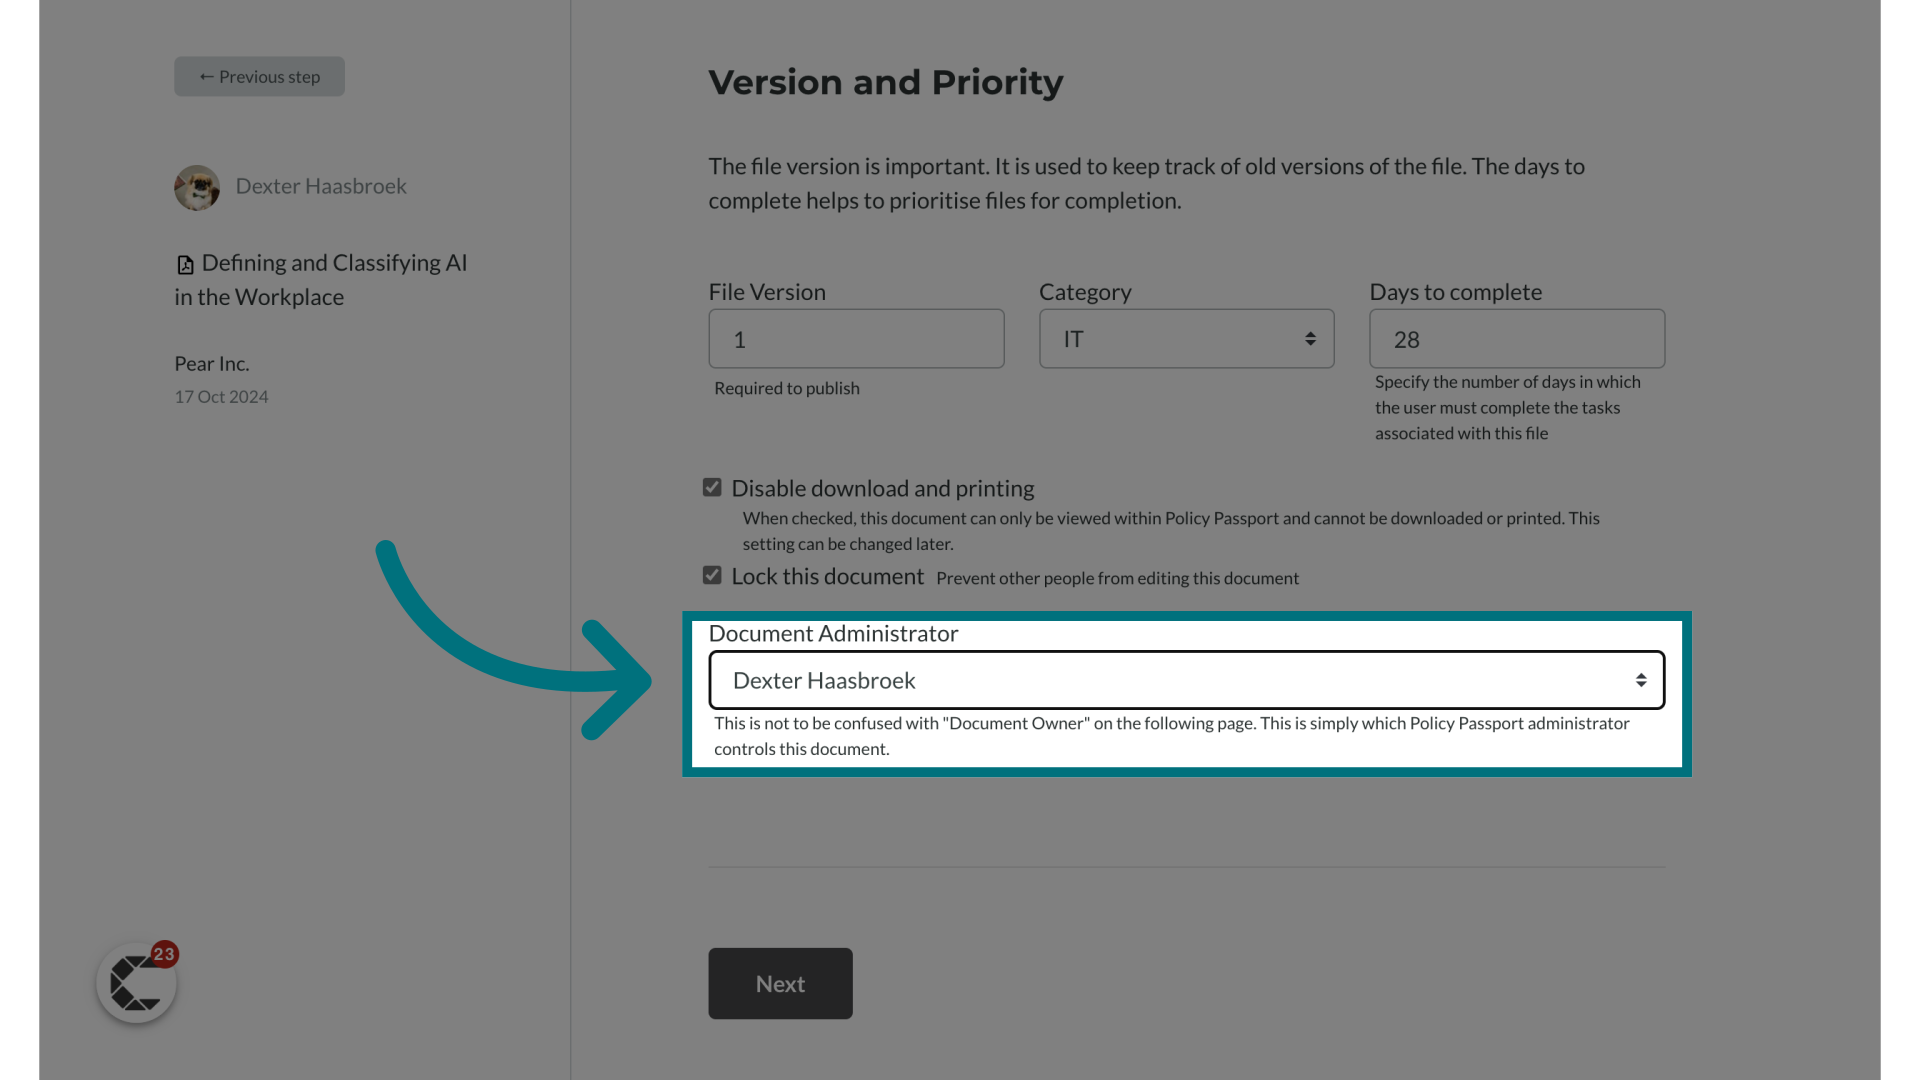
6. Select a "Document Administrator"
Choose an administrator responsible for managing this specific document.
Please note: If you choose to lock this document, the chosen "Document Administrator" will be the only admin user that will have access to edit this file.
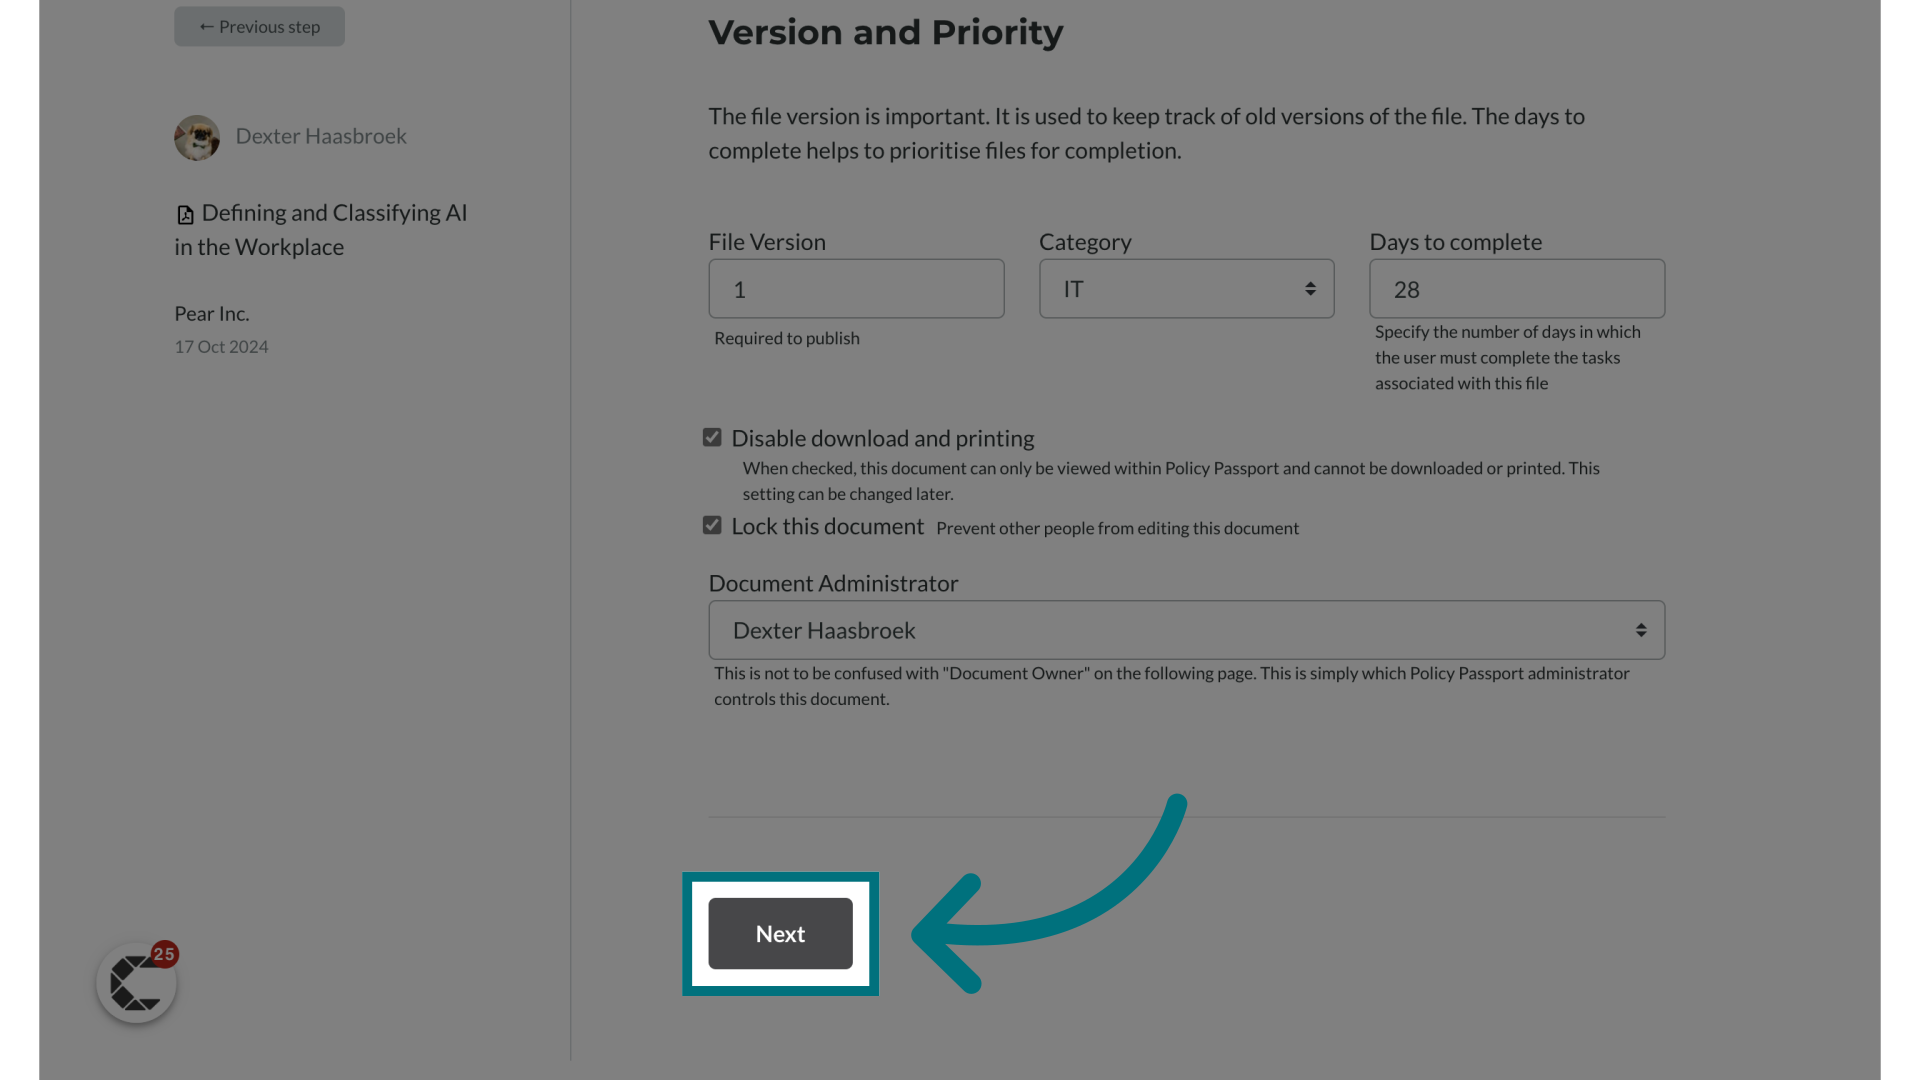
7. Click "Next"
Note & Optional Details
1. "Display note" is activated by default
- The display note feature allows administrators to provide supplementary information about the file, which will be visible to users when accessing it. This additional context can enhance understanding and provide valuable insights regarding the file's content or purpose.
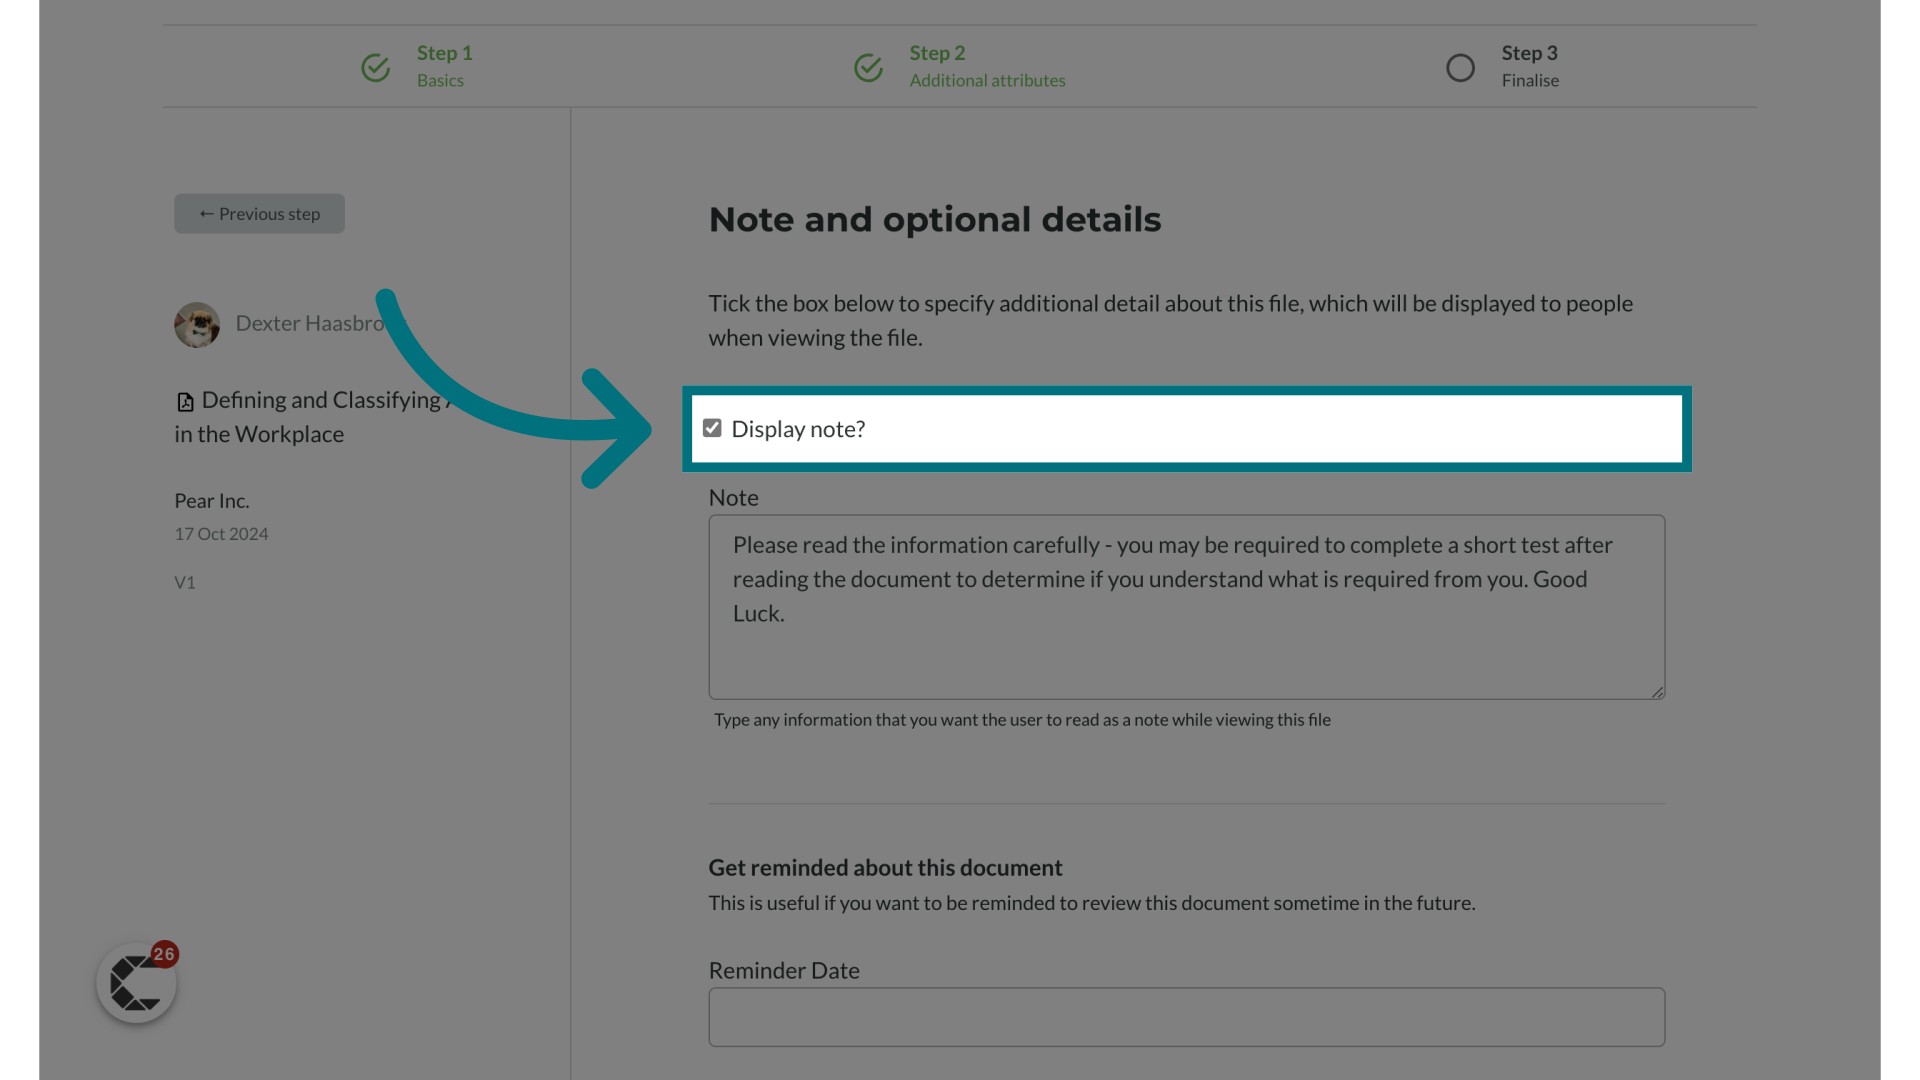
2. Enter the note text you want displayed to users
- Add any relevant information or instructions for the file.

3. Optional: Set a reminder date to update the file
- Schedule a future date for file review.
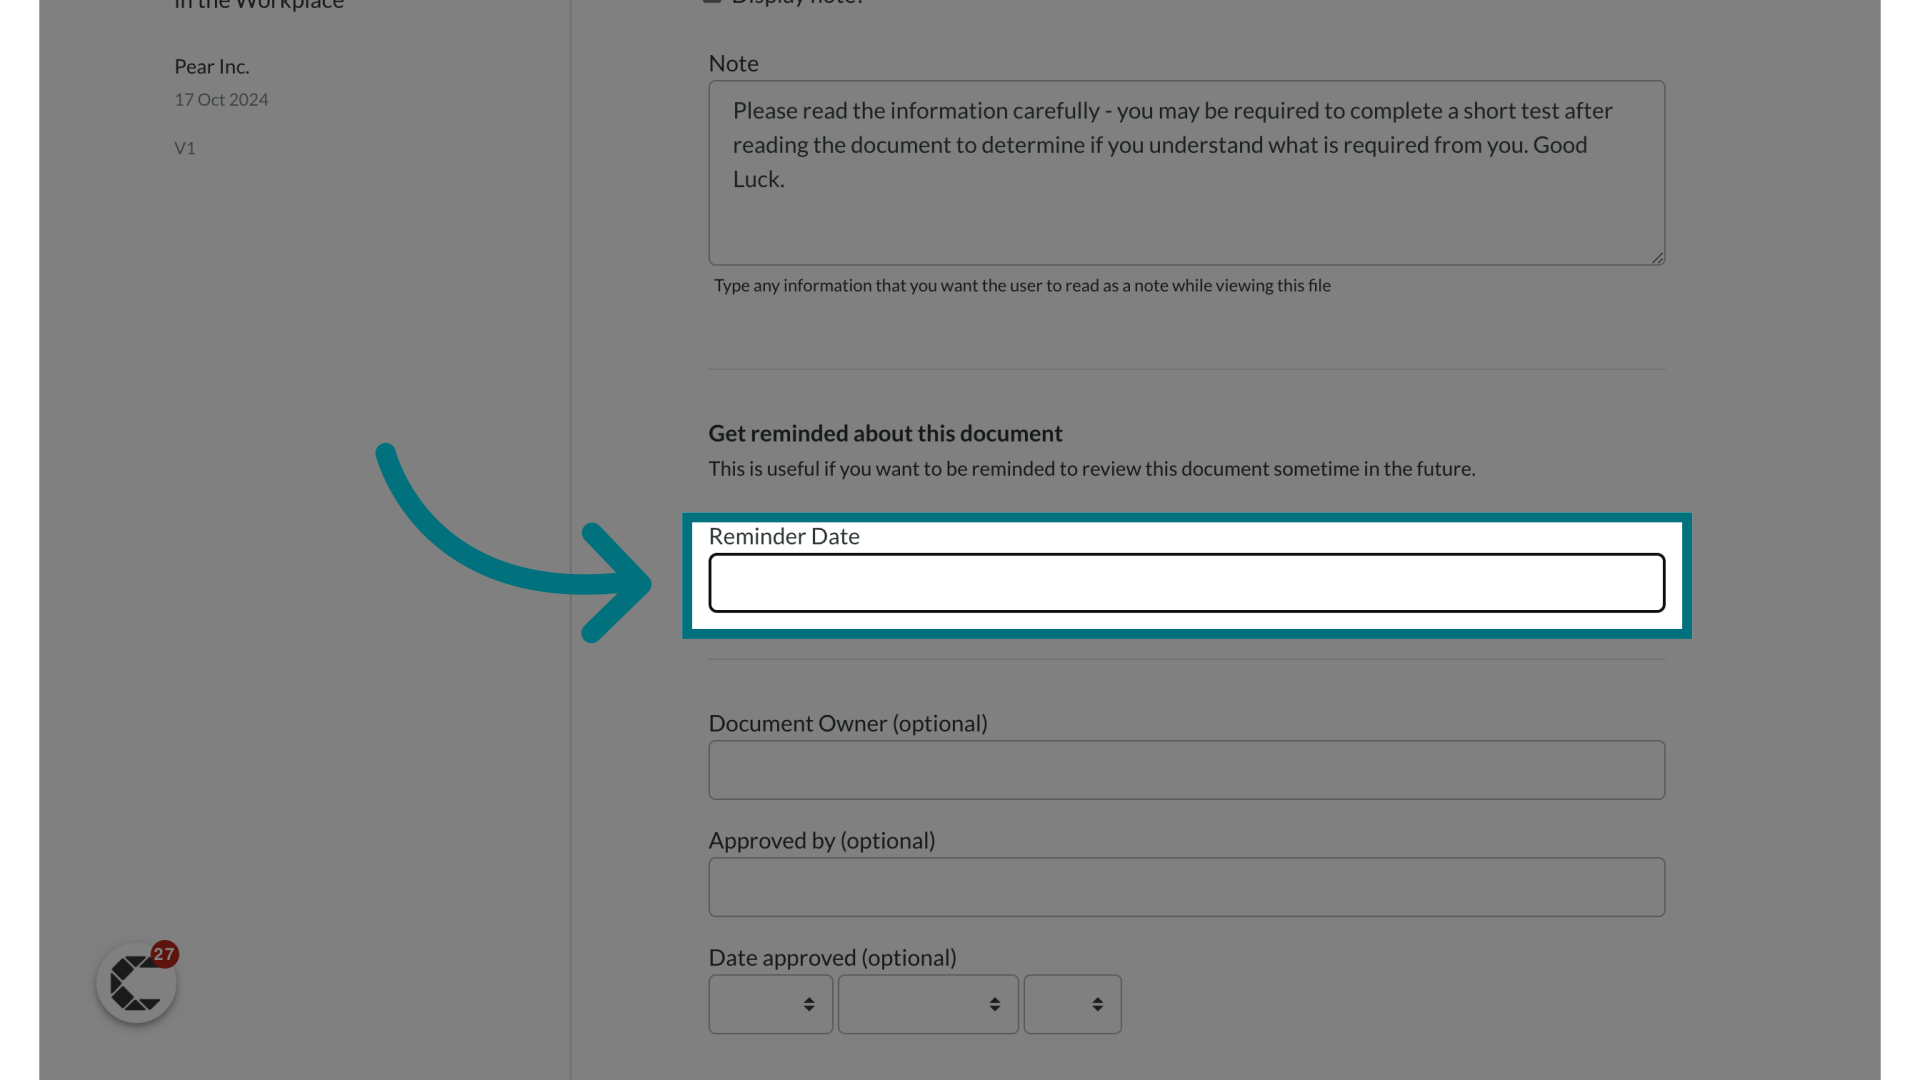
4. Select a reminder date
- This optional function facilitates proactive file management by enabling administrators to schedule future (internal) file review dates. This feature will activate an internal reminder email to all administrators on the date selected, notifying them that the selected file is due for review. This reminder date does not have any effect on the end users.
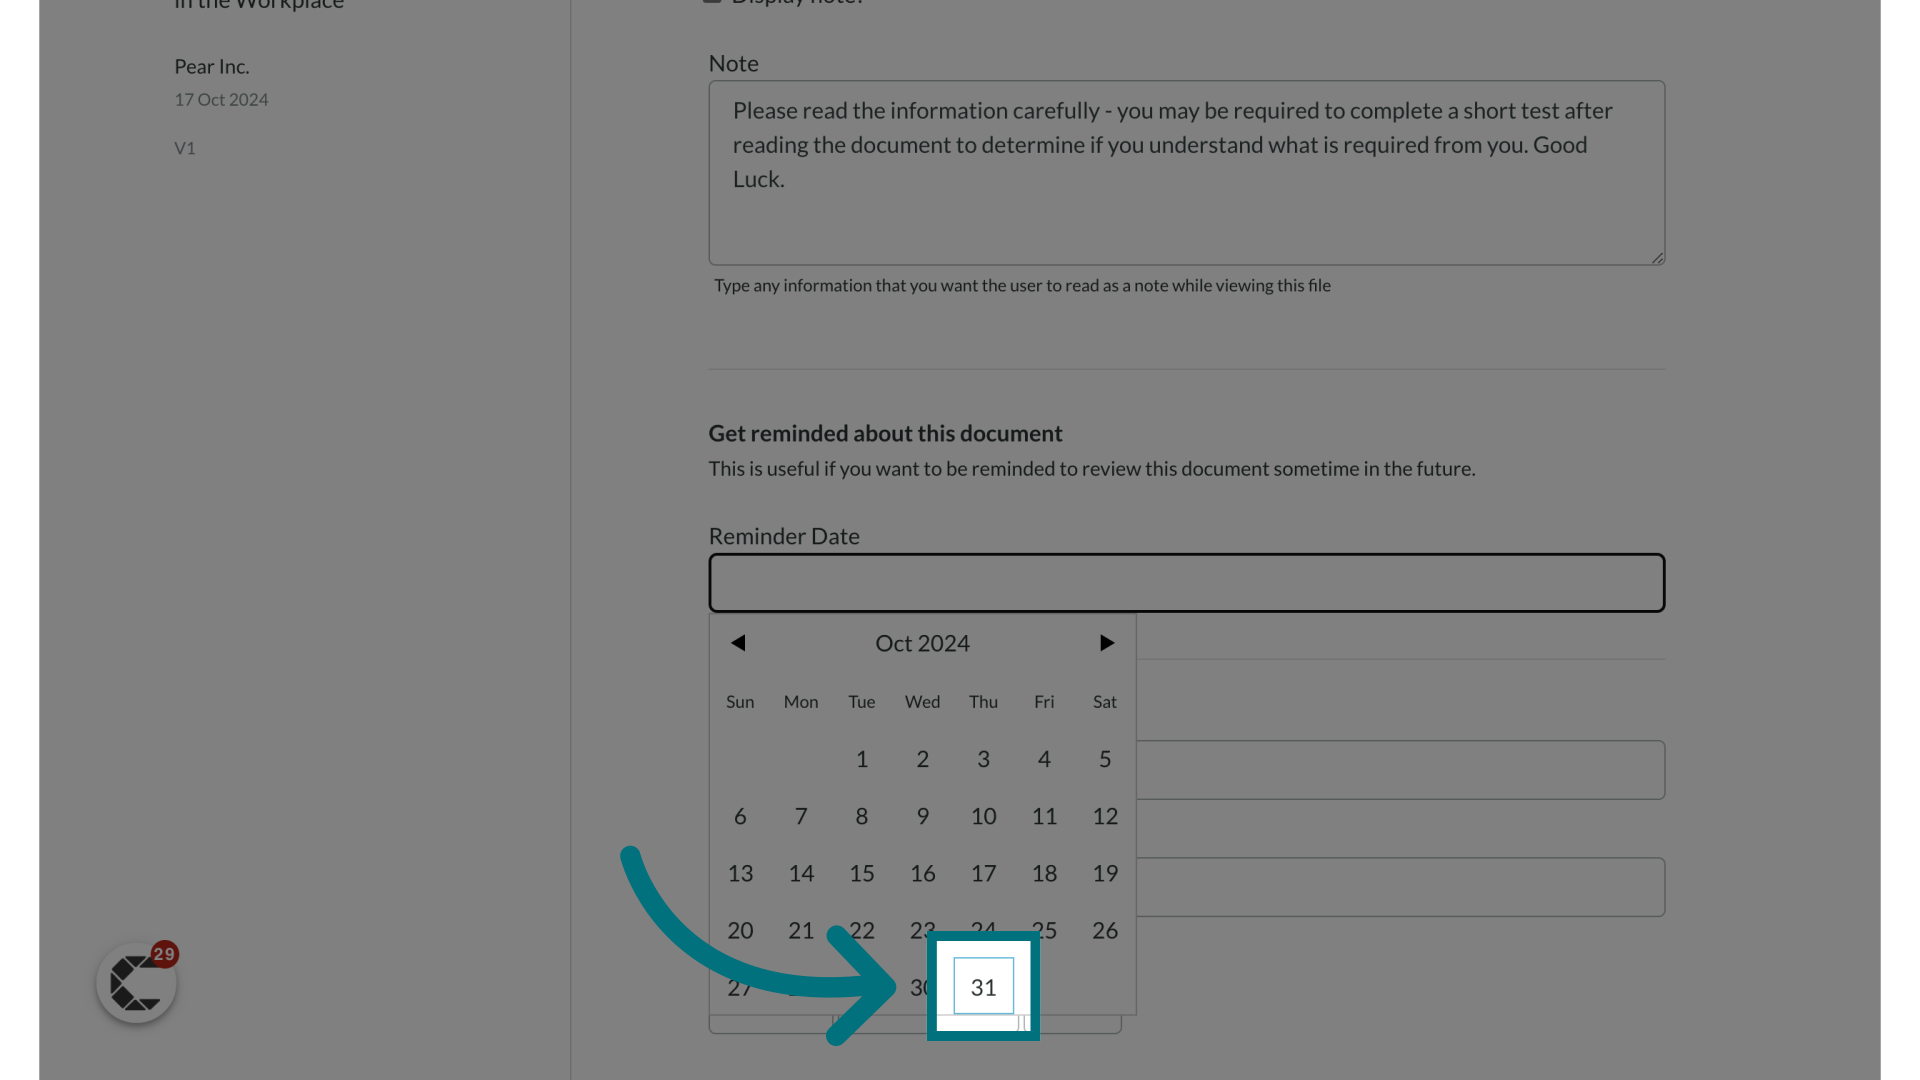
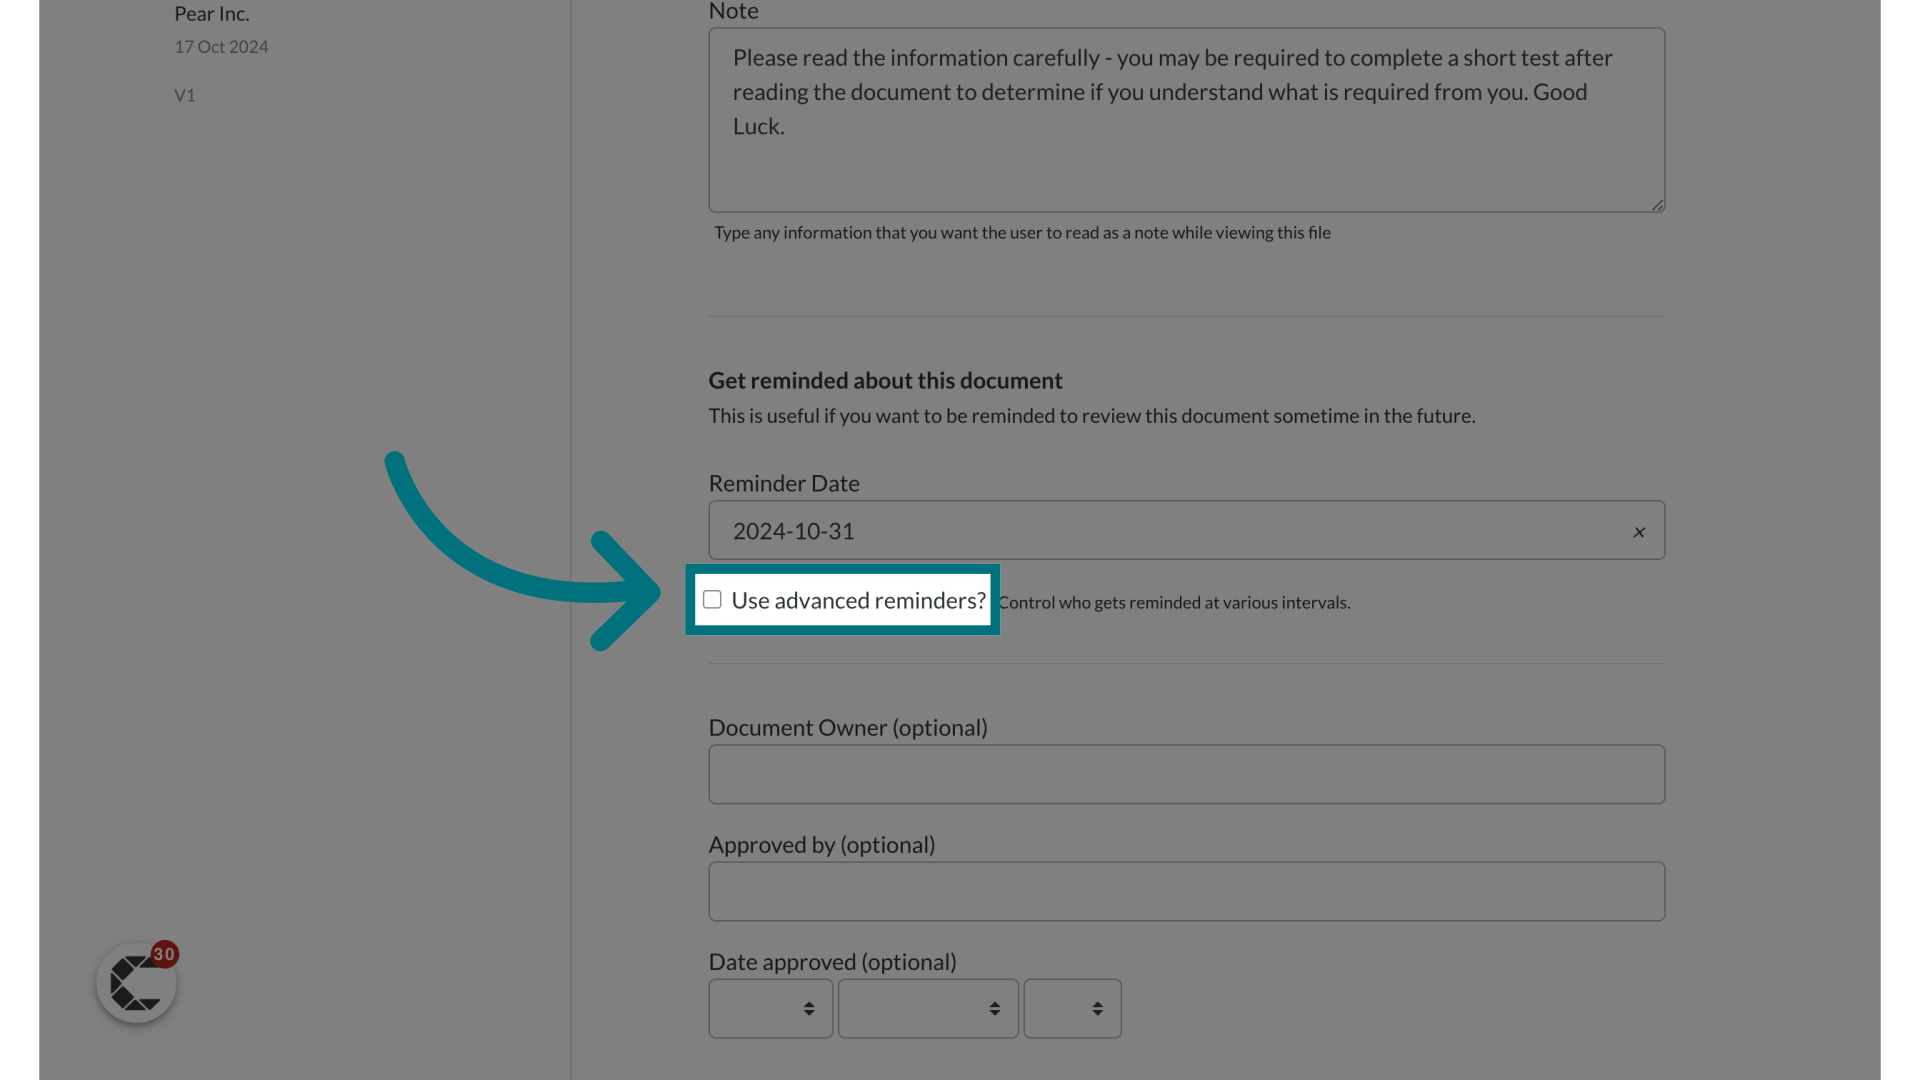
5. Optional: Enable advanced reminders
- Set up more detailed reminder settings if needed. The advanced feature will send out reminder emails to the assigned administrator.
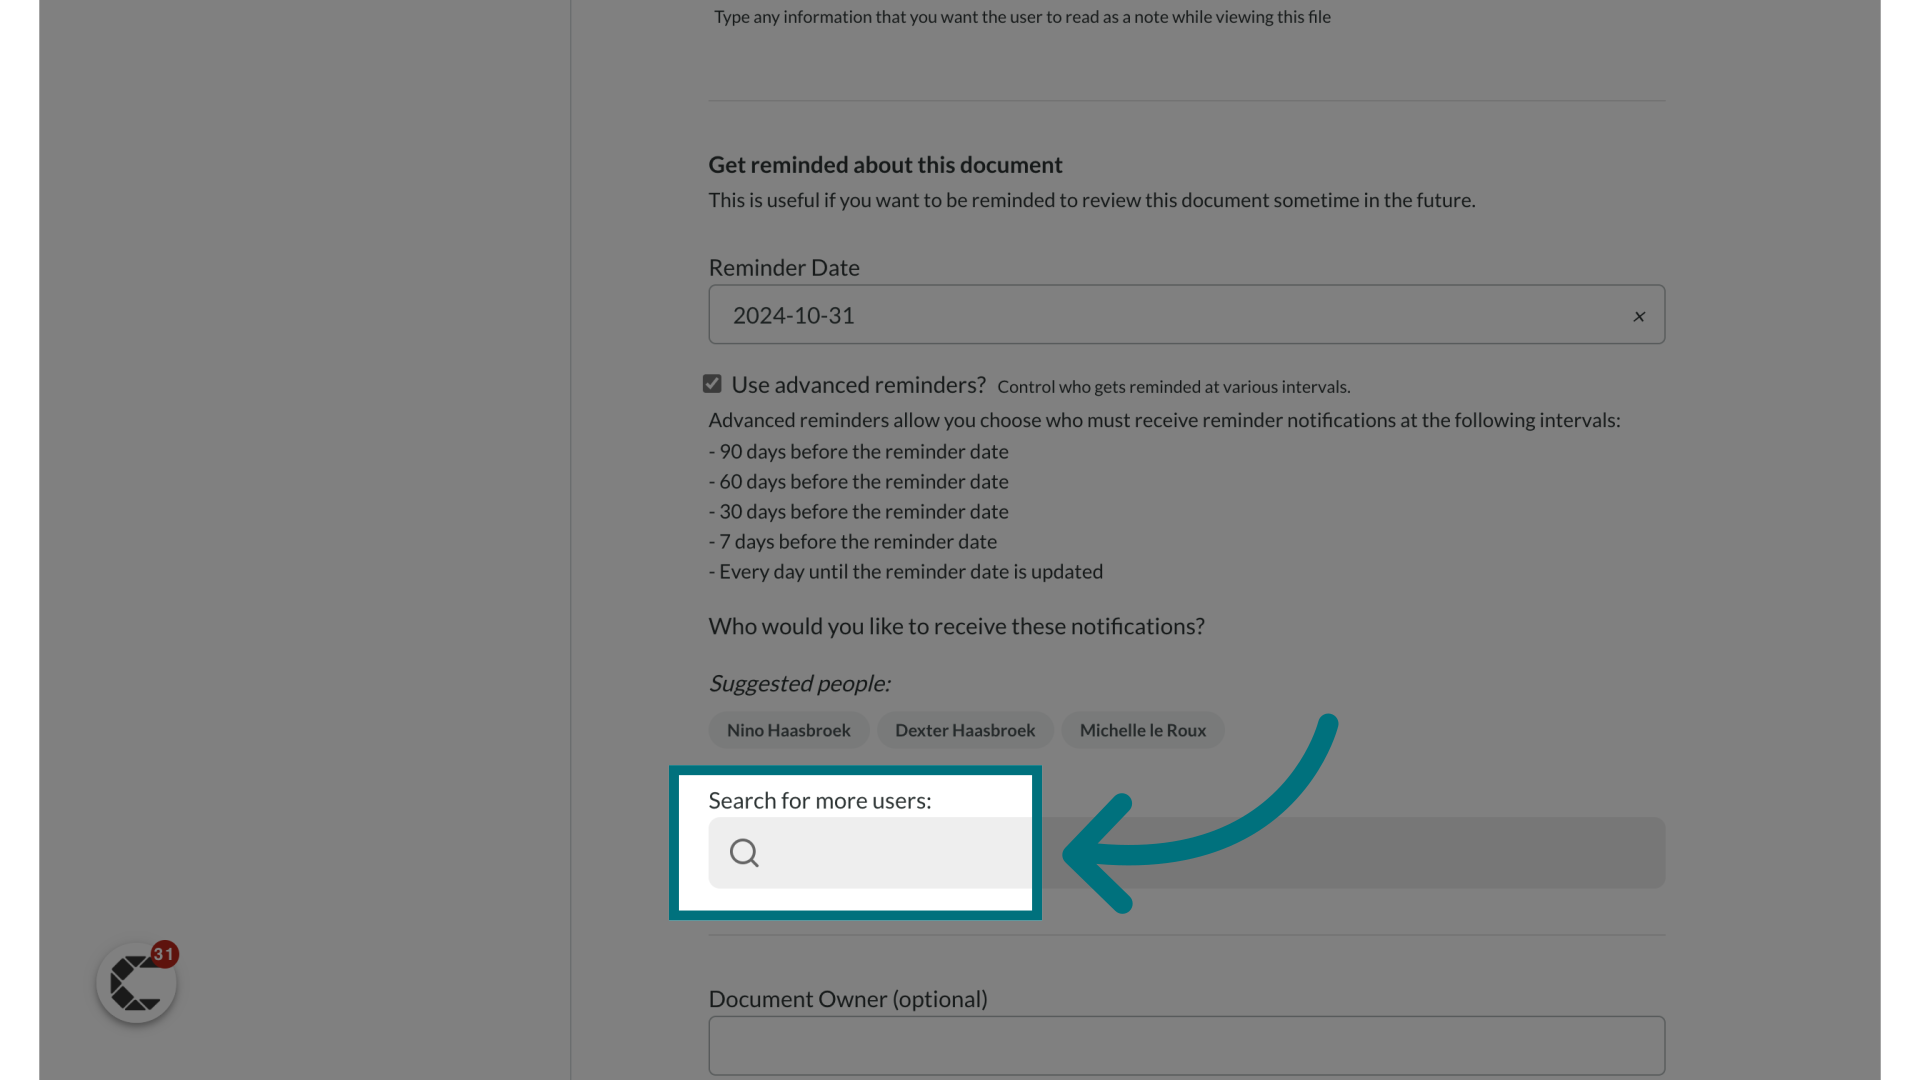
6. Search for users that should be notified about this file's expiration
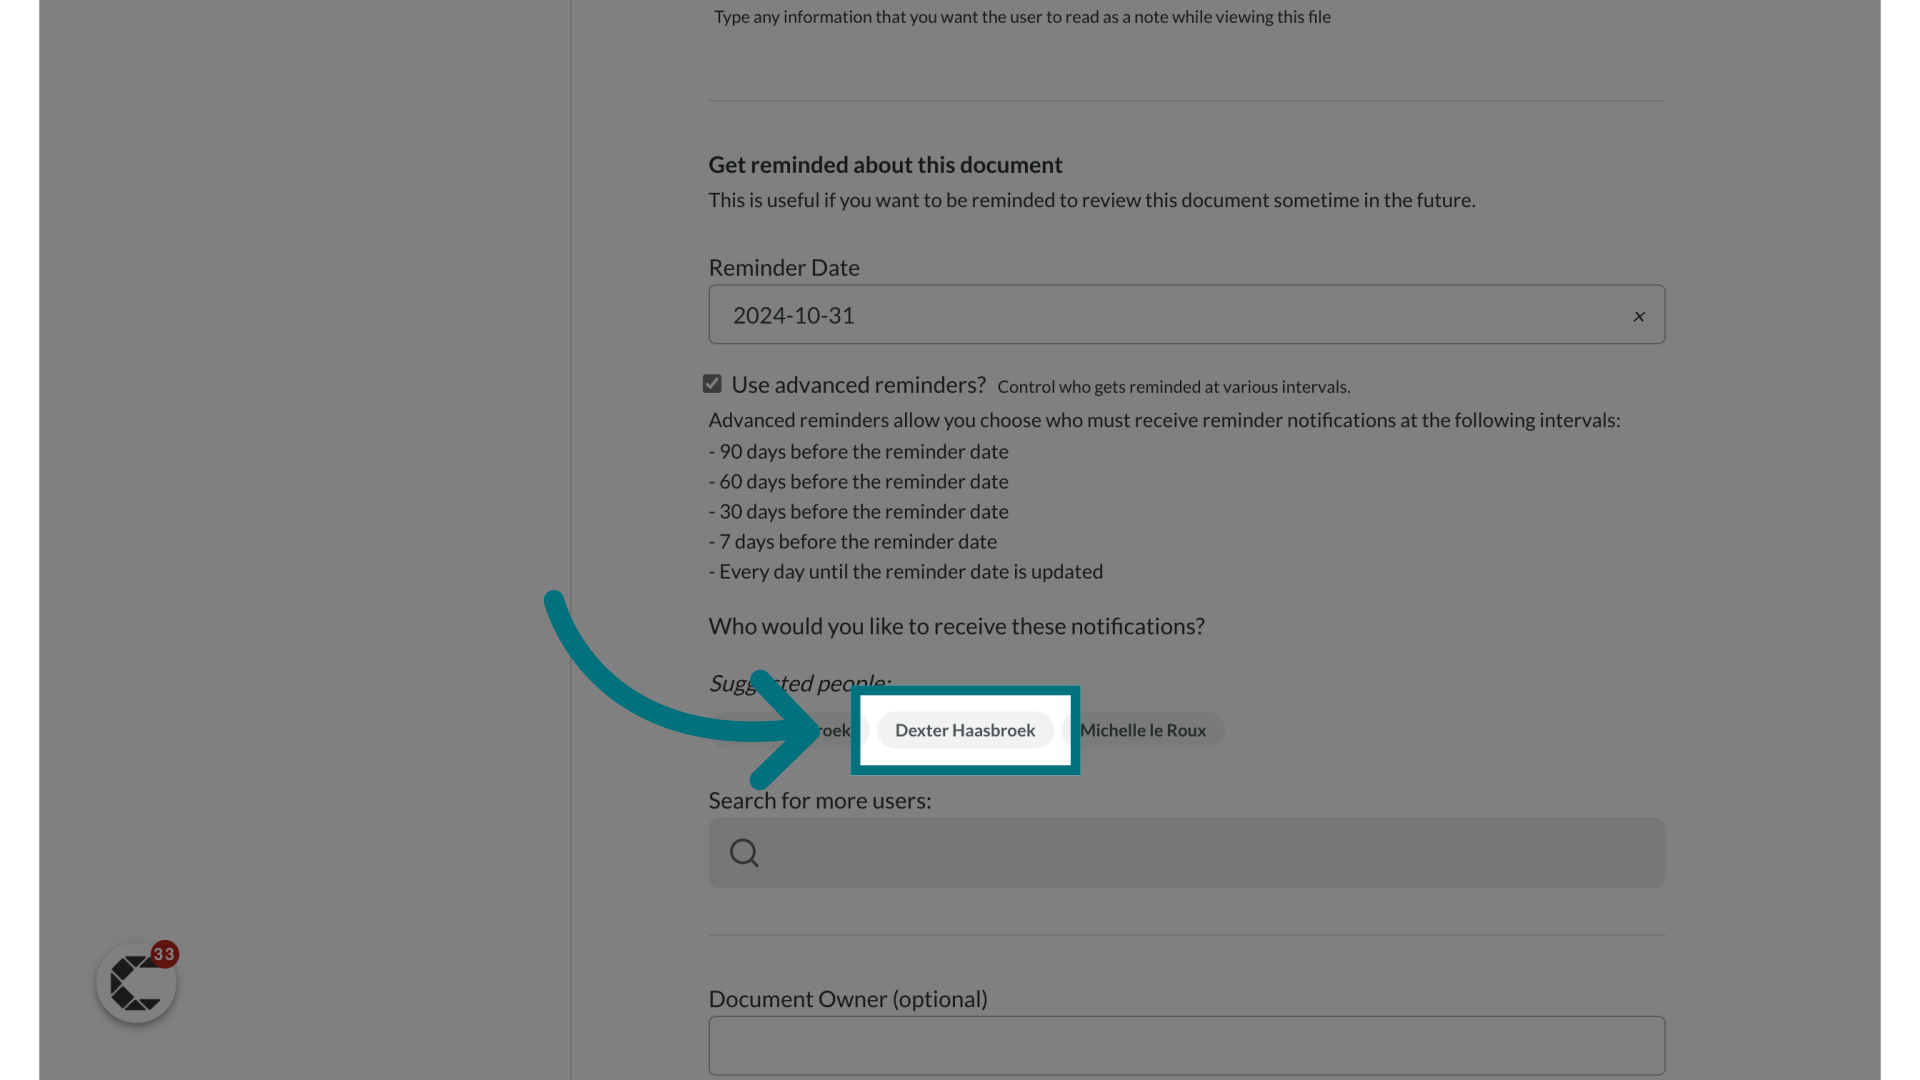
7. You can also select one of the "Suggested people"
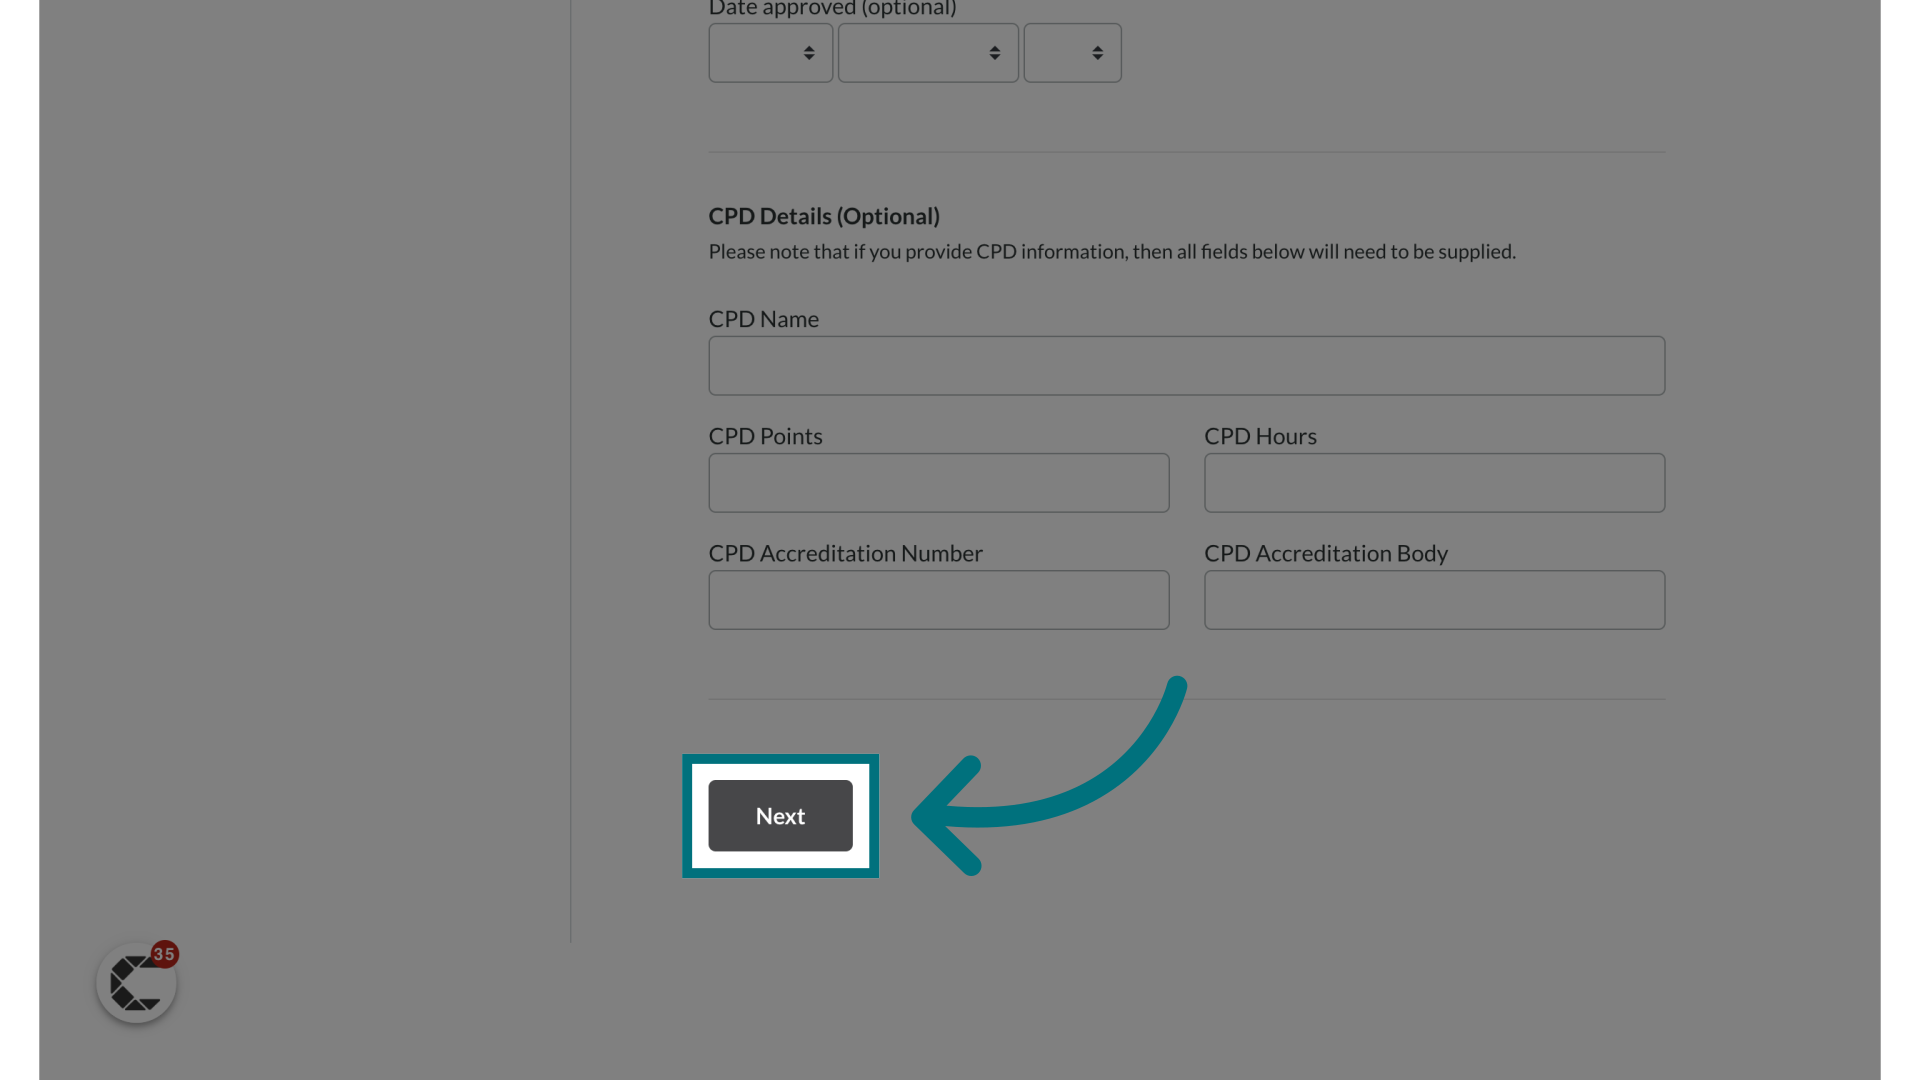
8. Click "Next"
Creating a test
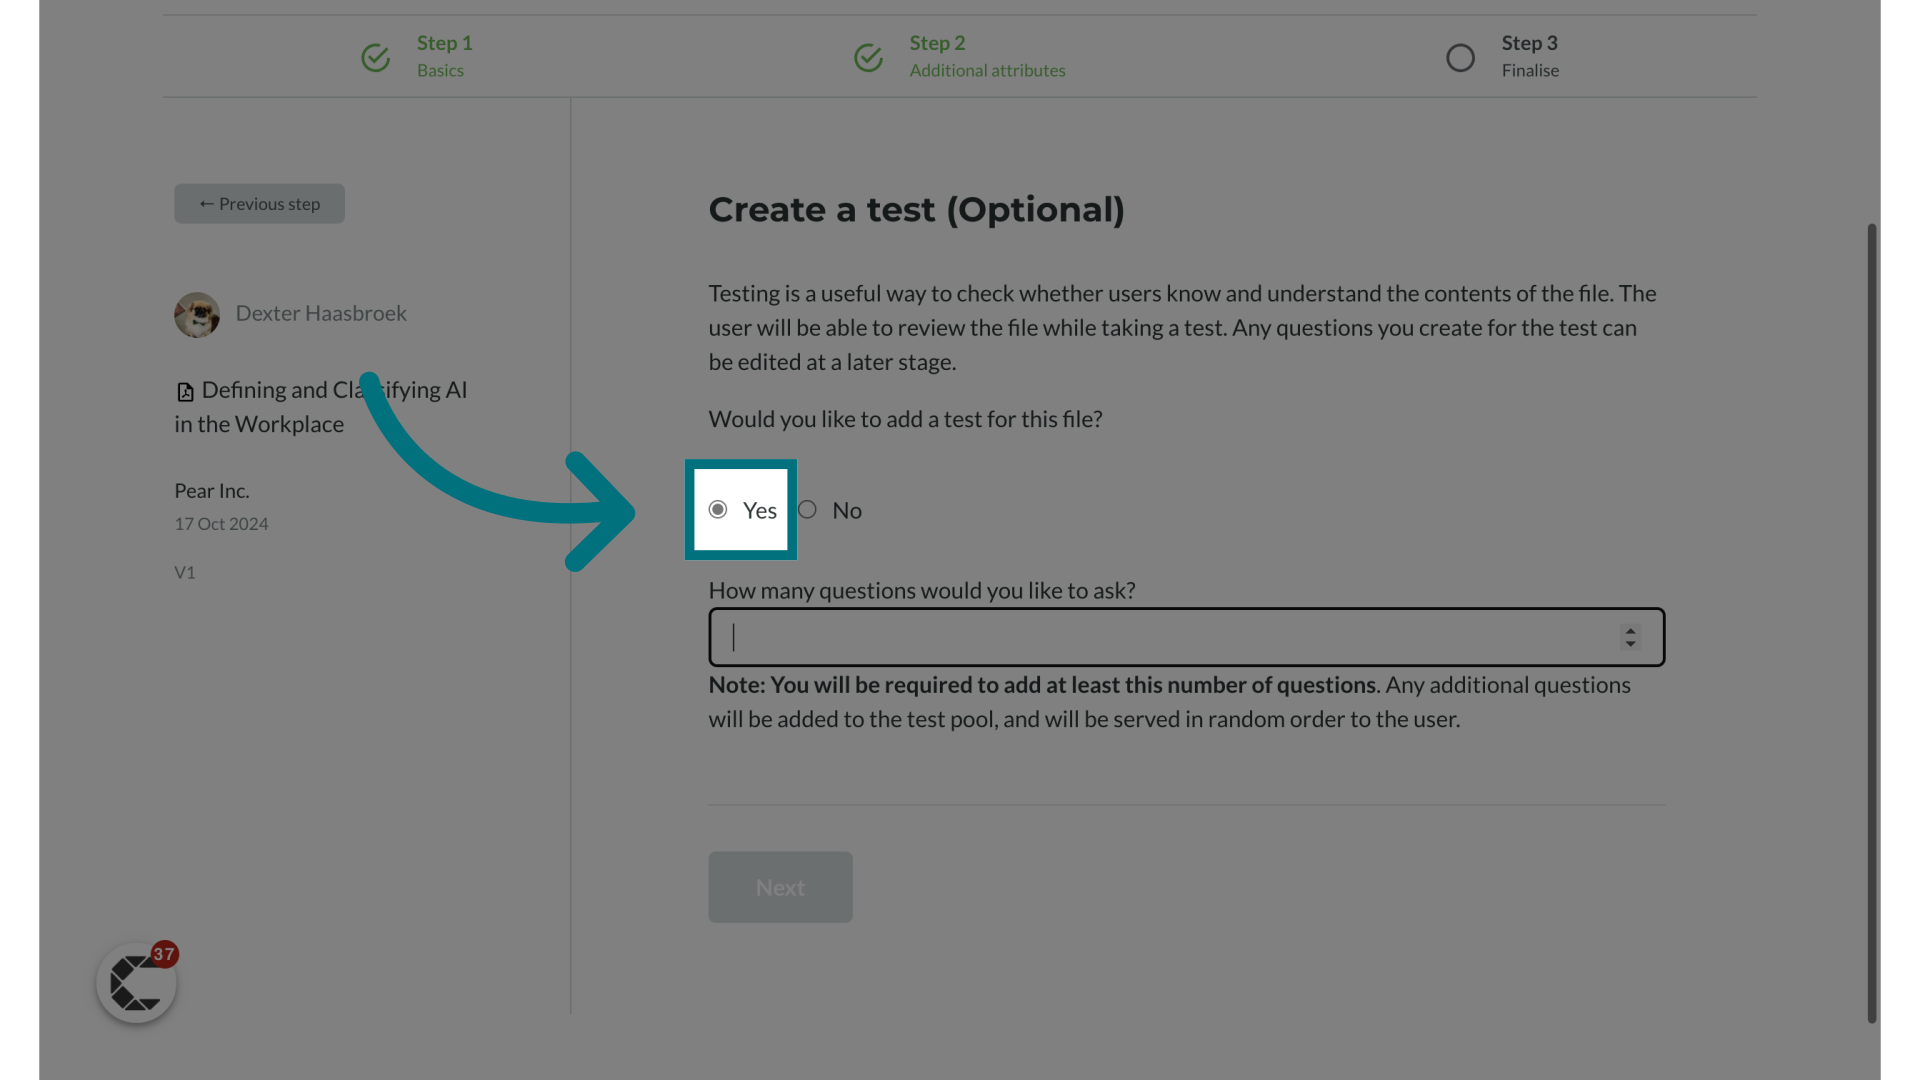
This optional function enables you to test the end user's knowledge. It is a open book test and therefore users are encouraged to refer back to the content and look for the answers.
1. Select "Yes"
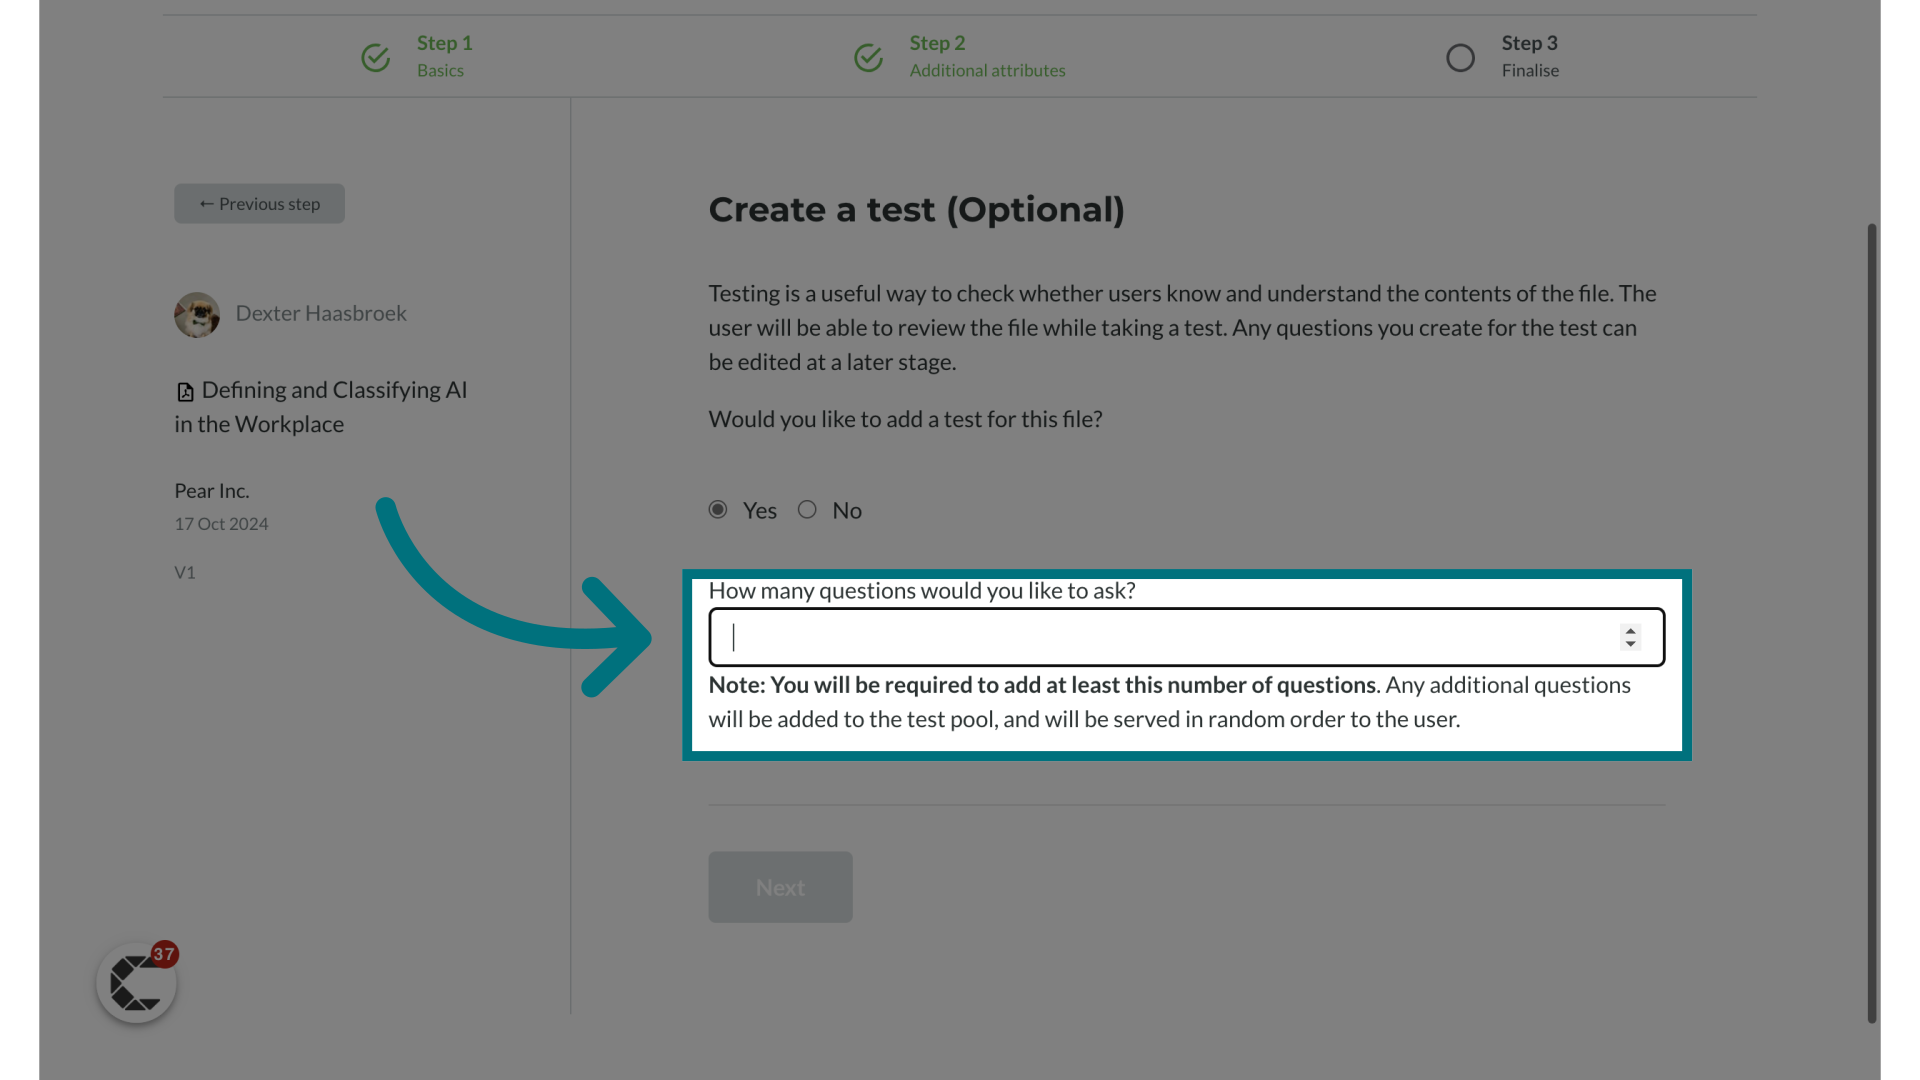
2. Select how many questions you would like to ask
- All of the questions are multiple-choice and will be served in a random order to the user.
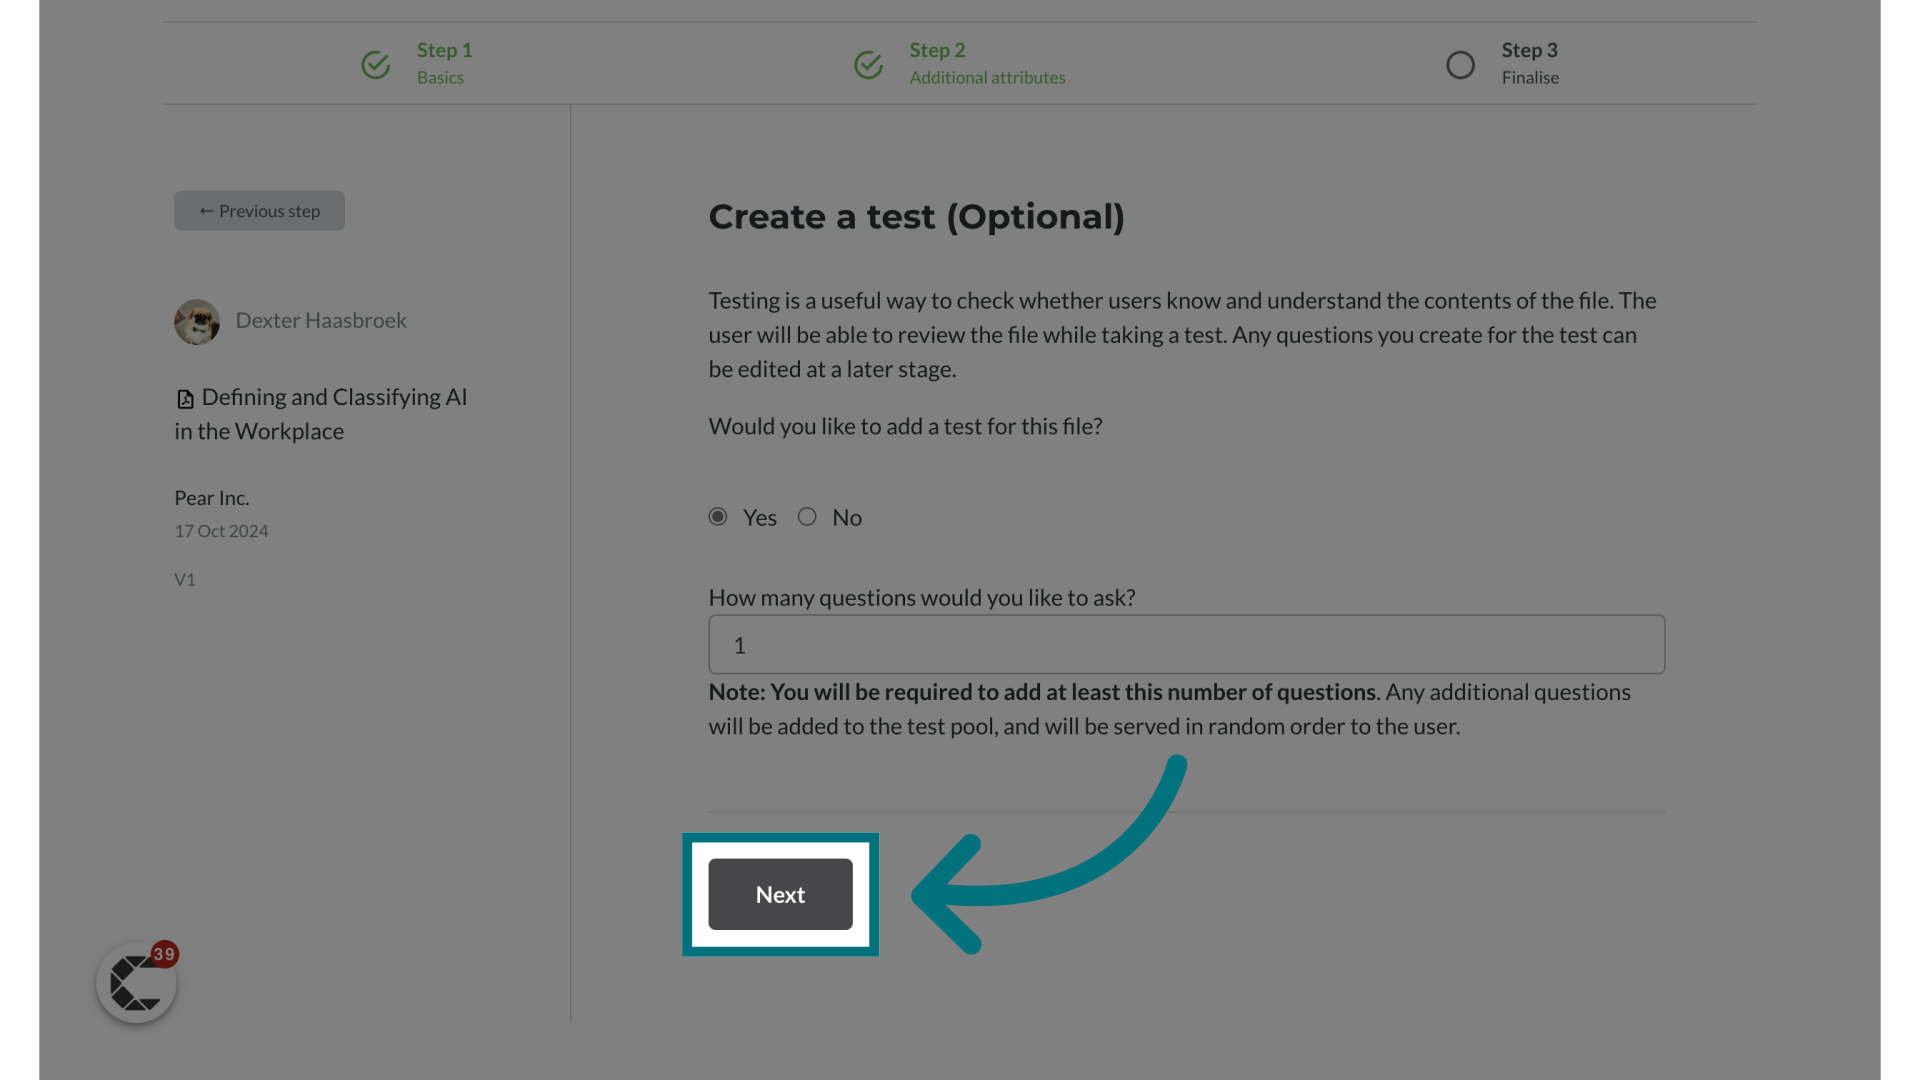
3. Click "Next"
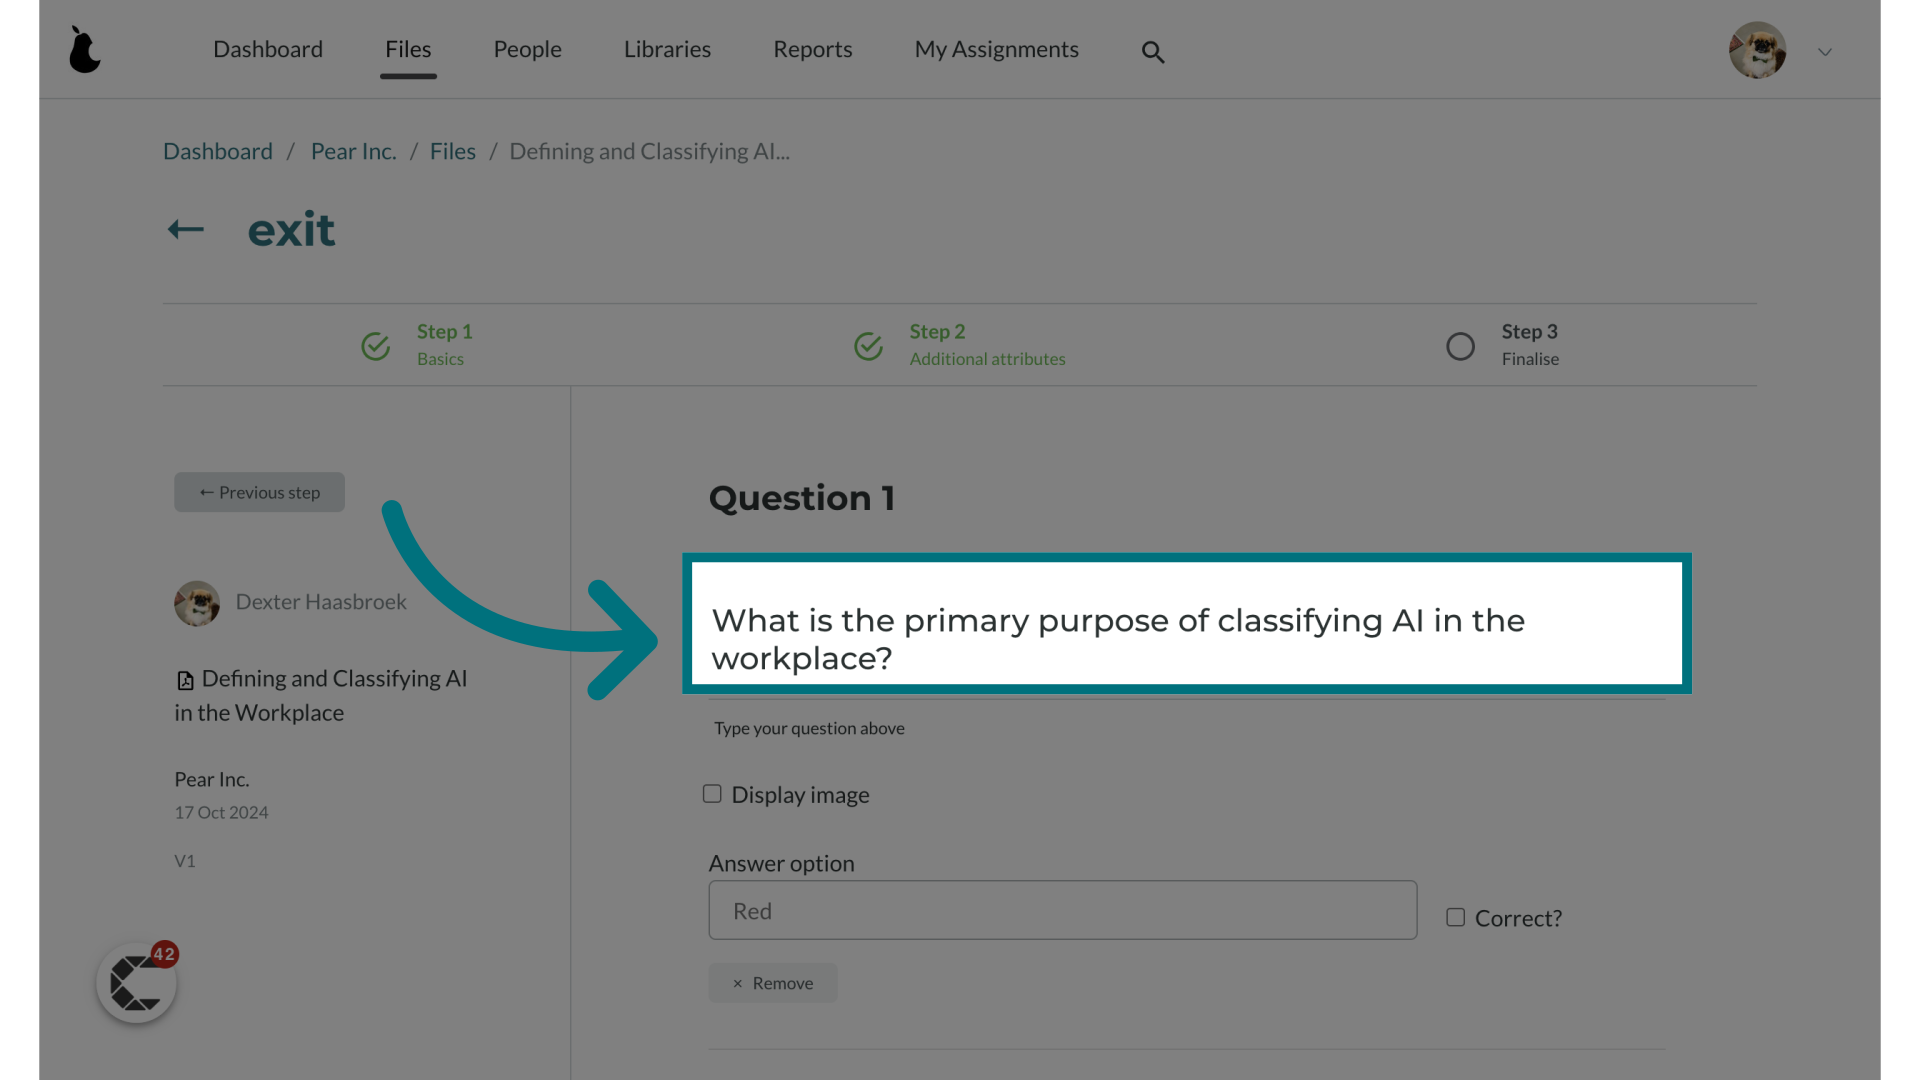
4. Provide a question
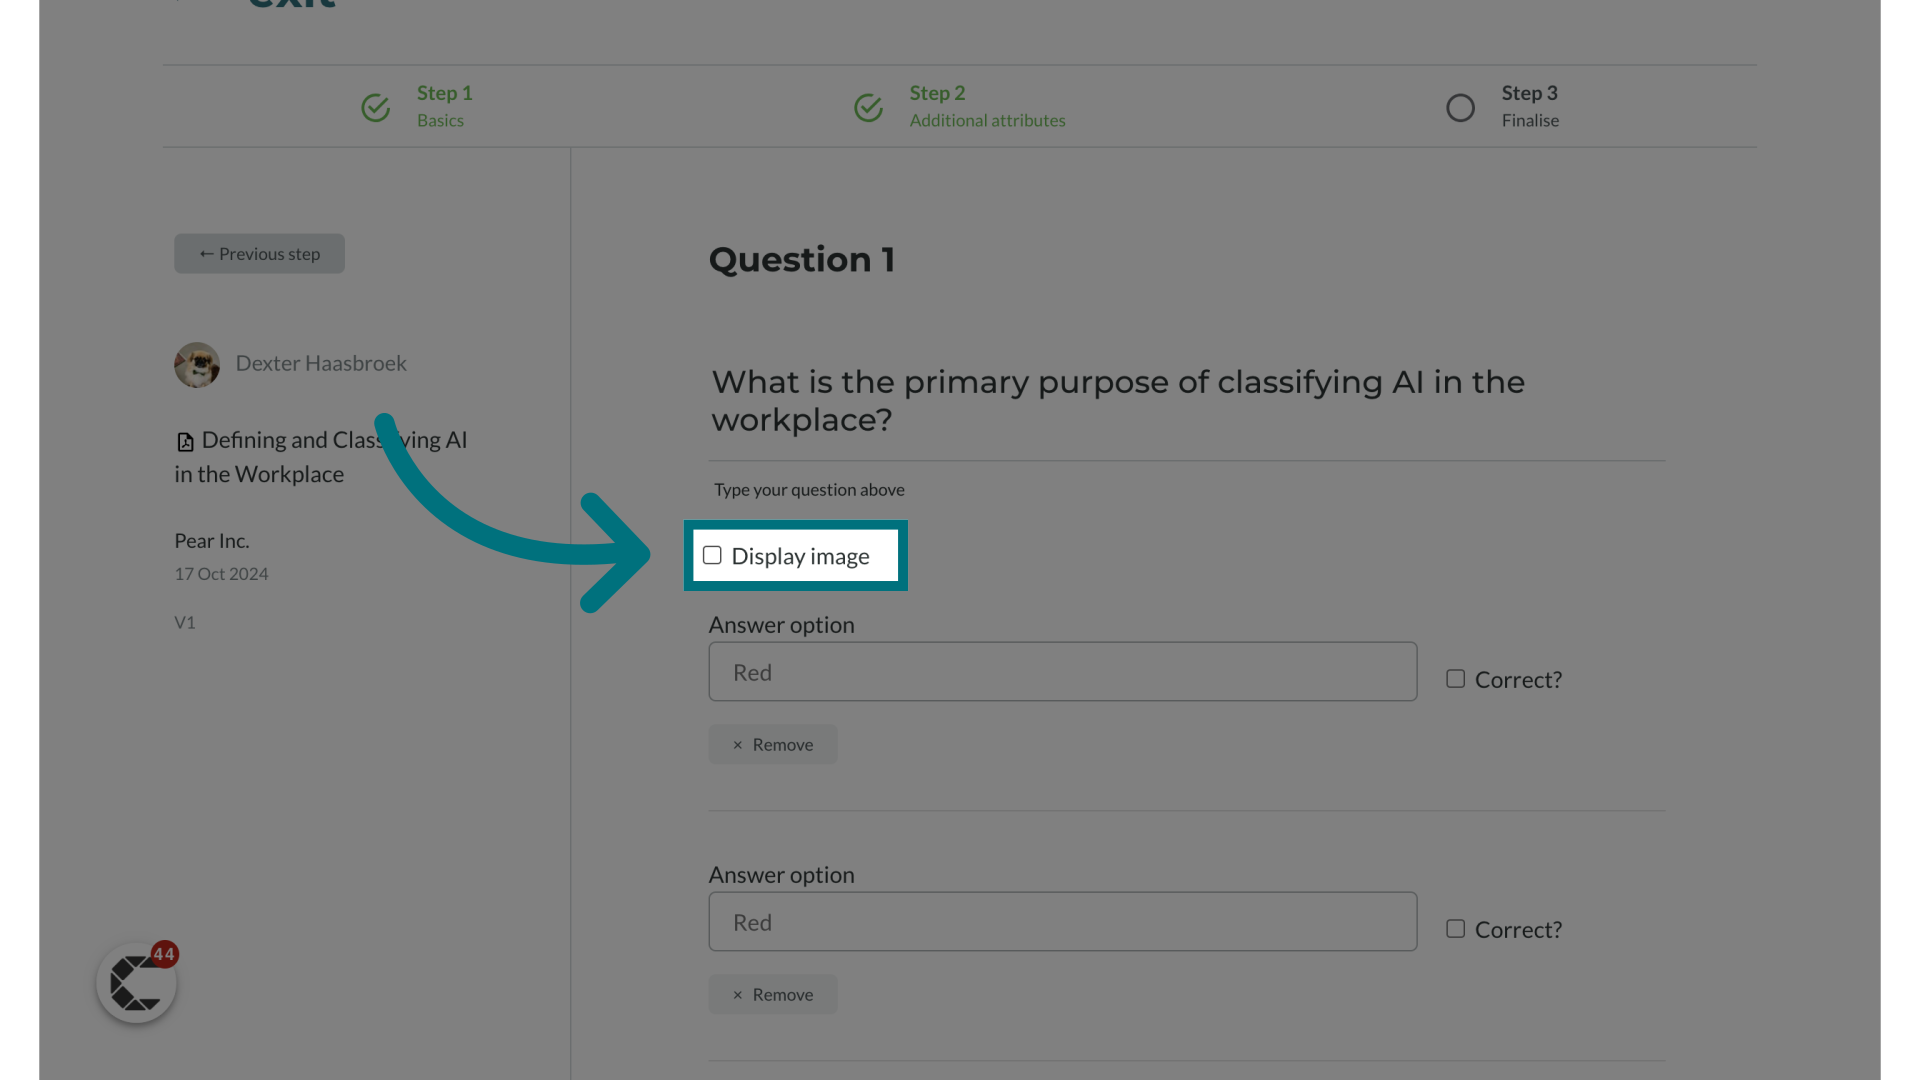
5. Optional: Enable a "Display image"
- Add an image to your question if desired
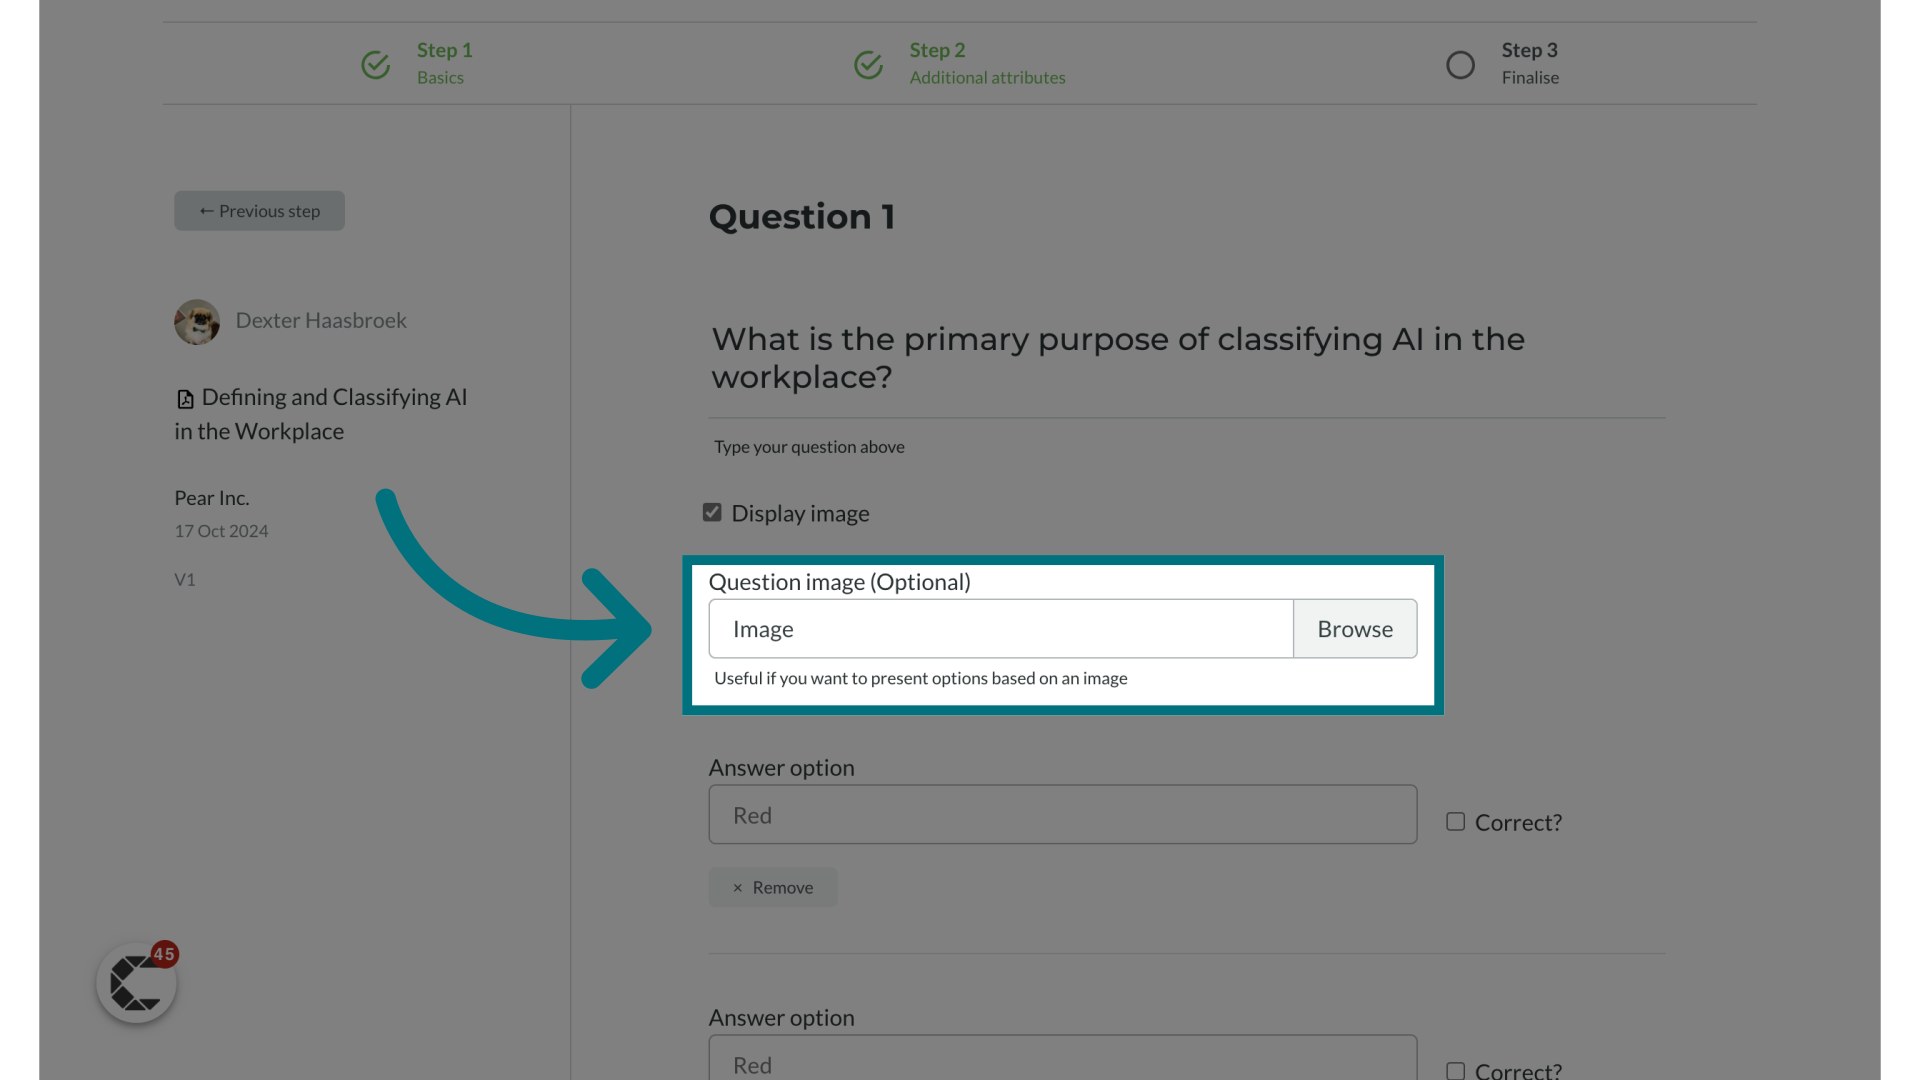
6. Upload an image
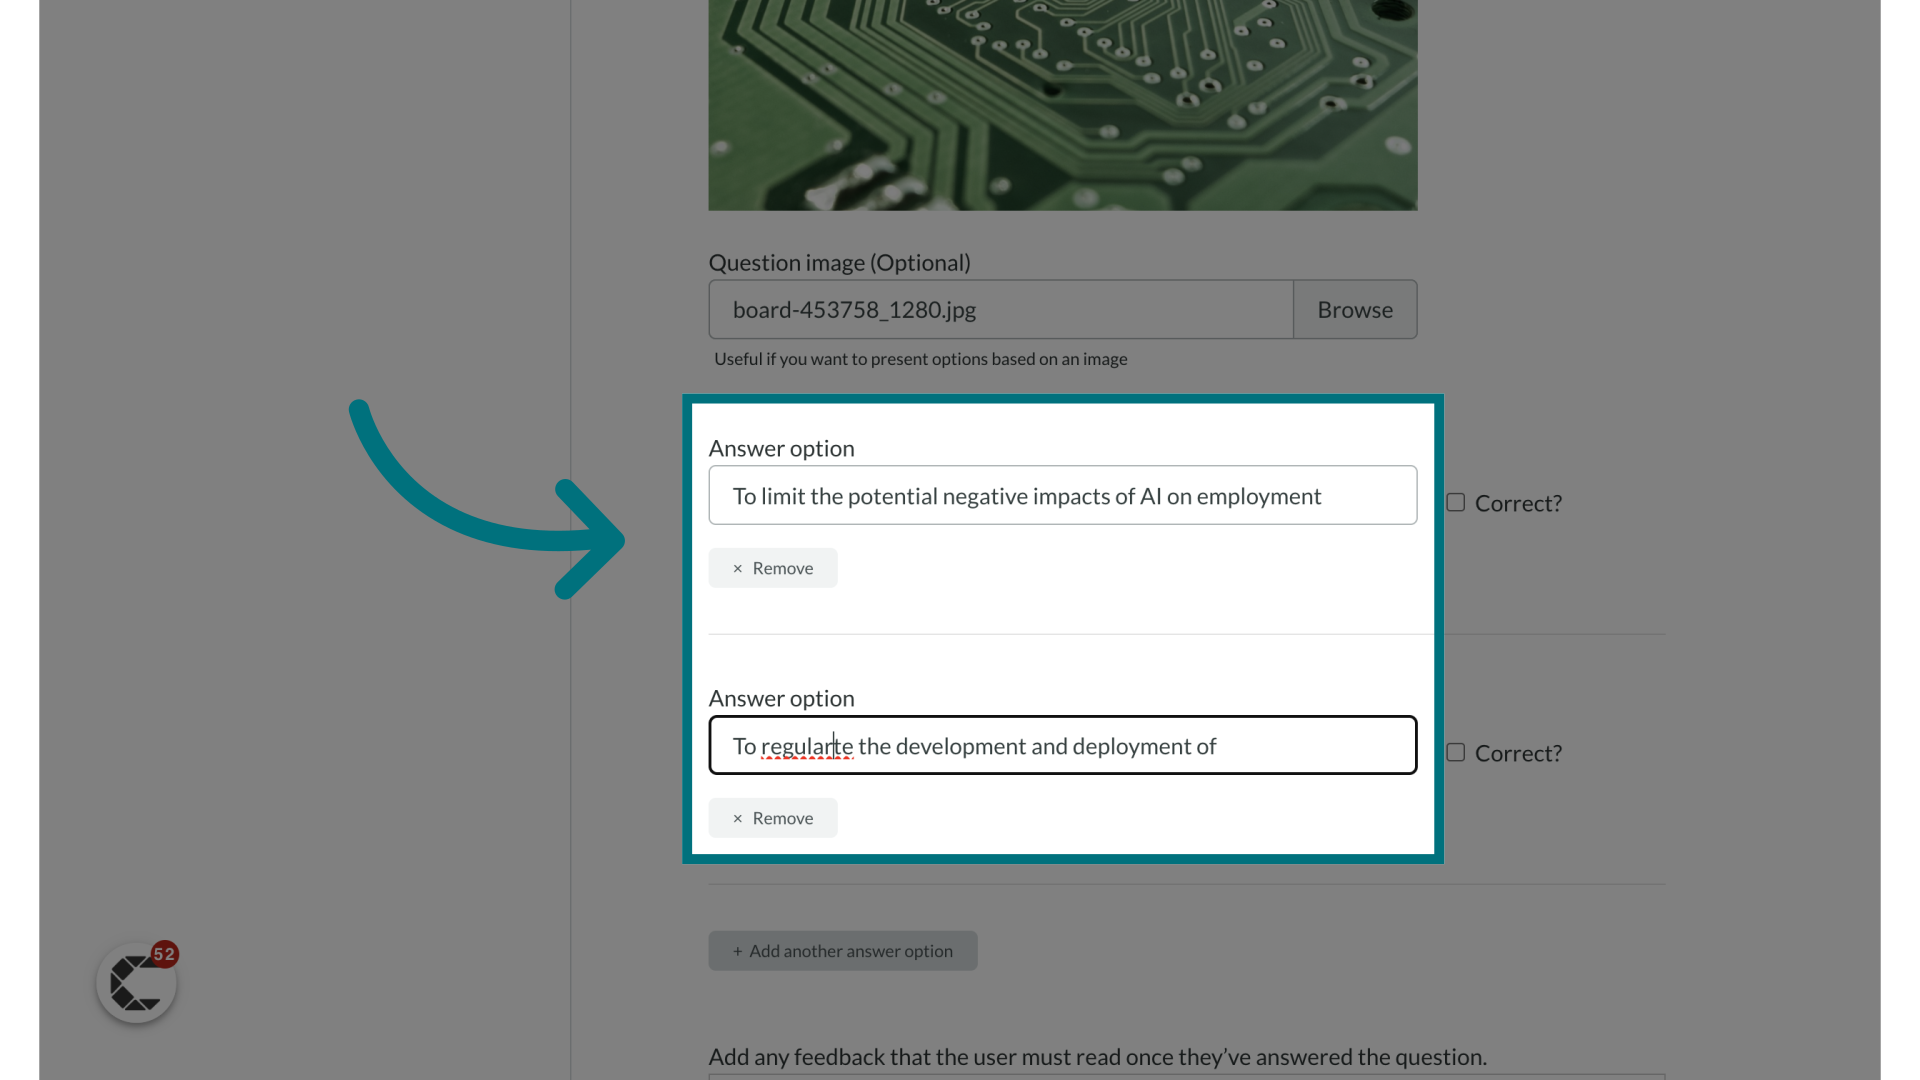
7. Provide answer options
- Enter multiple choice options for you questions
8. Click "+ Add another answer option"
Should you wish to add more answer options you can do so.
9. Provide another answer option
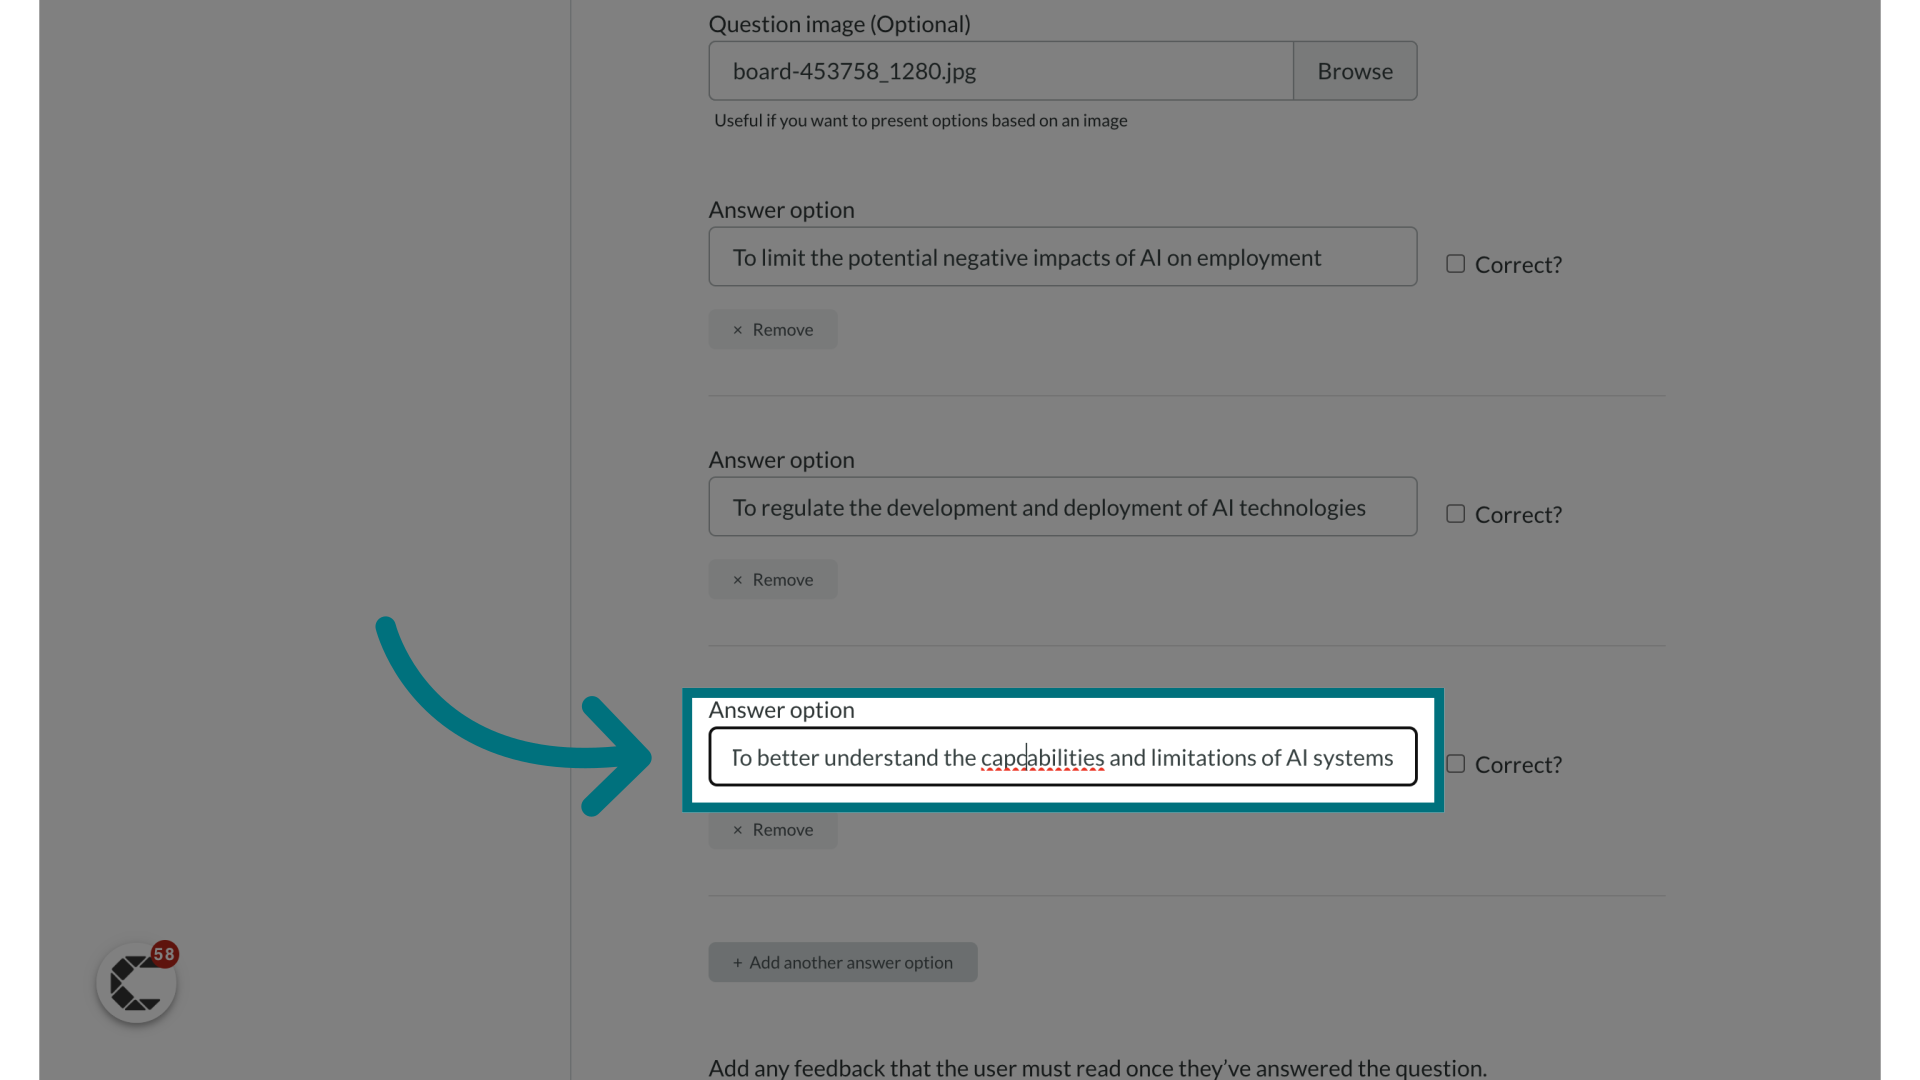
10. Choose which answer options are correct
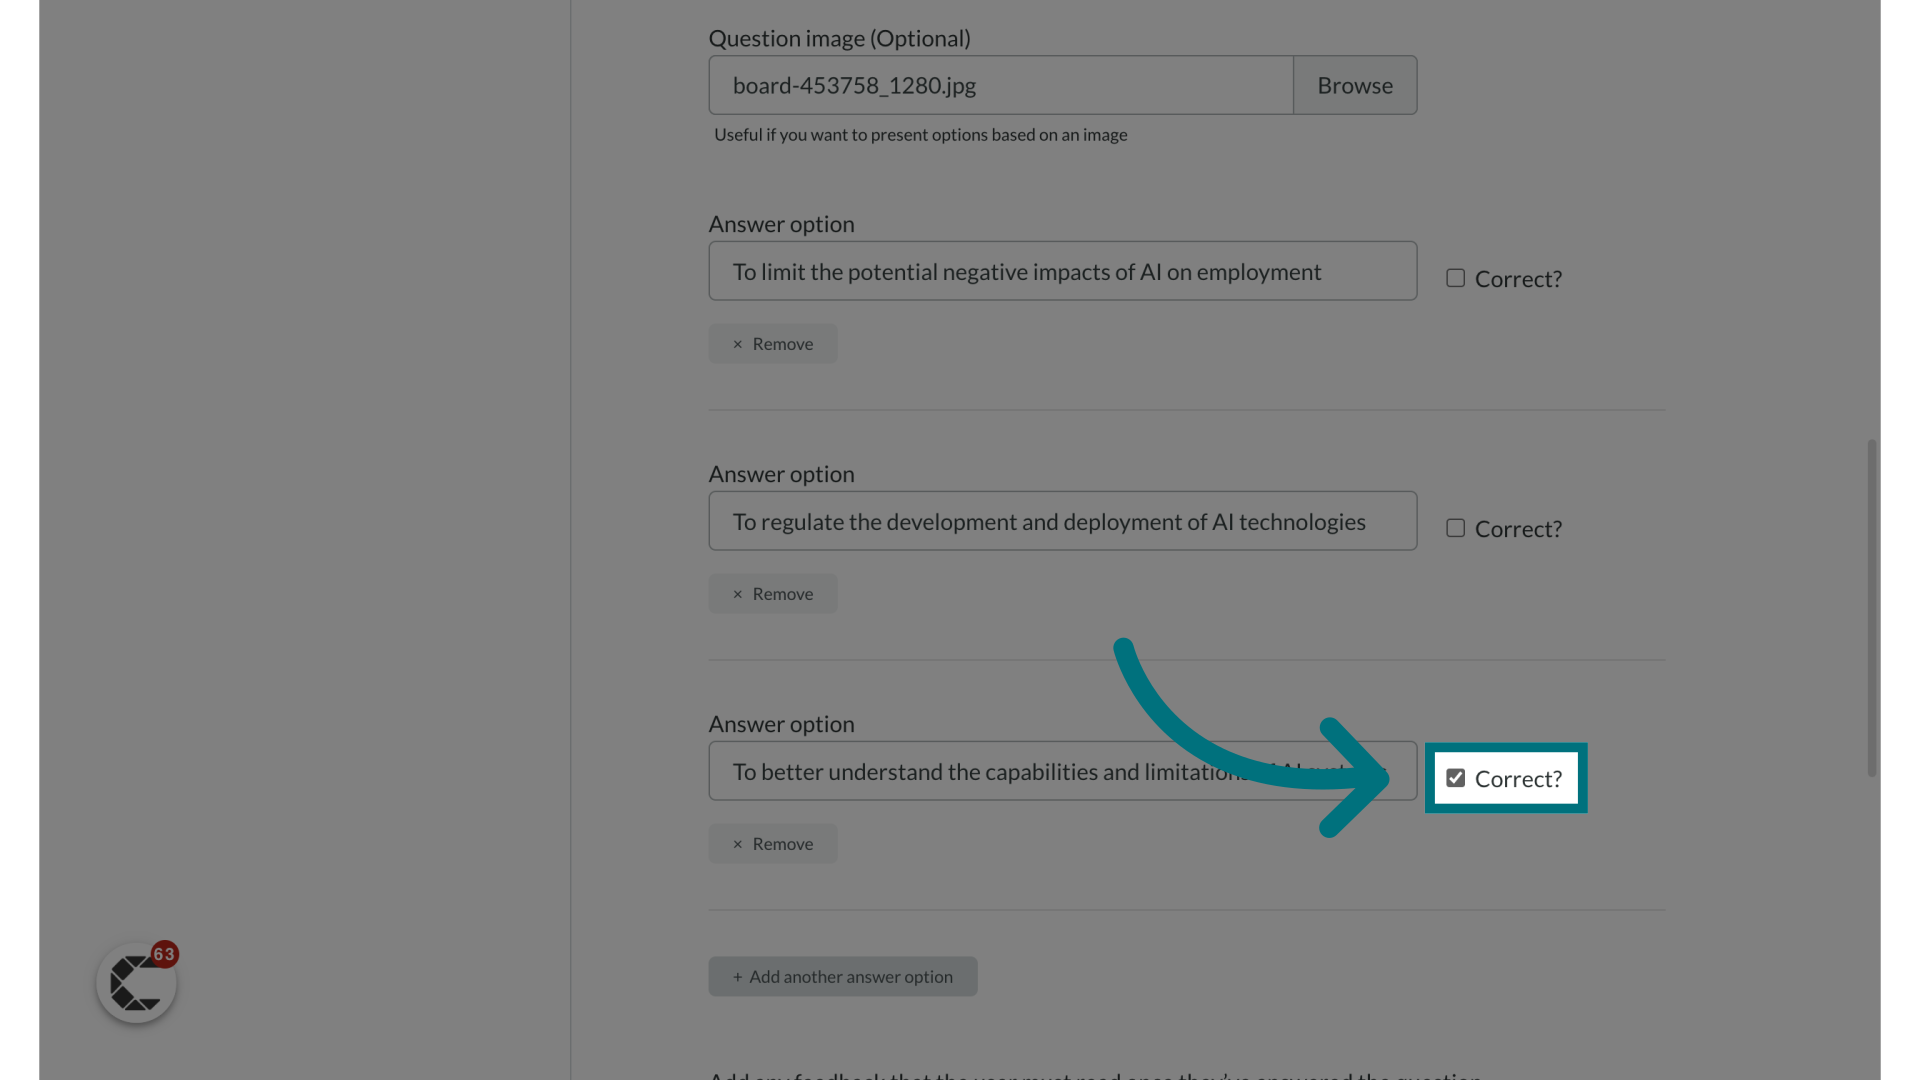
11. Optional: Provide any feedback that should be displayed after the question is answered
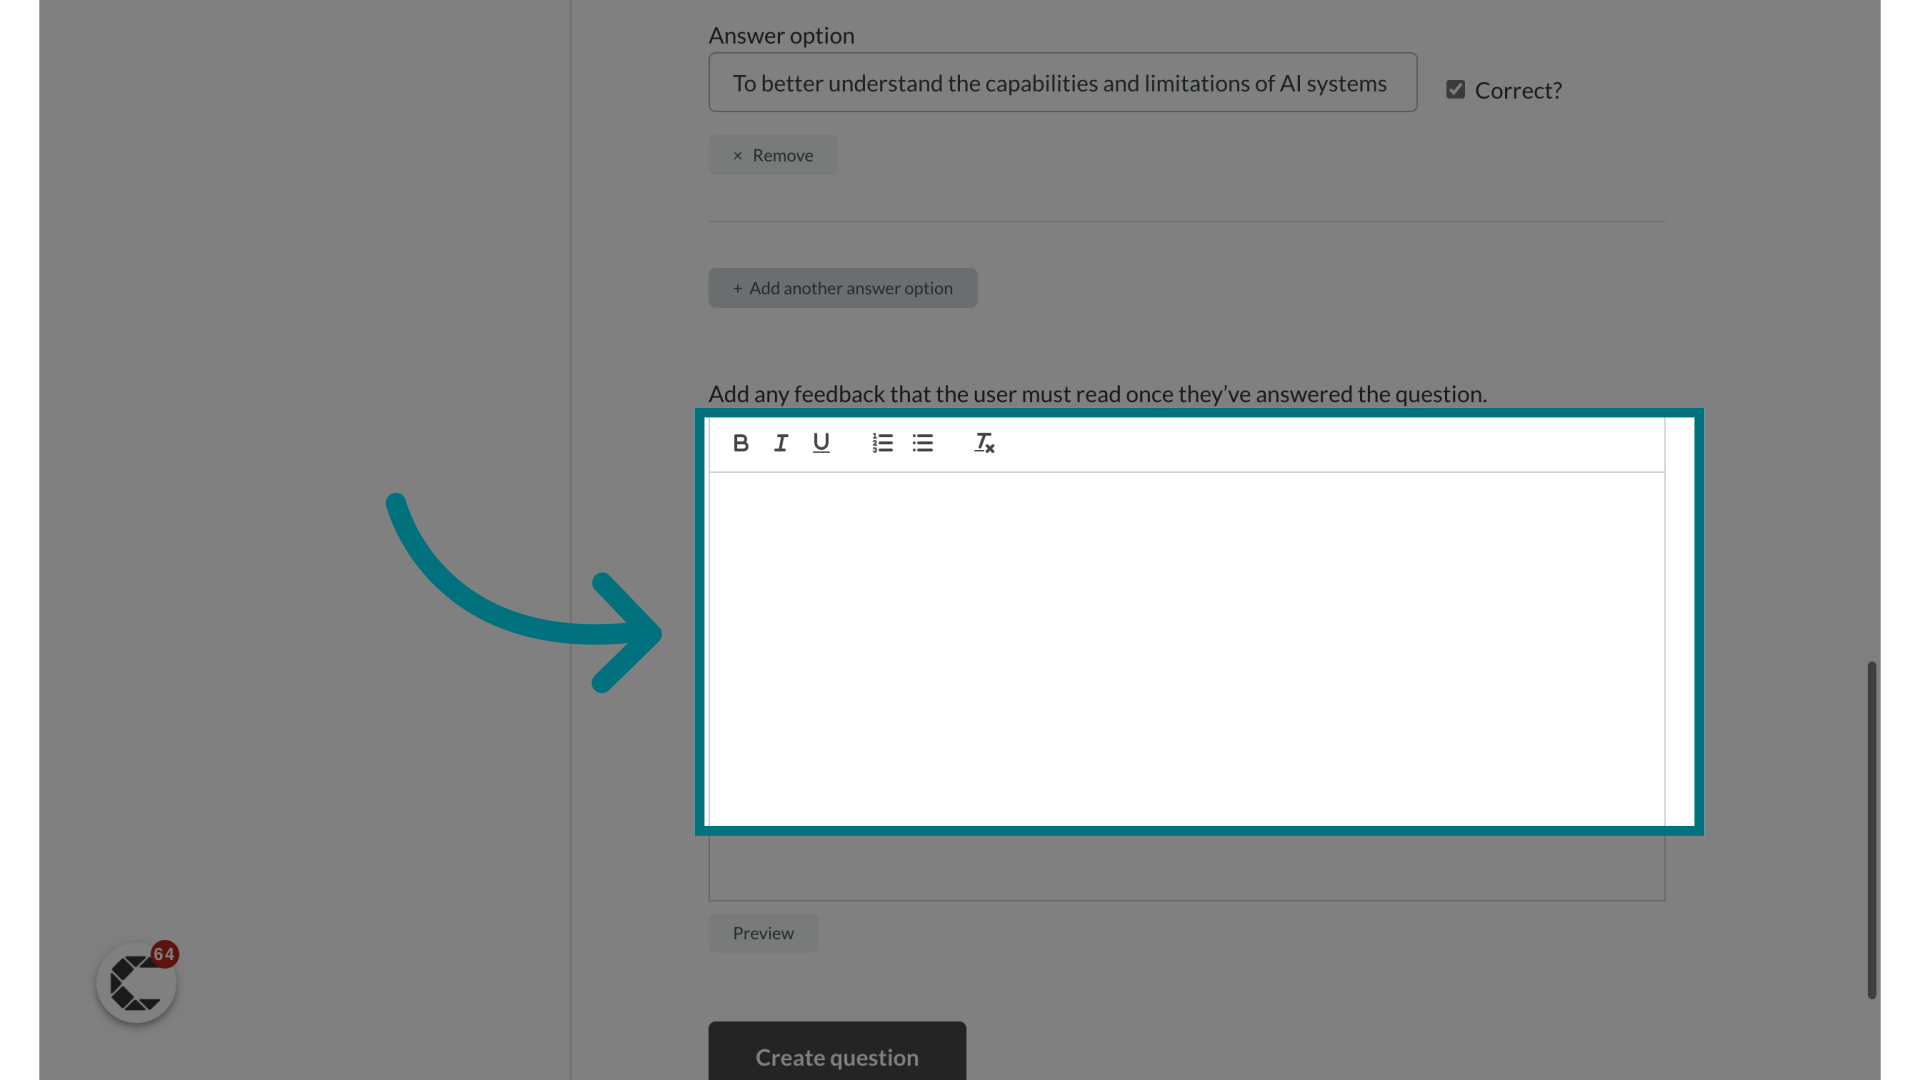
12. Click "Create question"
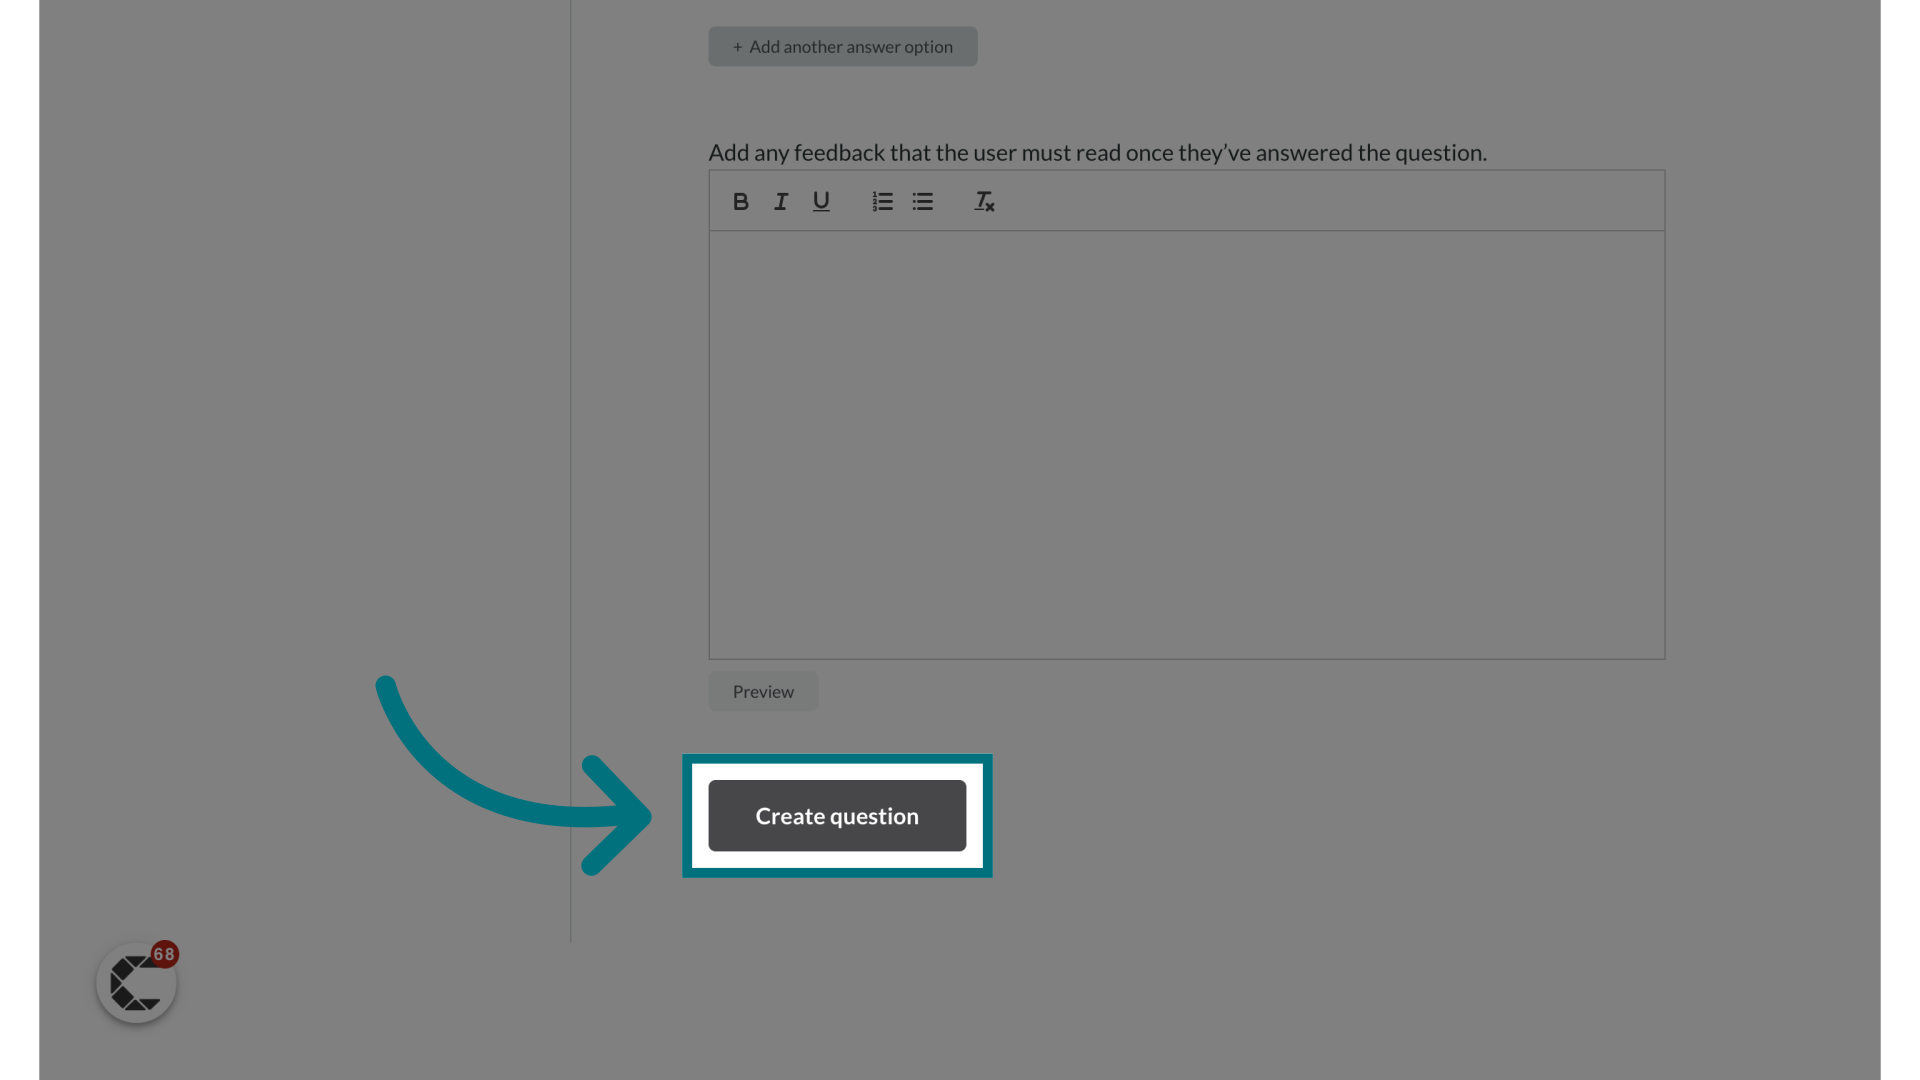
13. Review your question
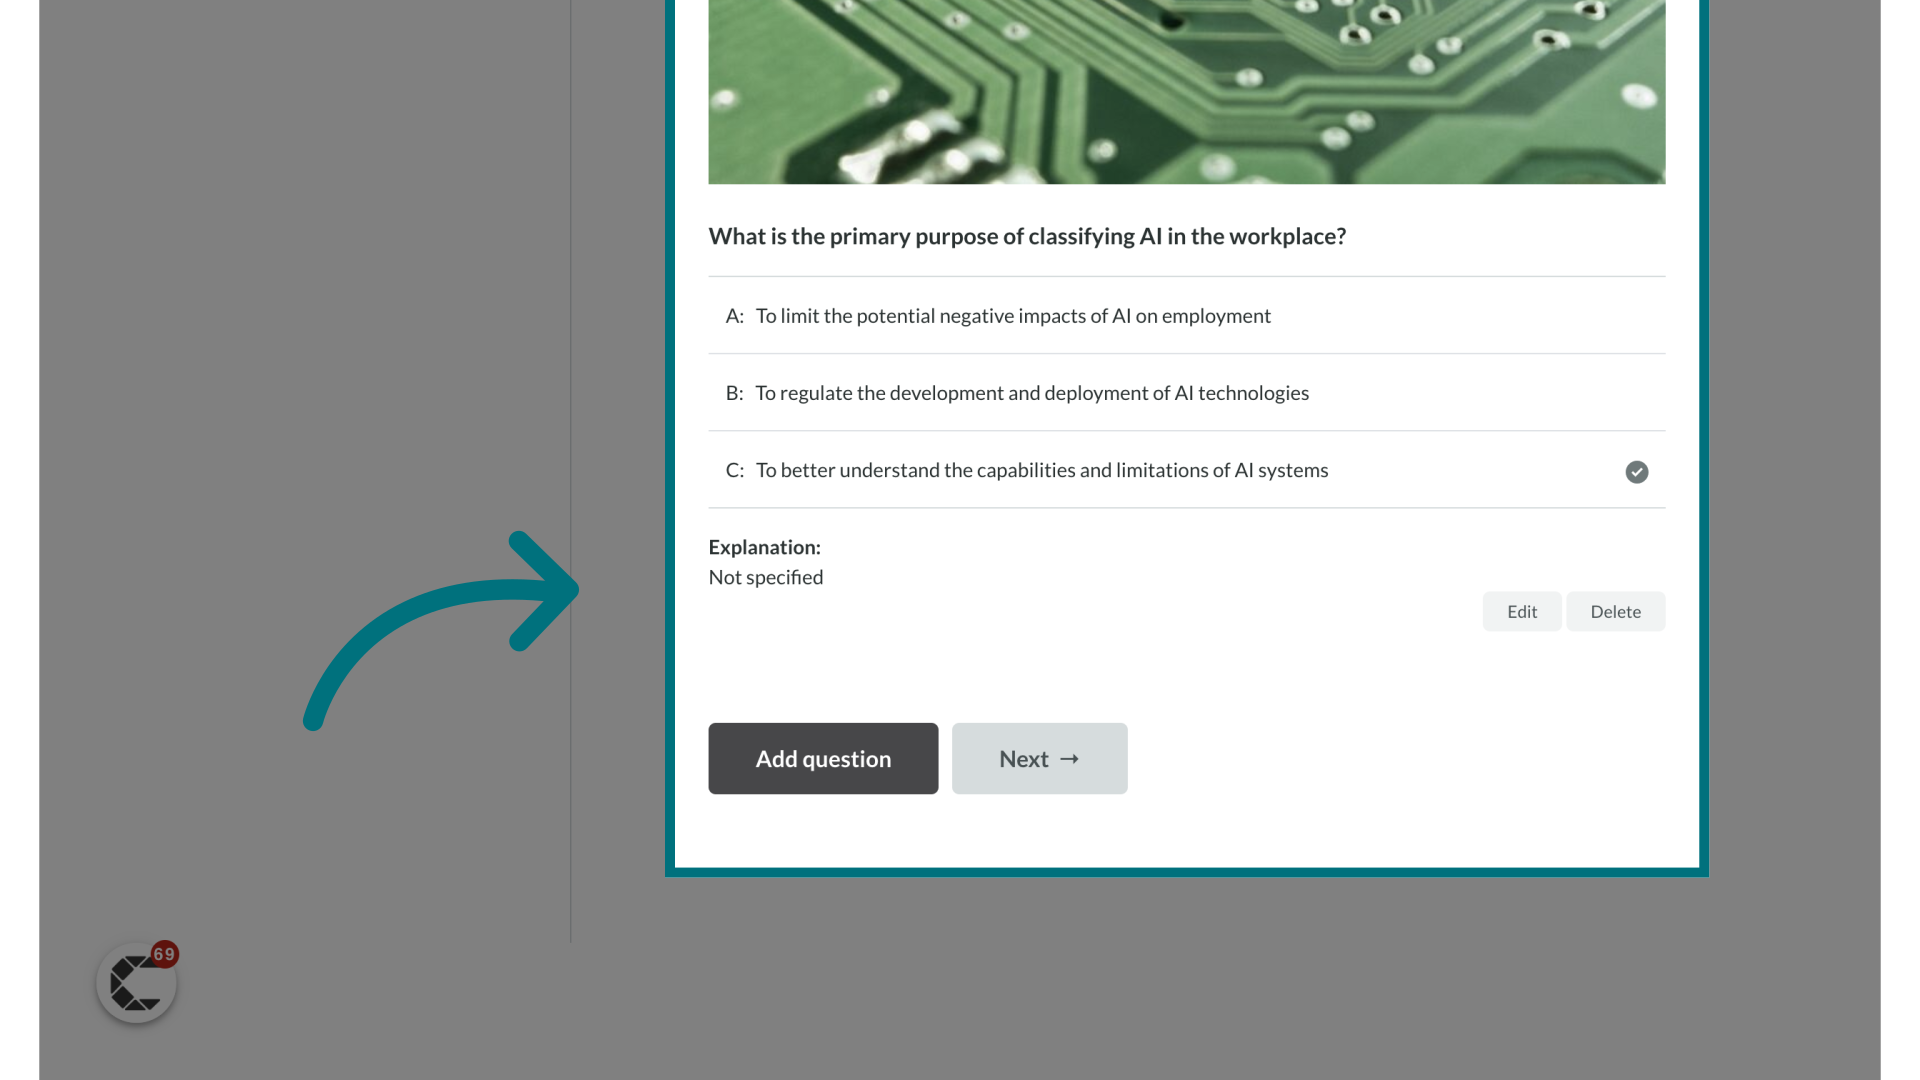
14. Optional: You can add another question and repeat the process
- Feel free to add as many questions as you wish. Simply repeat steps 4-13.

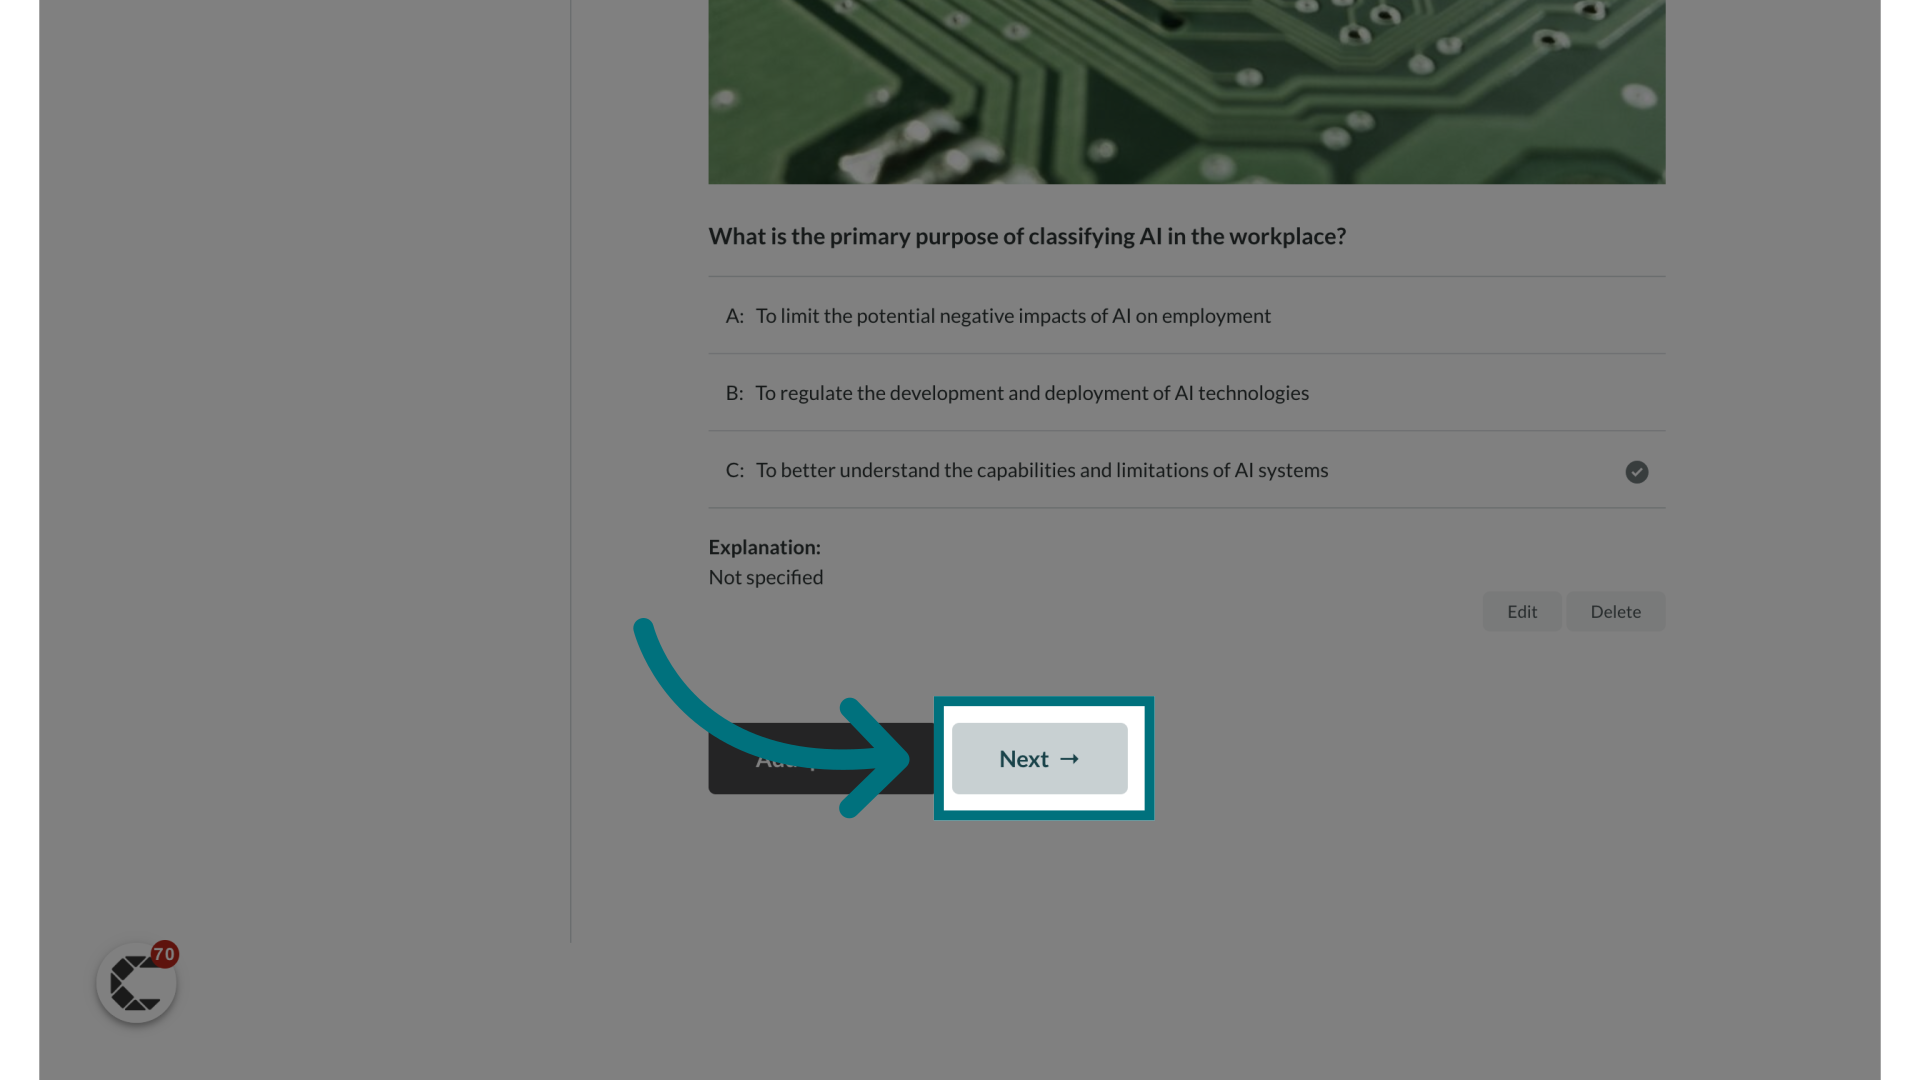
15. Click "Next →"
Feeback & Acknowledgement
Please Note:
If no questions or acknowledgments are activated on a file, a user will not receive a reminder email the next day and there will not be proof of completion on reports.
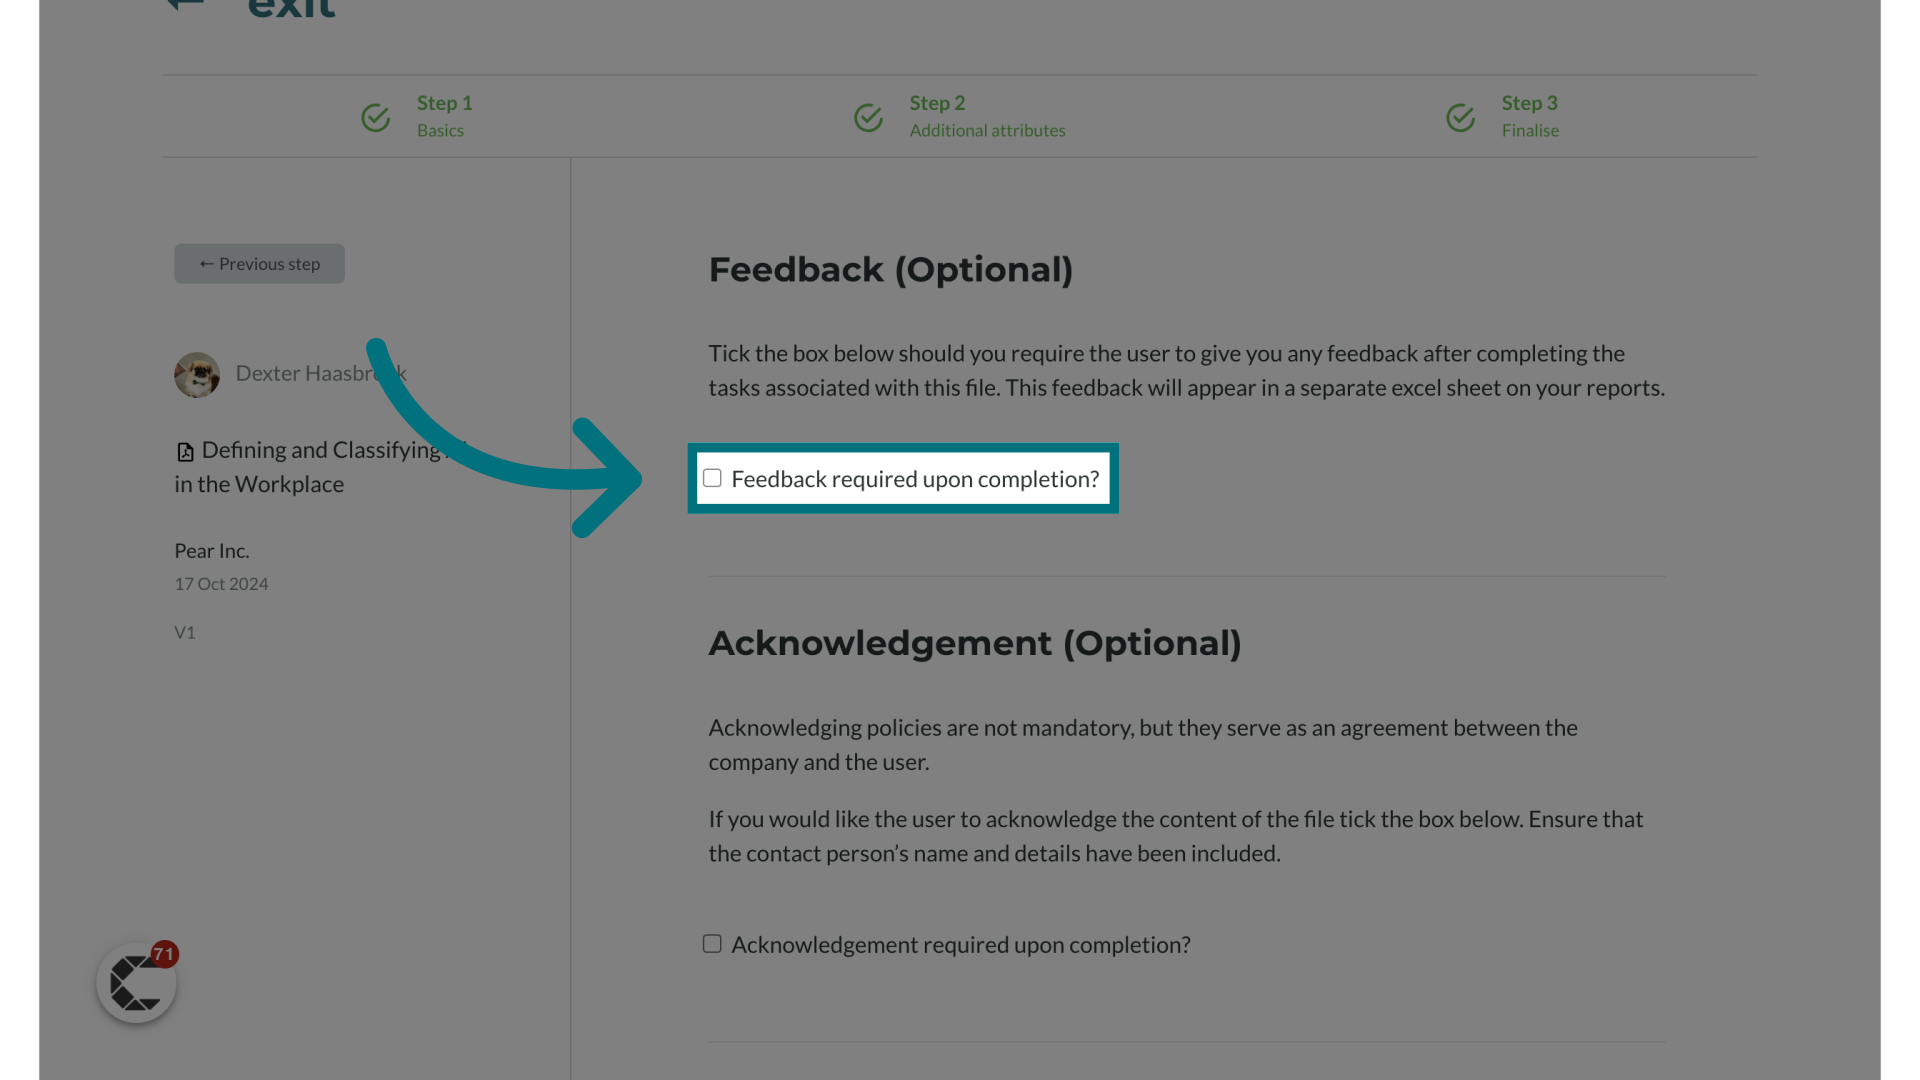
1. Enable feedback
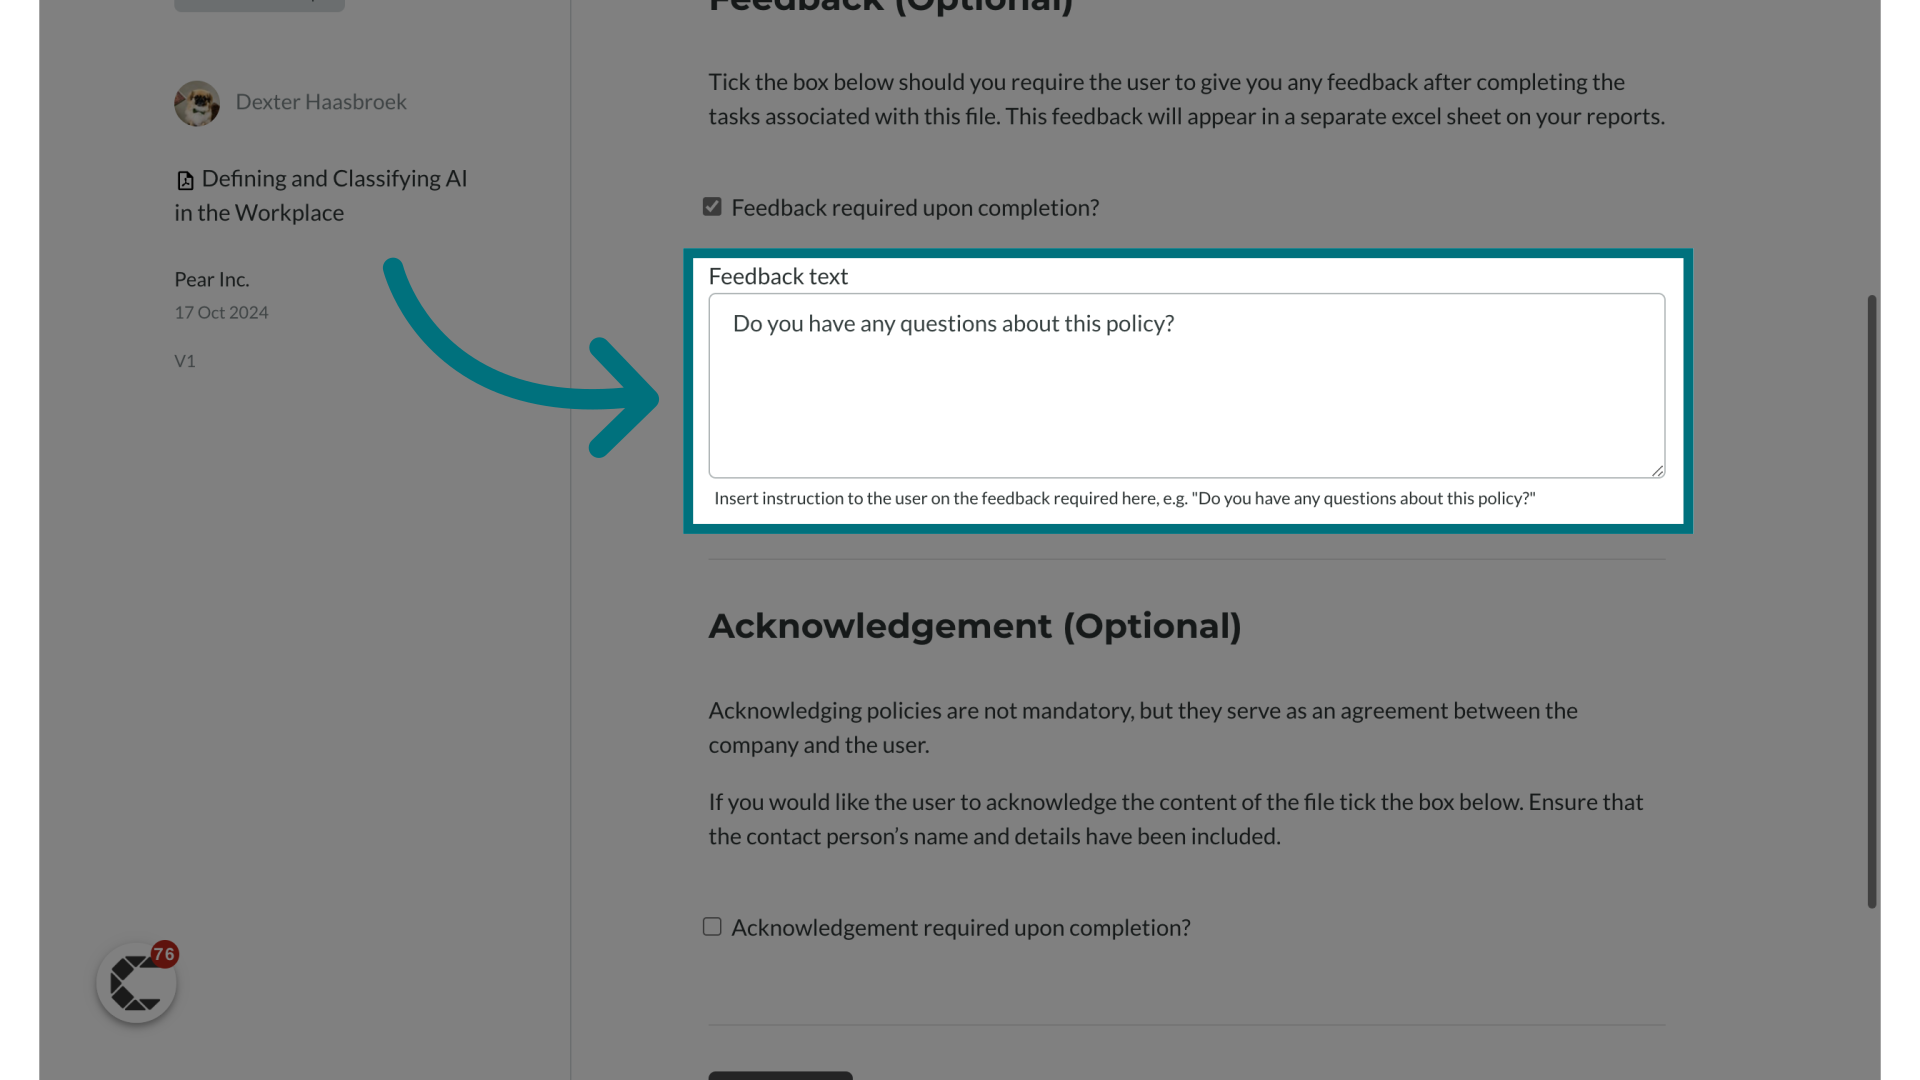
2. Provide feedback text
- Enter instructions or prompts for user feedback.
3. Enable acknowledgements
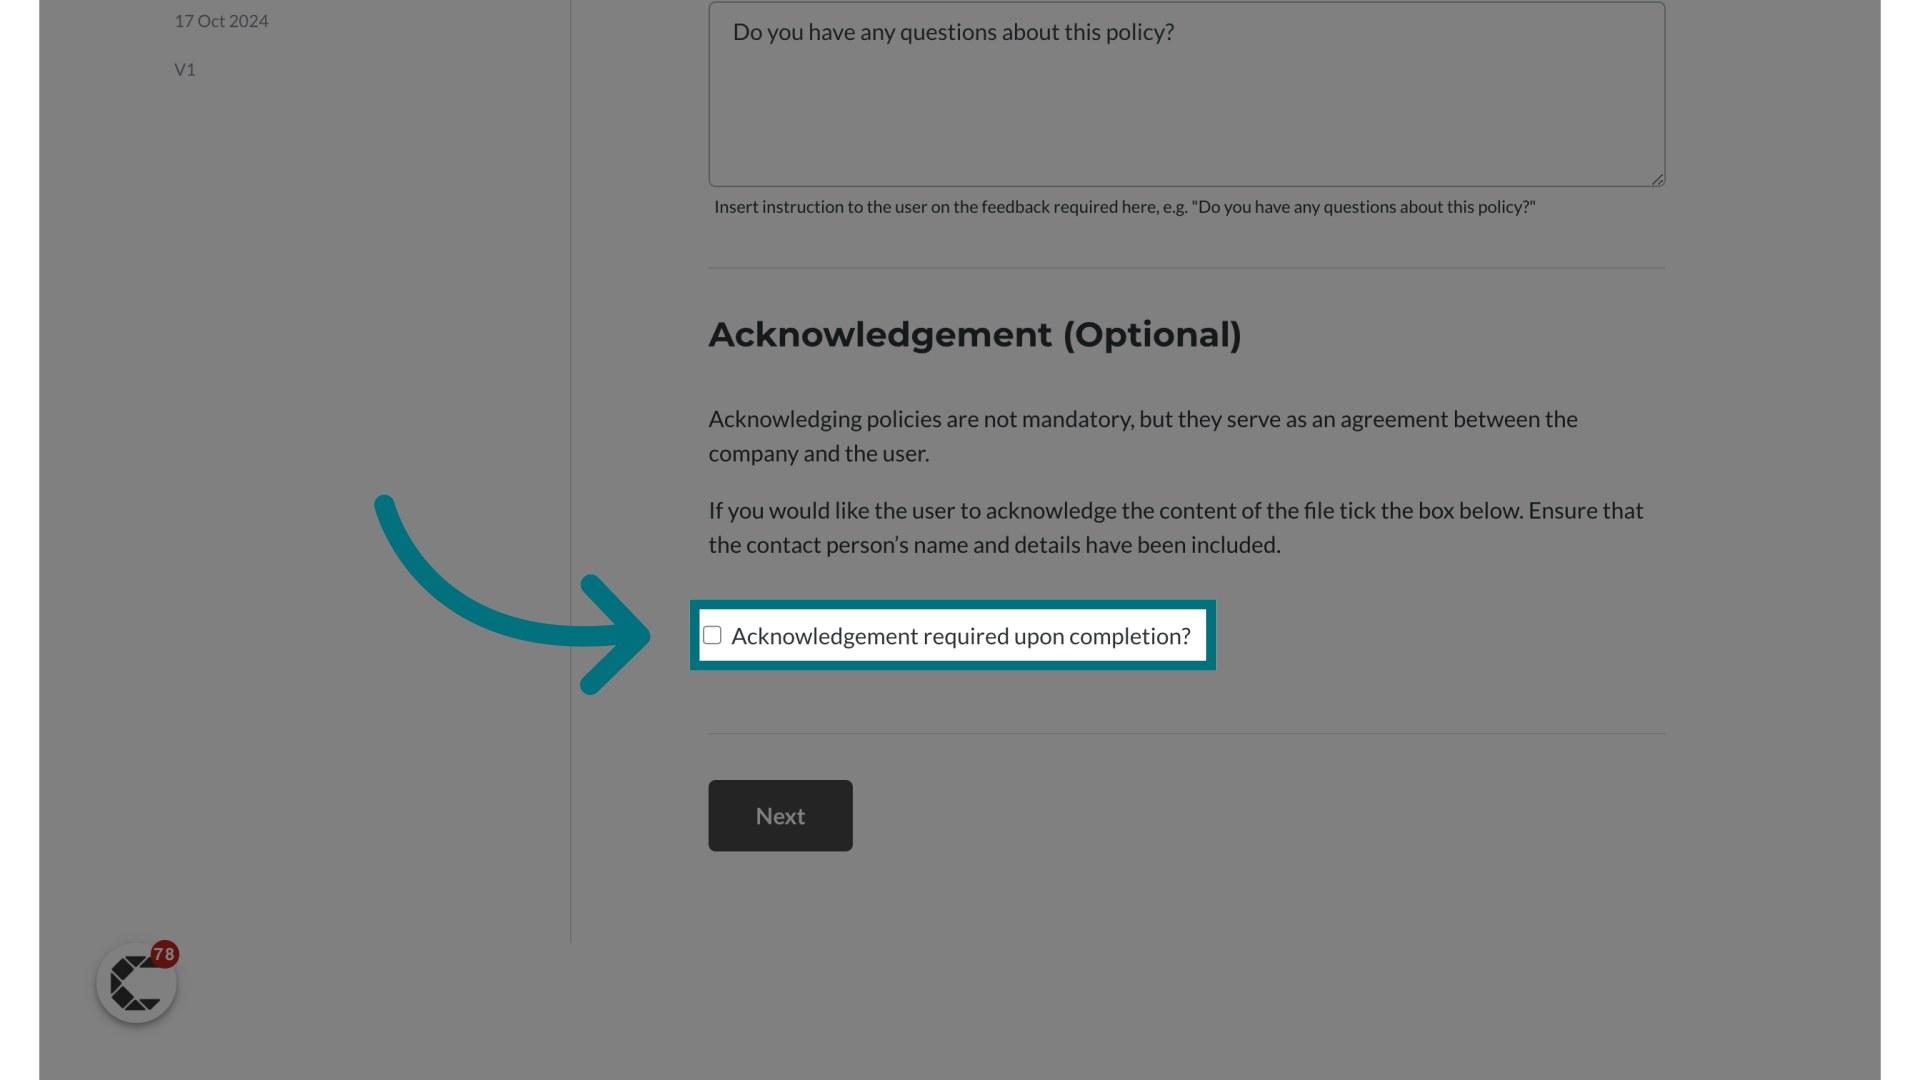
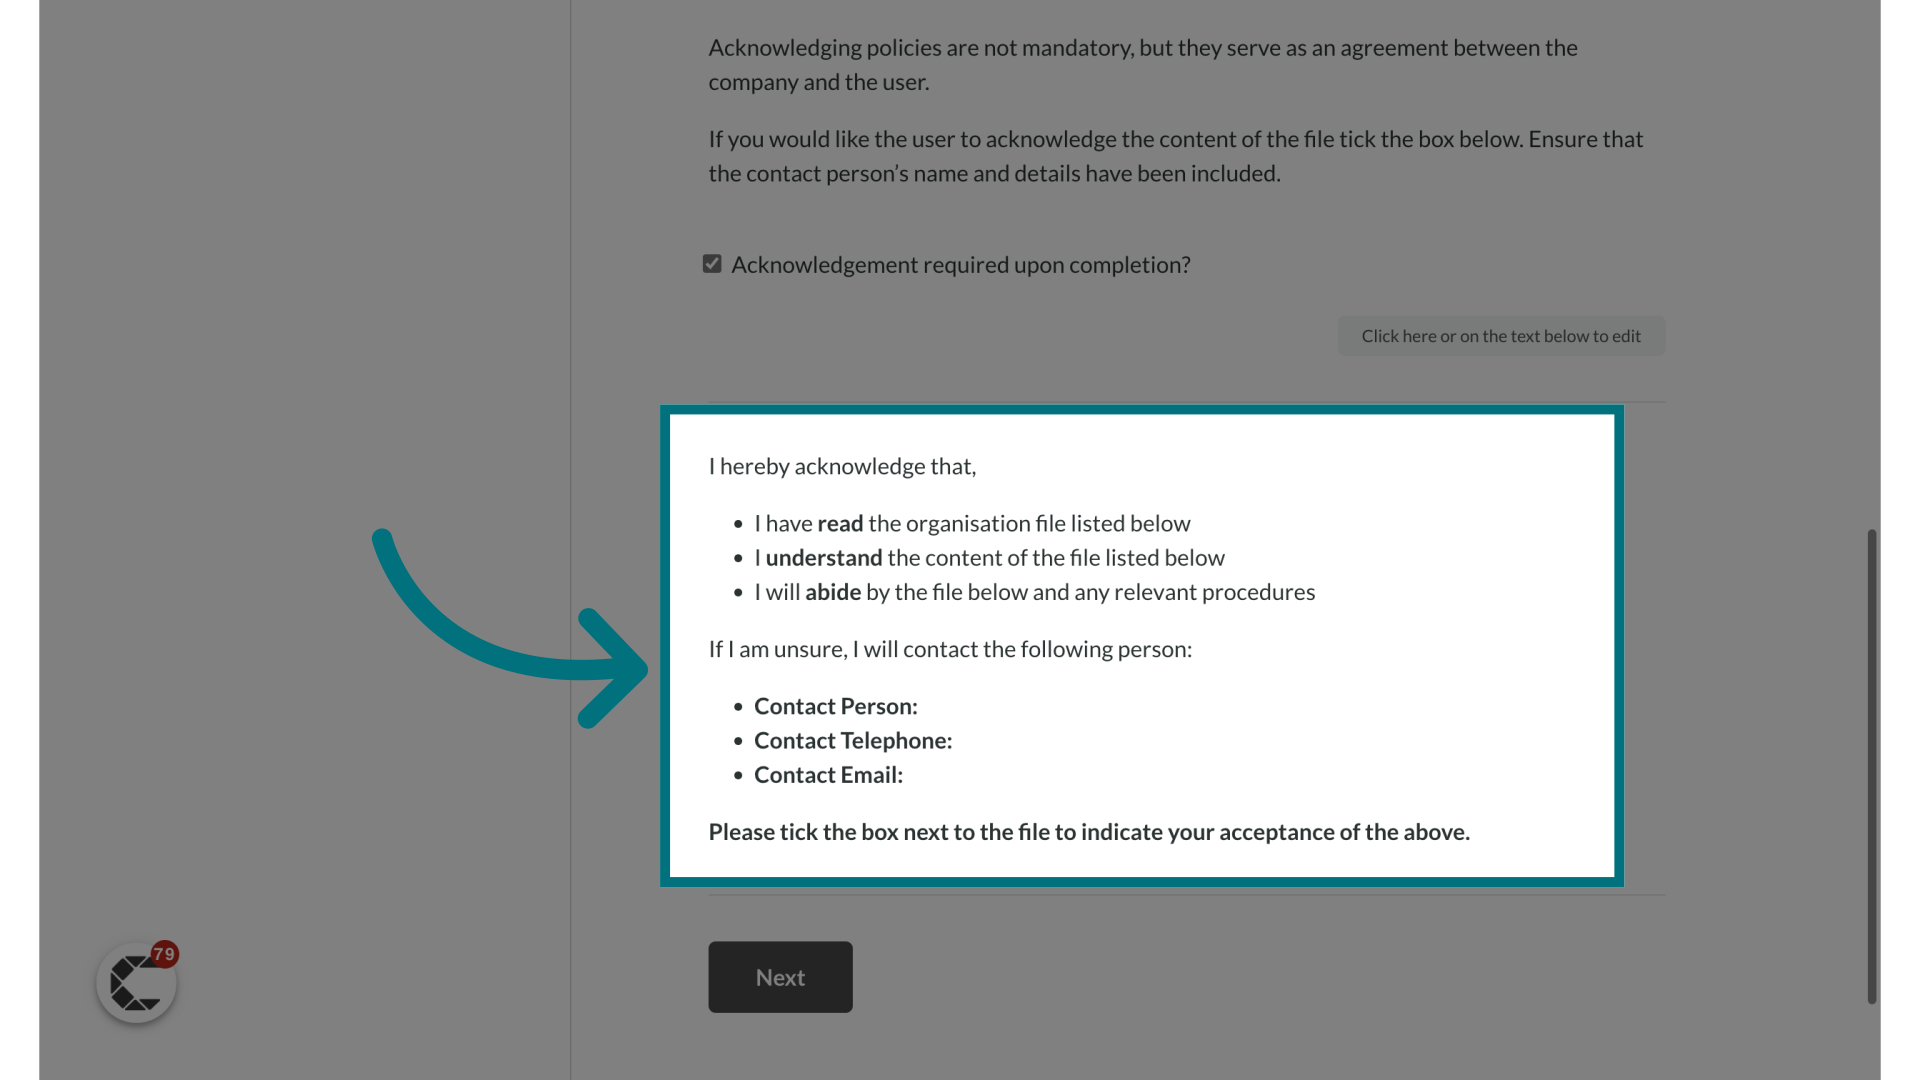
4. Update the default acknowledgement text
Customize the acknowledgement text if needed.
The text is edible, we provide a standard suggested wording.
5. Click "Next"

Adding a survey
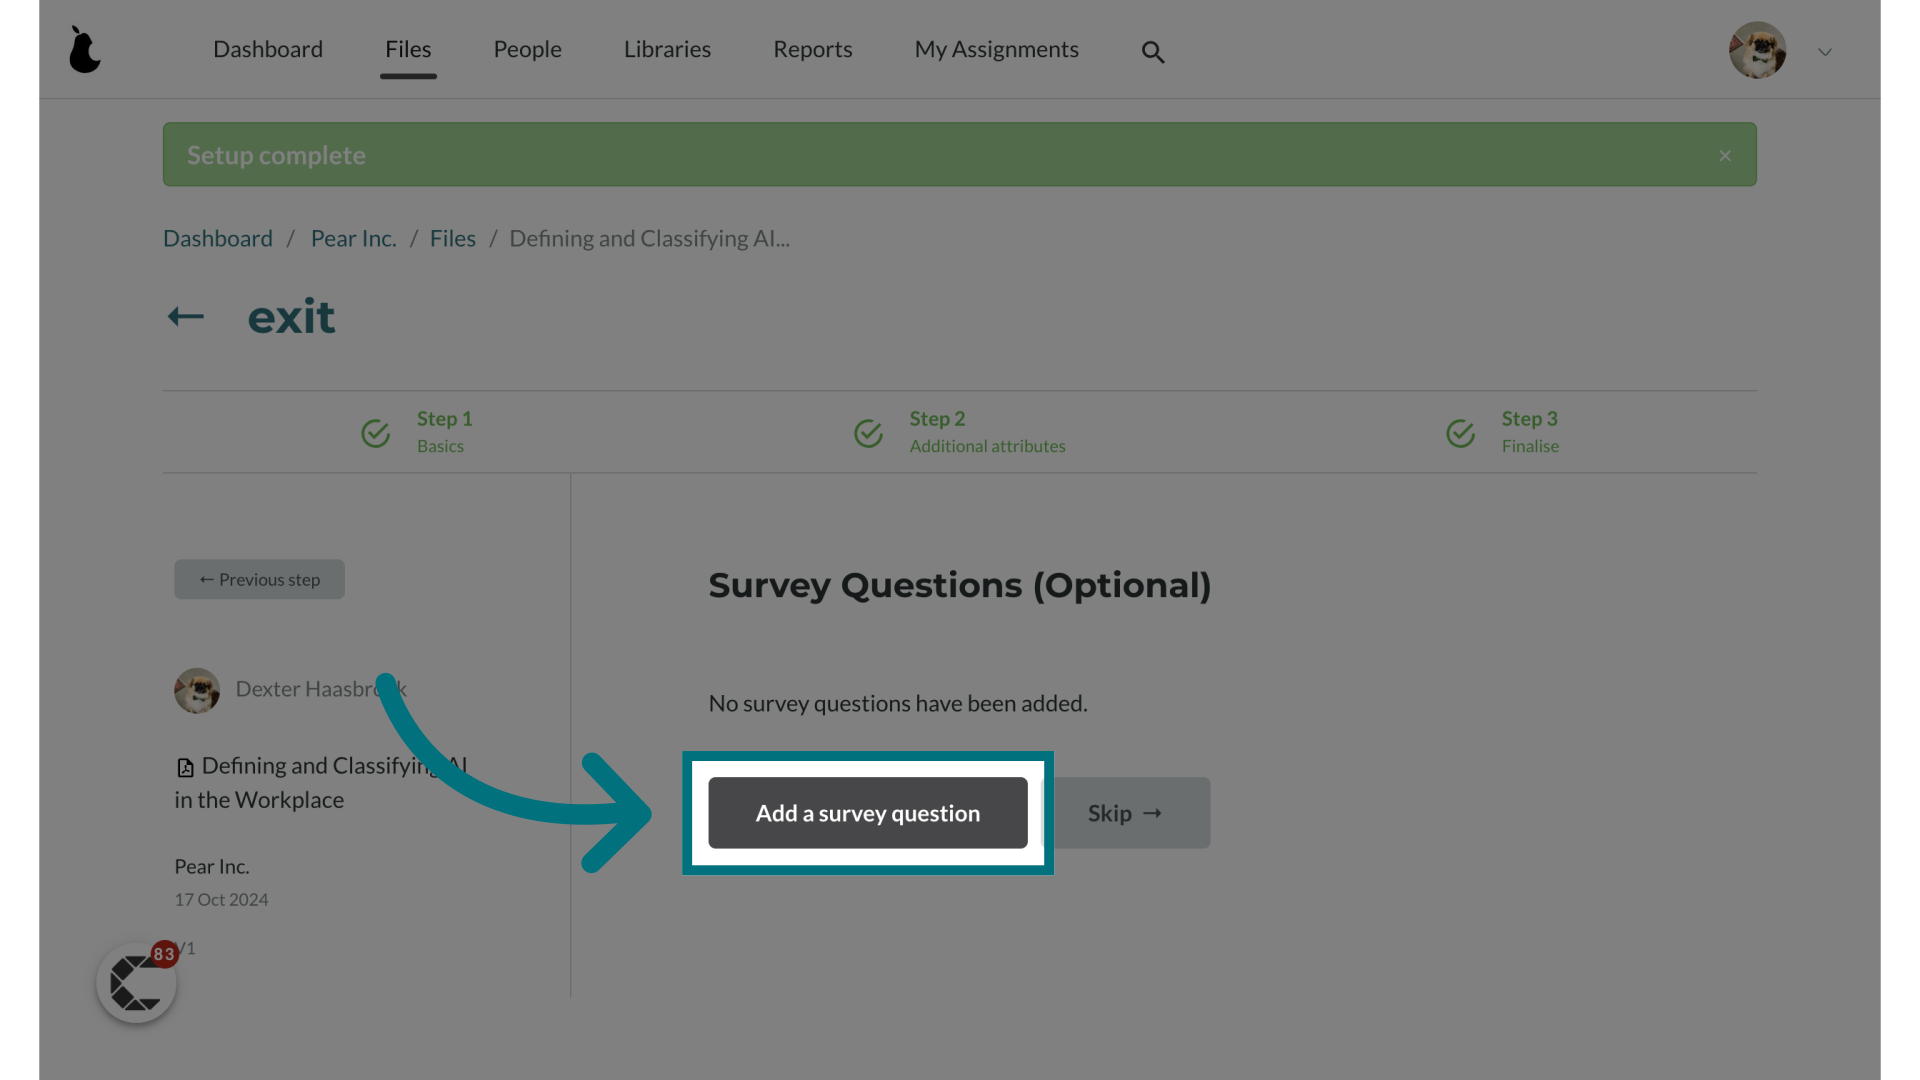
1. Click "Add a survey question"
2. Provide a survey question
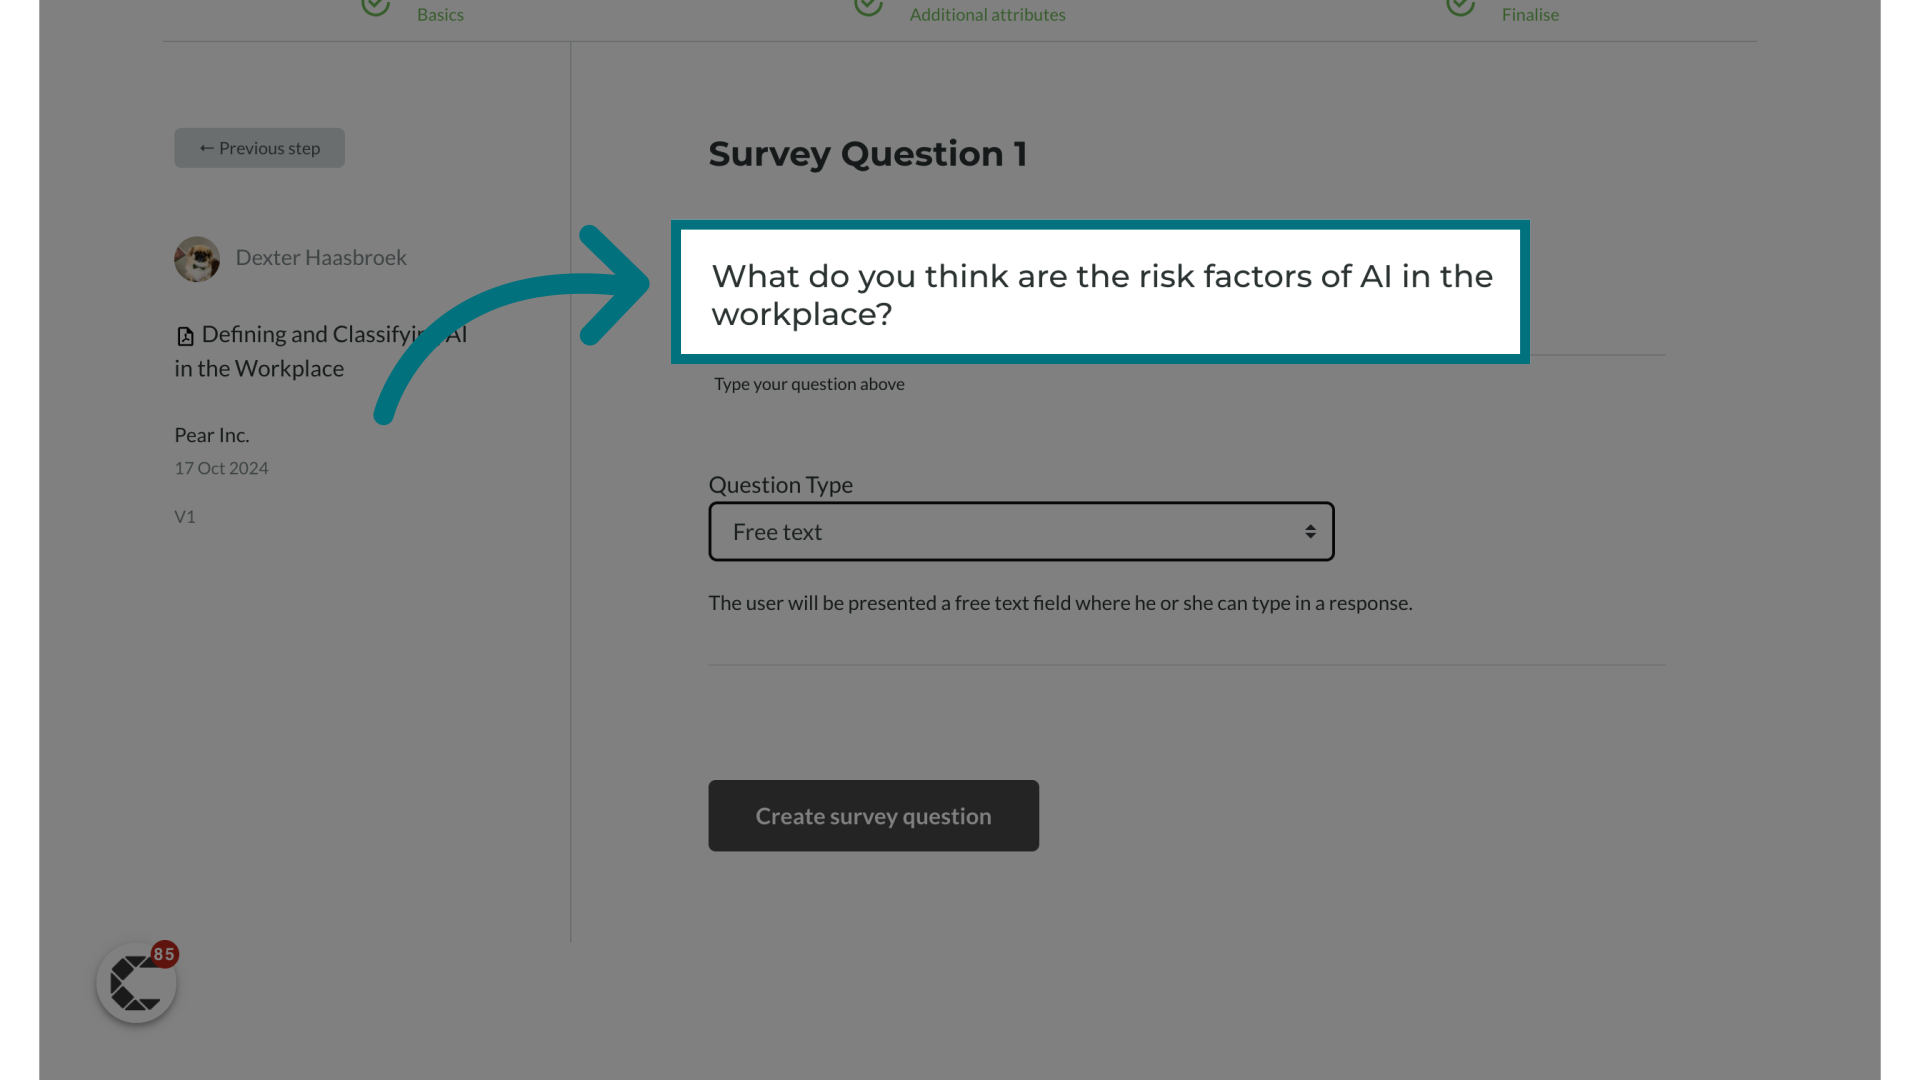
3. Select a question type
- The available question types are:
- Free text: Ideal for answers in sentences or paragraphs
- Multiple choice: Great for selecting from pre-set options
- Scale: Perfect for rating something
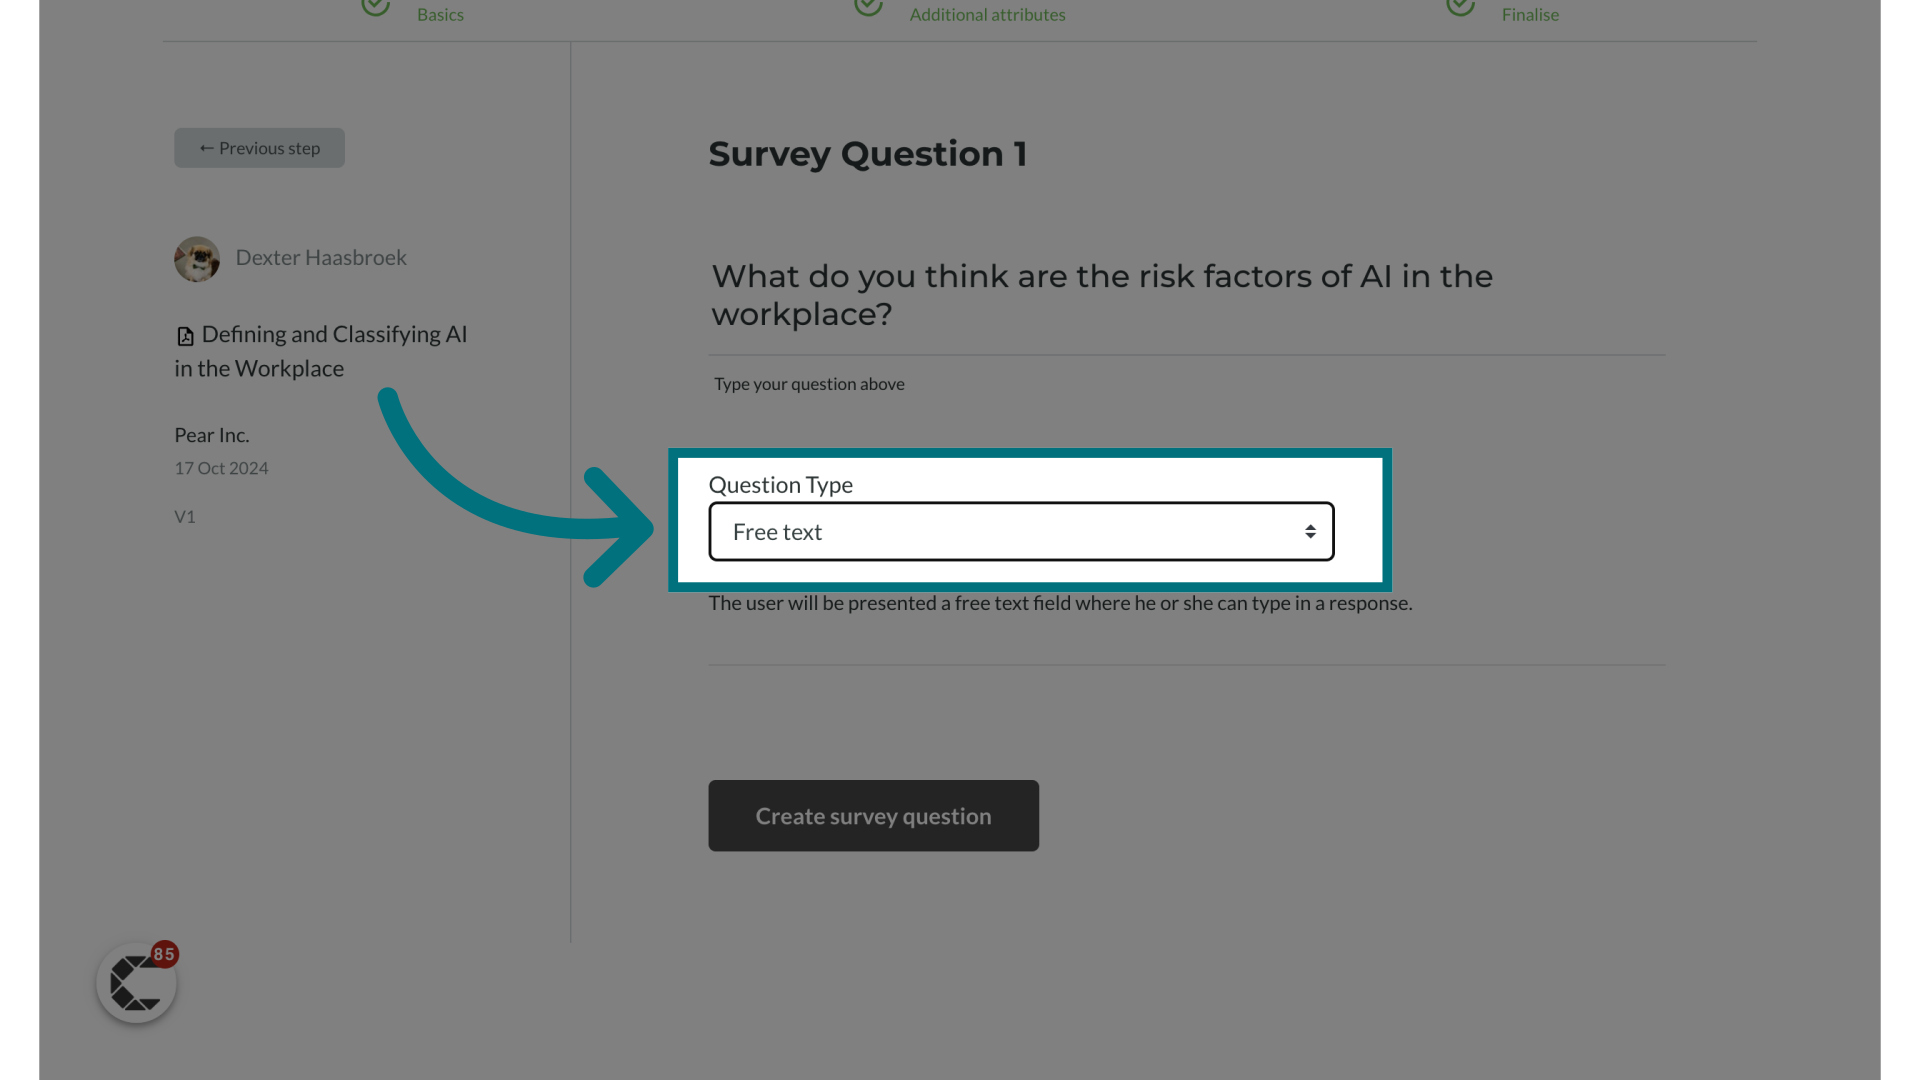
4. Click "Create survey question"
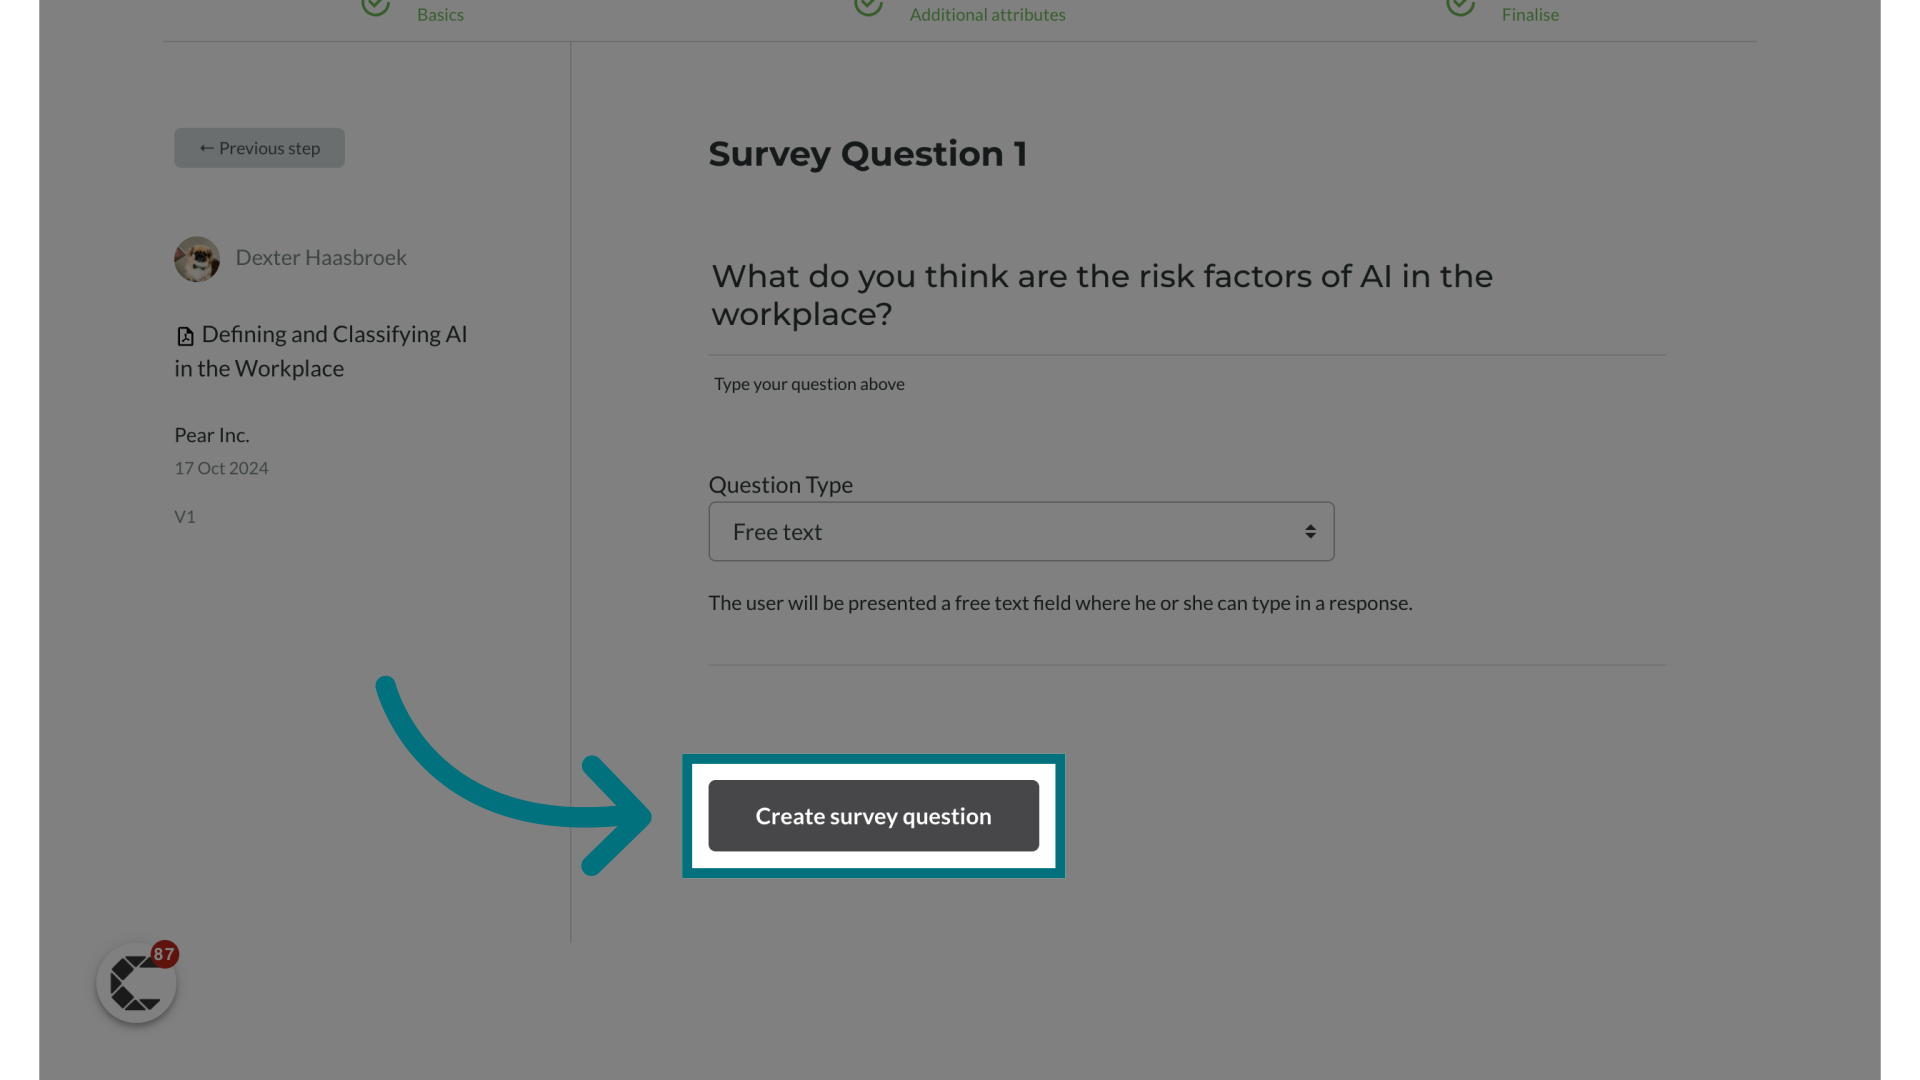
5. Review your survey question
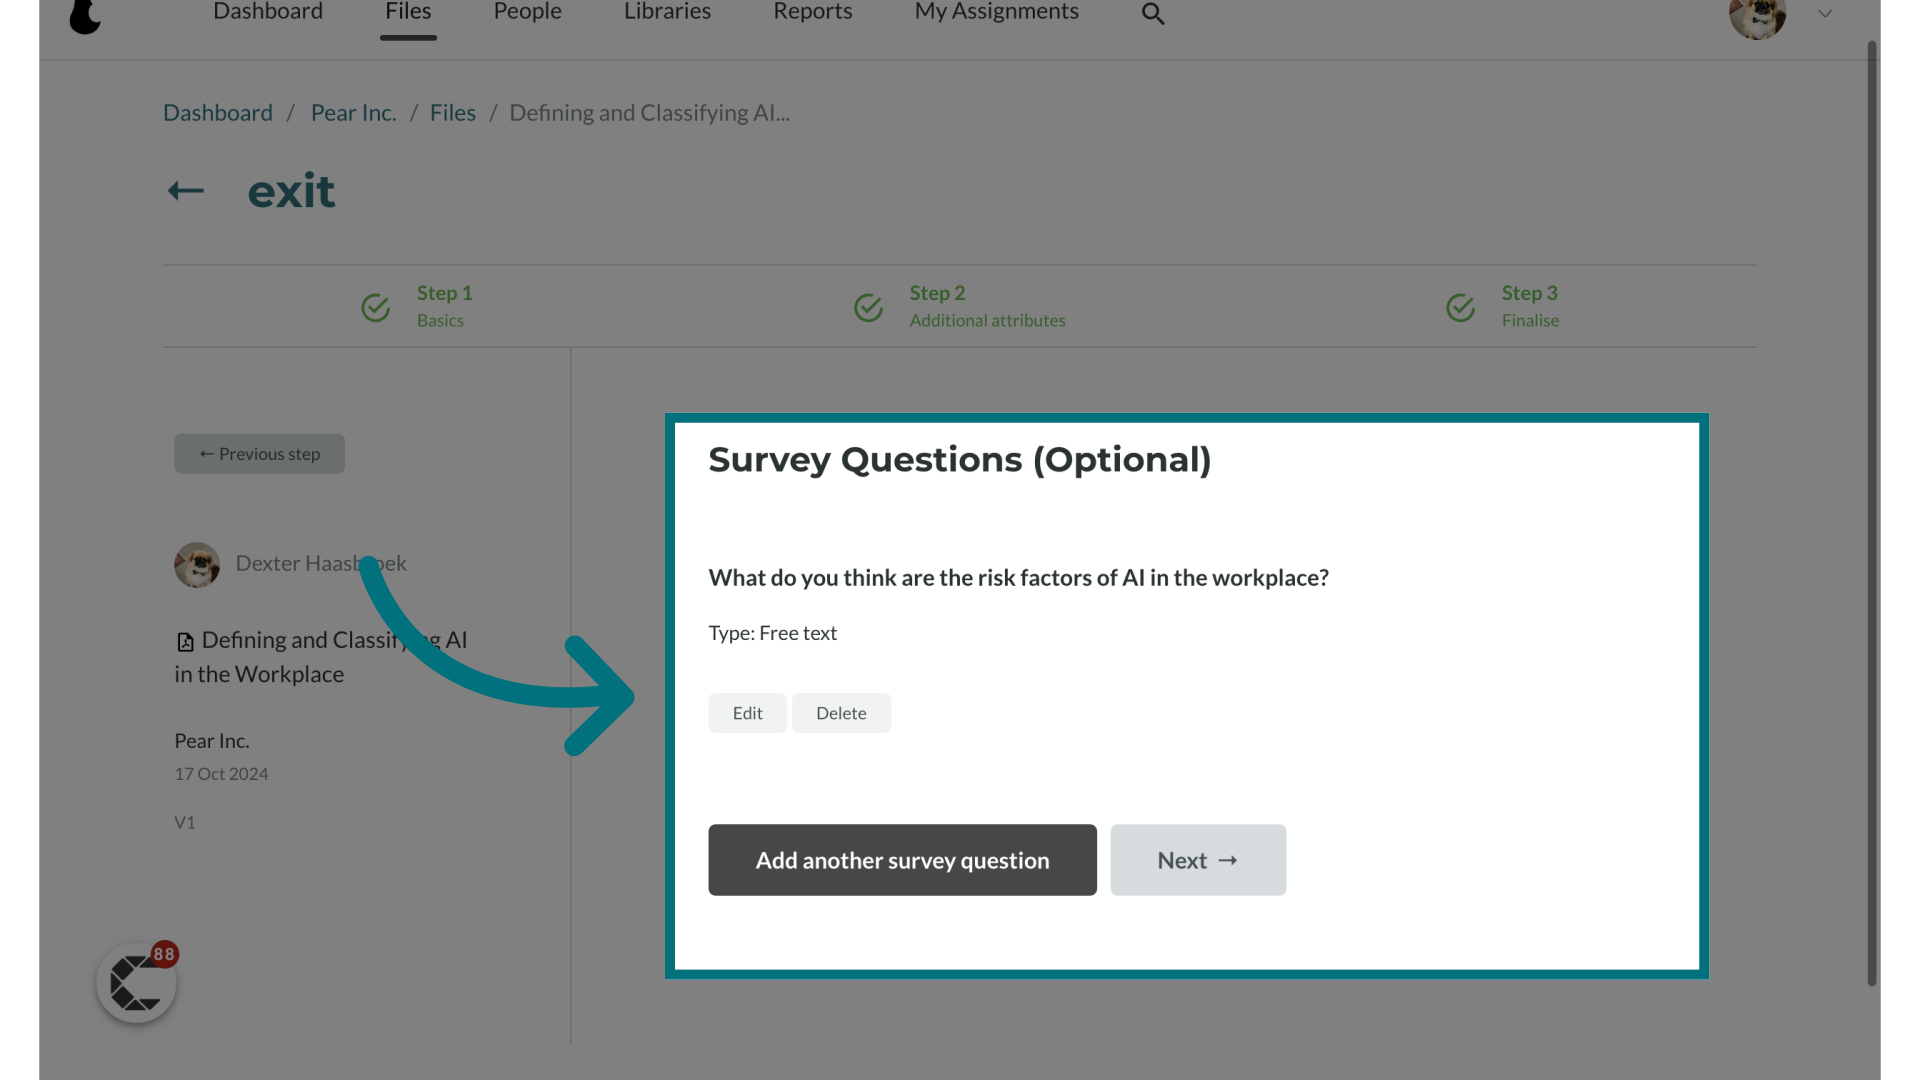
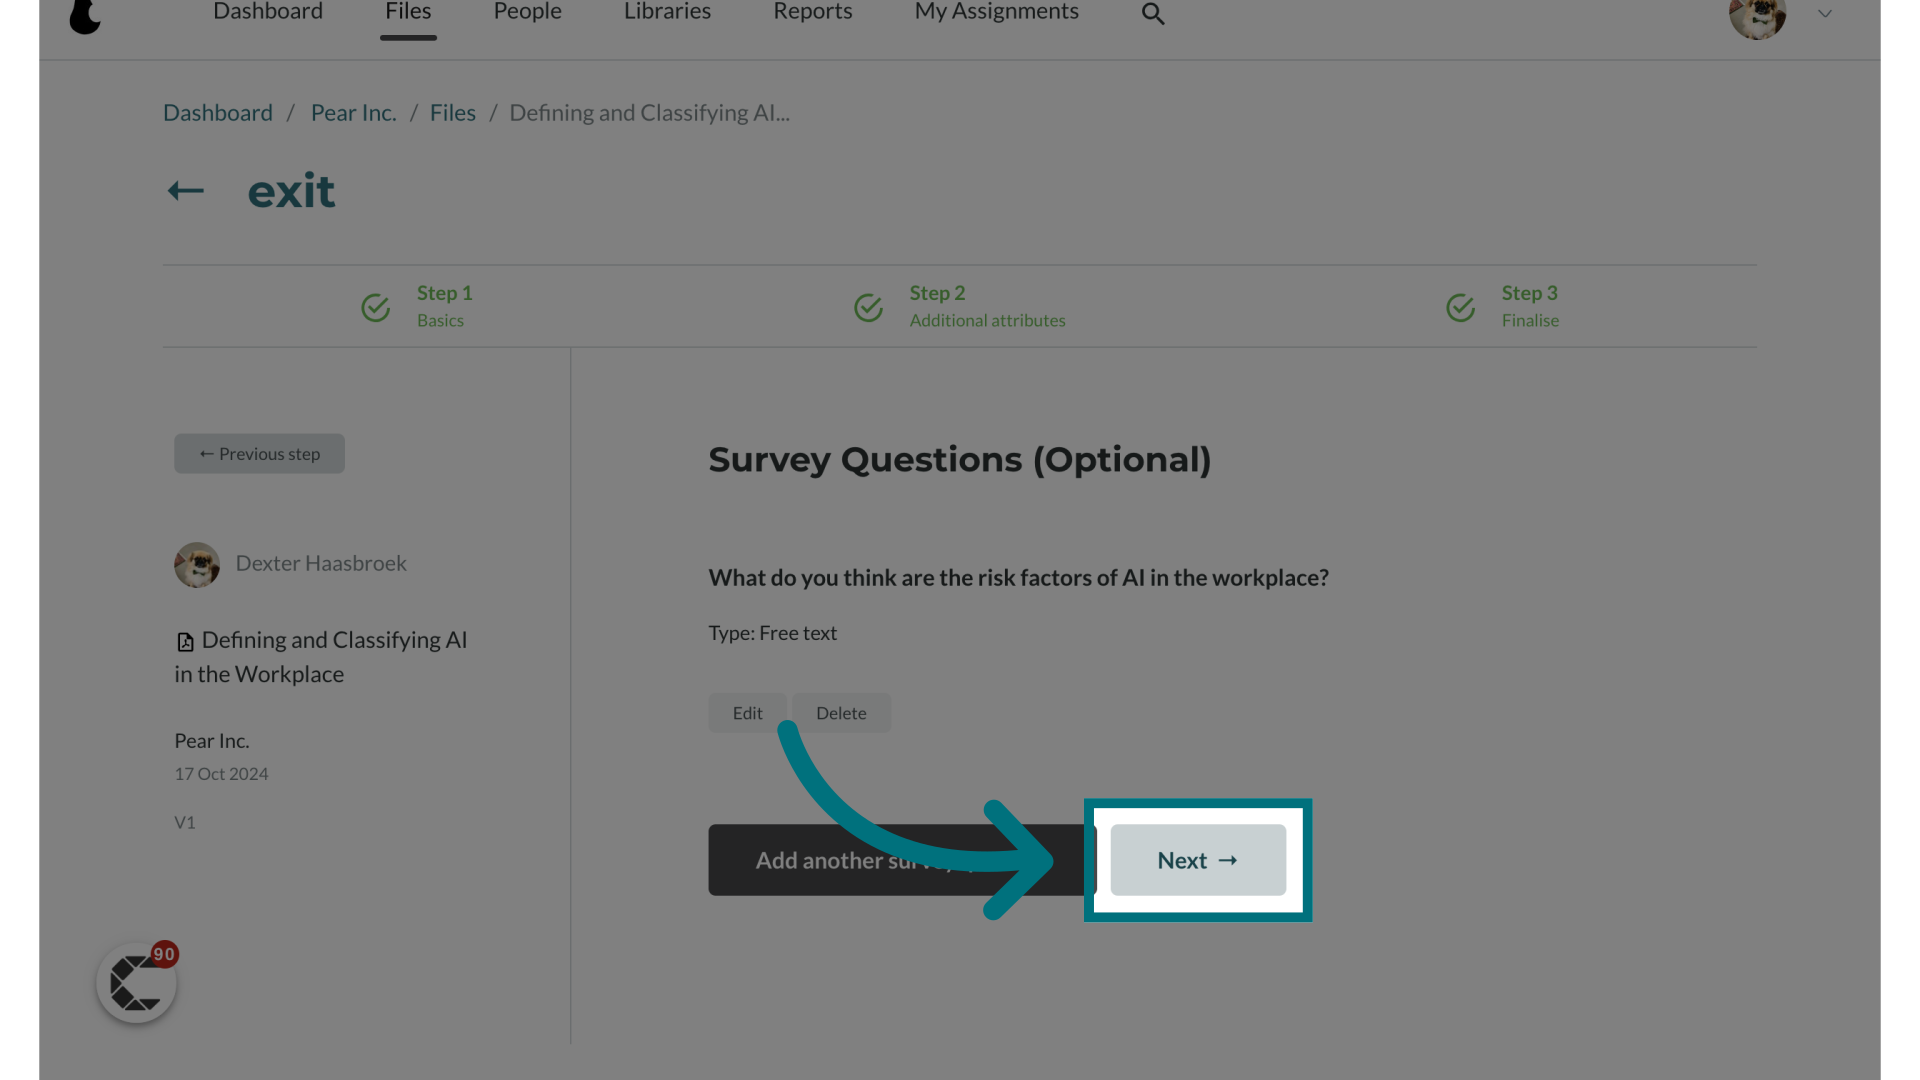
6. Click "Next →"
Assigning & Publishing Your File
After creating a file, it is automatically set to 'unpublished.' To make the file visible to users, you'll need to assign and publish it by following the steps outlined below.
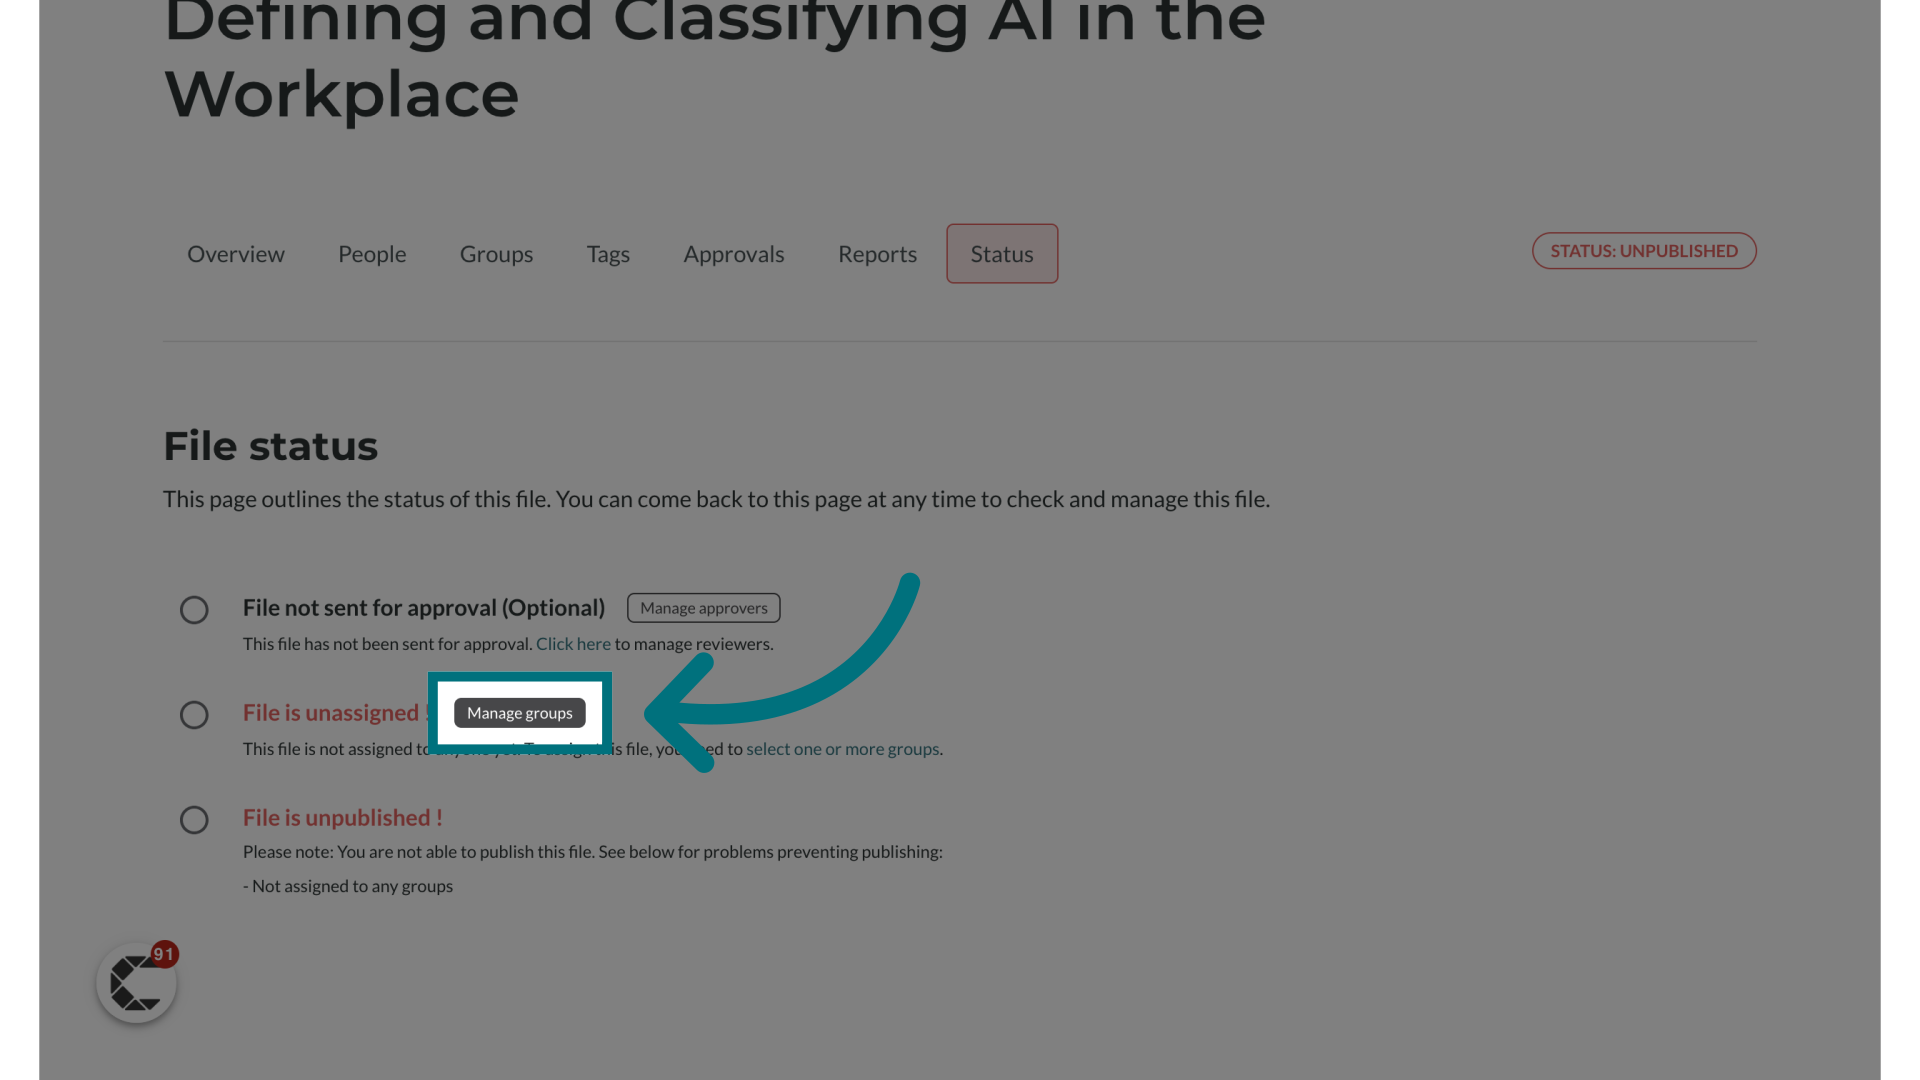
1. Click "Manage groups"
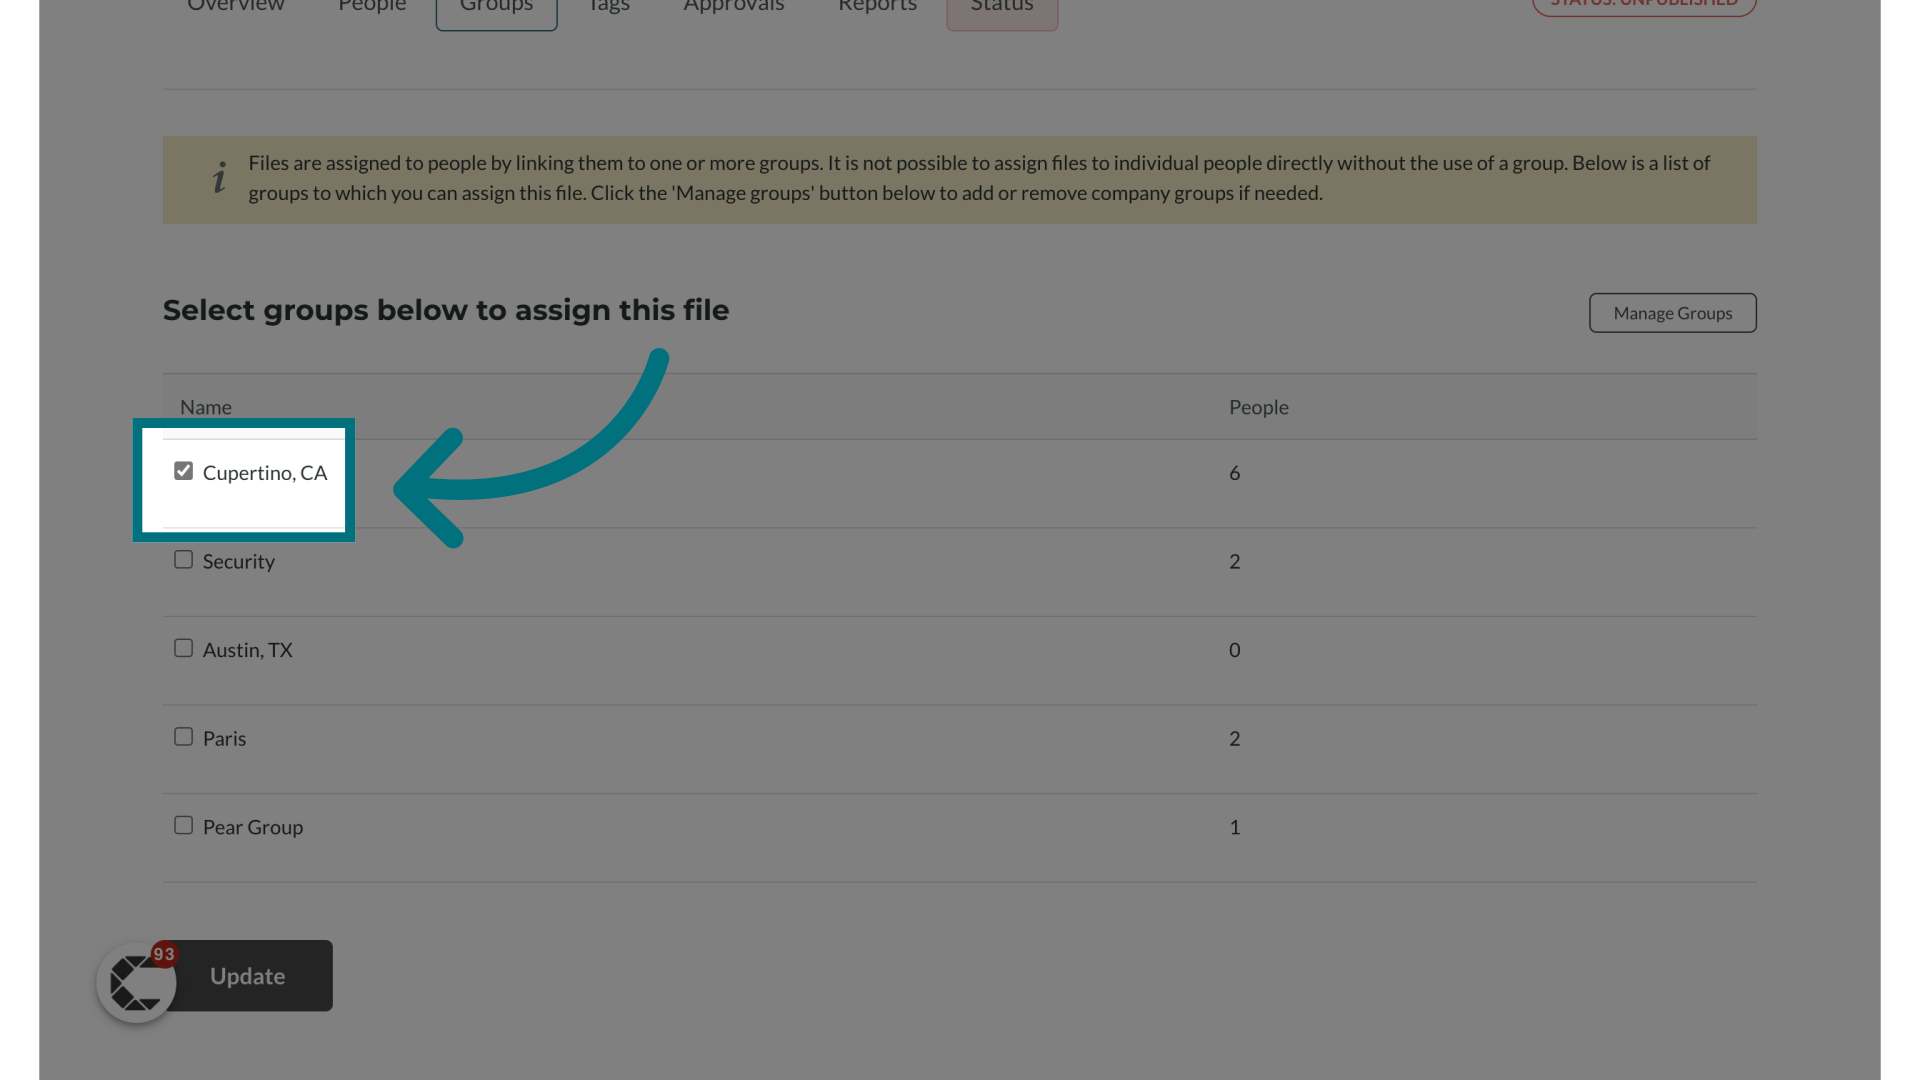
2. Select a group
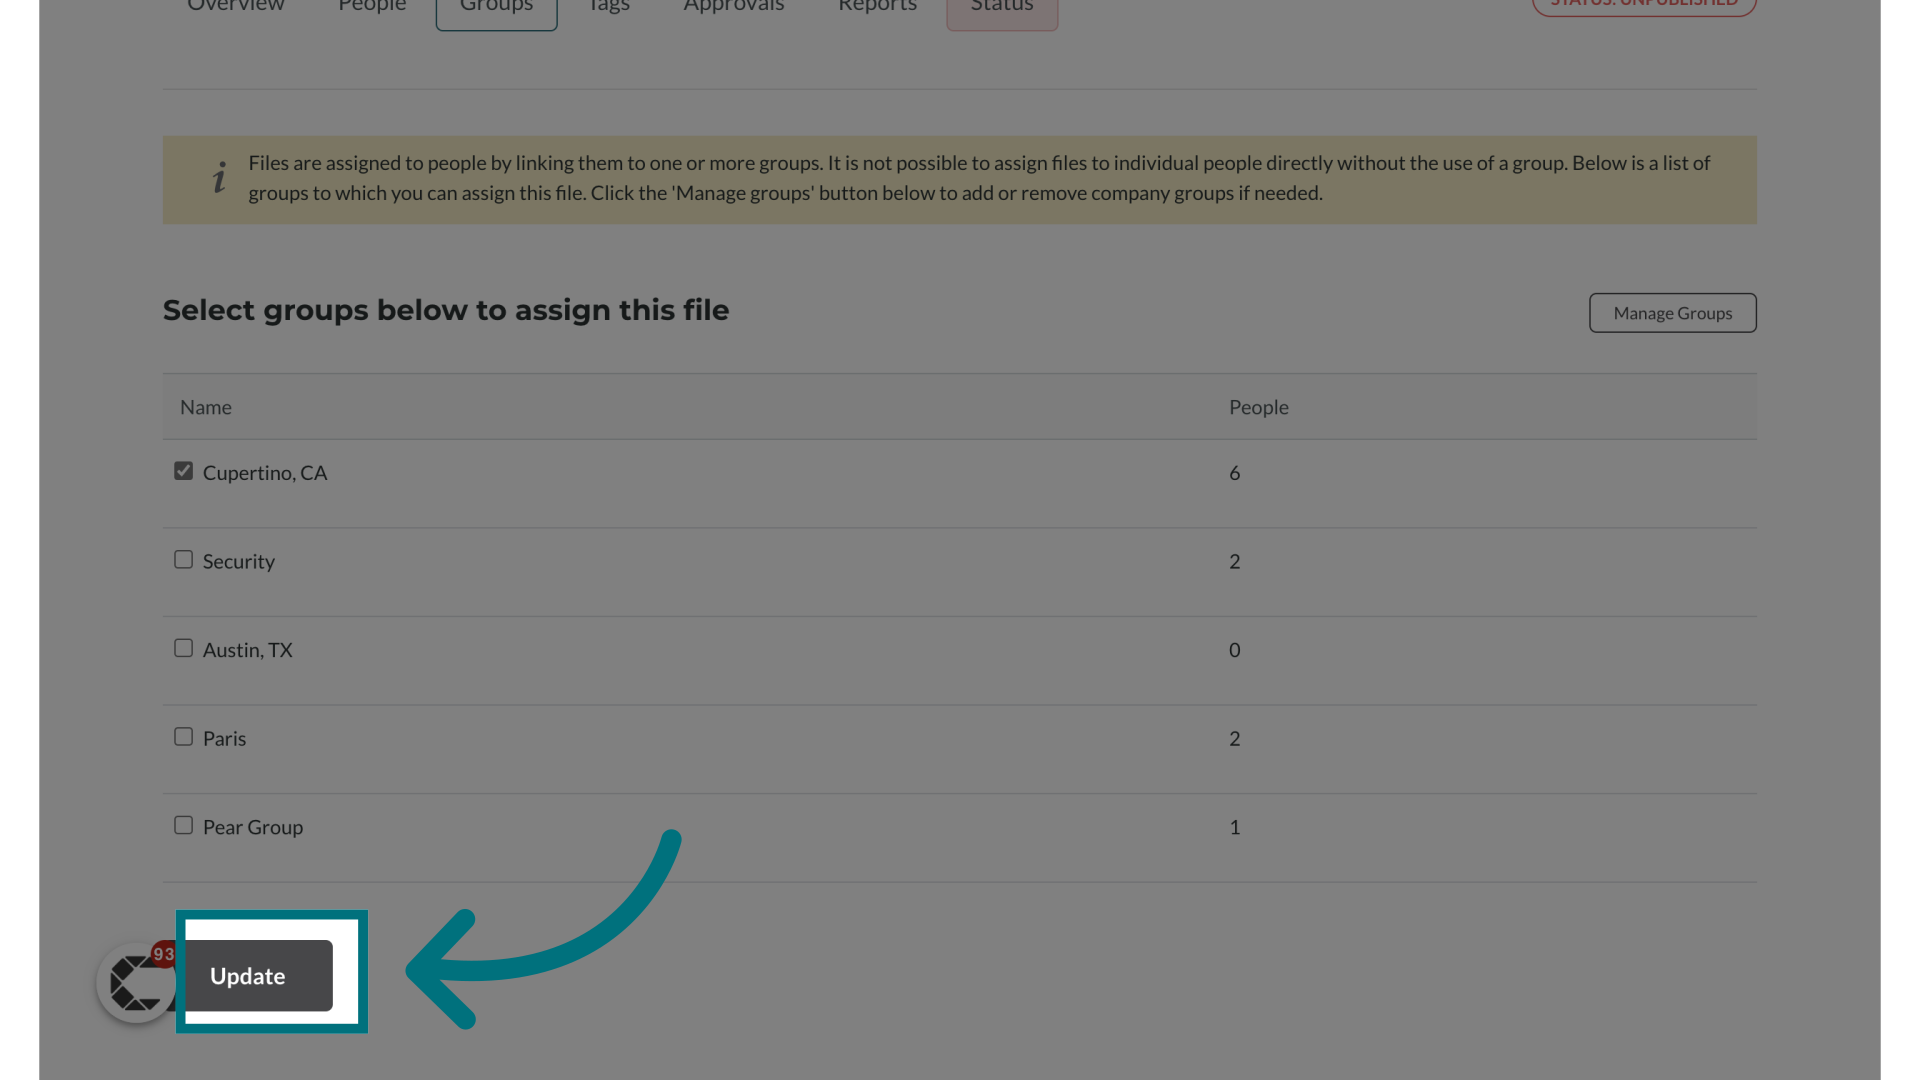
3. Click "Update"
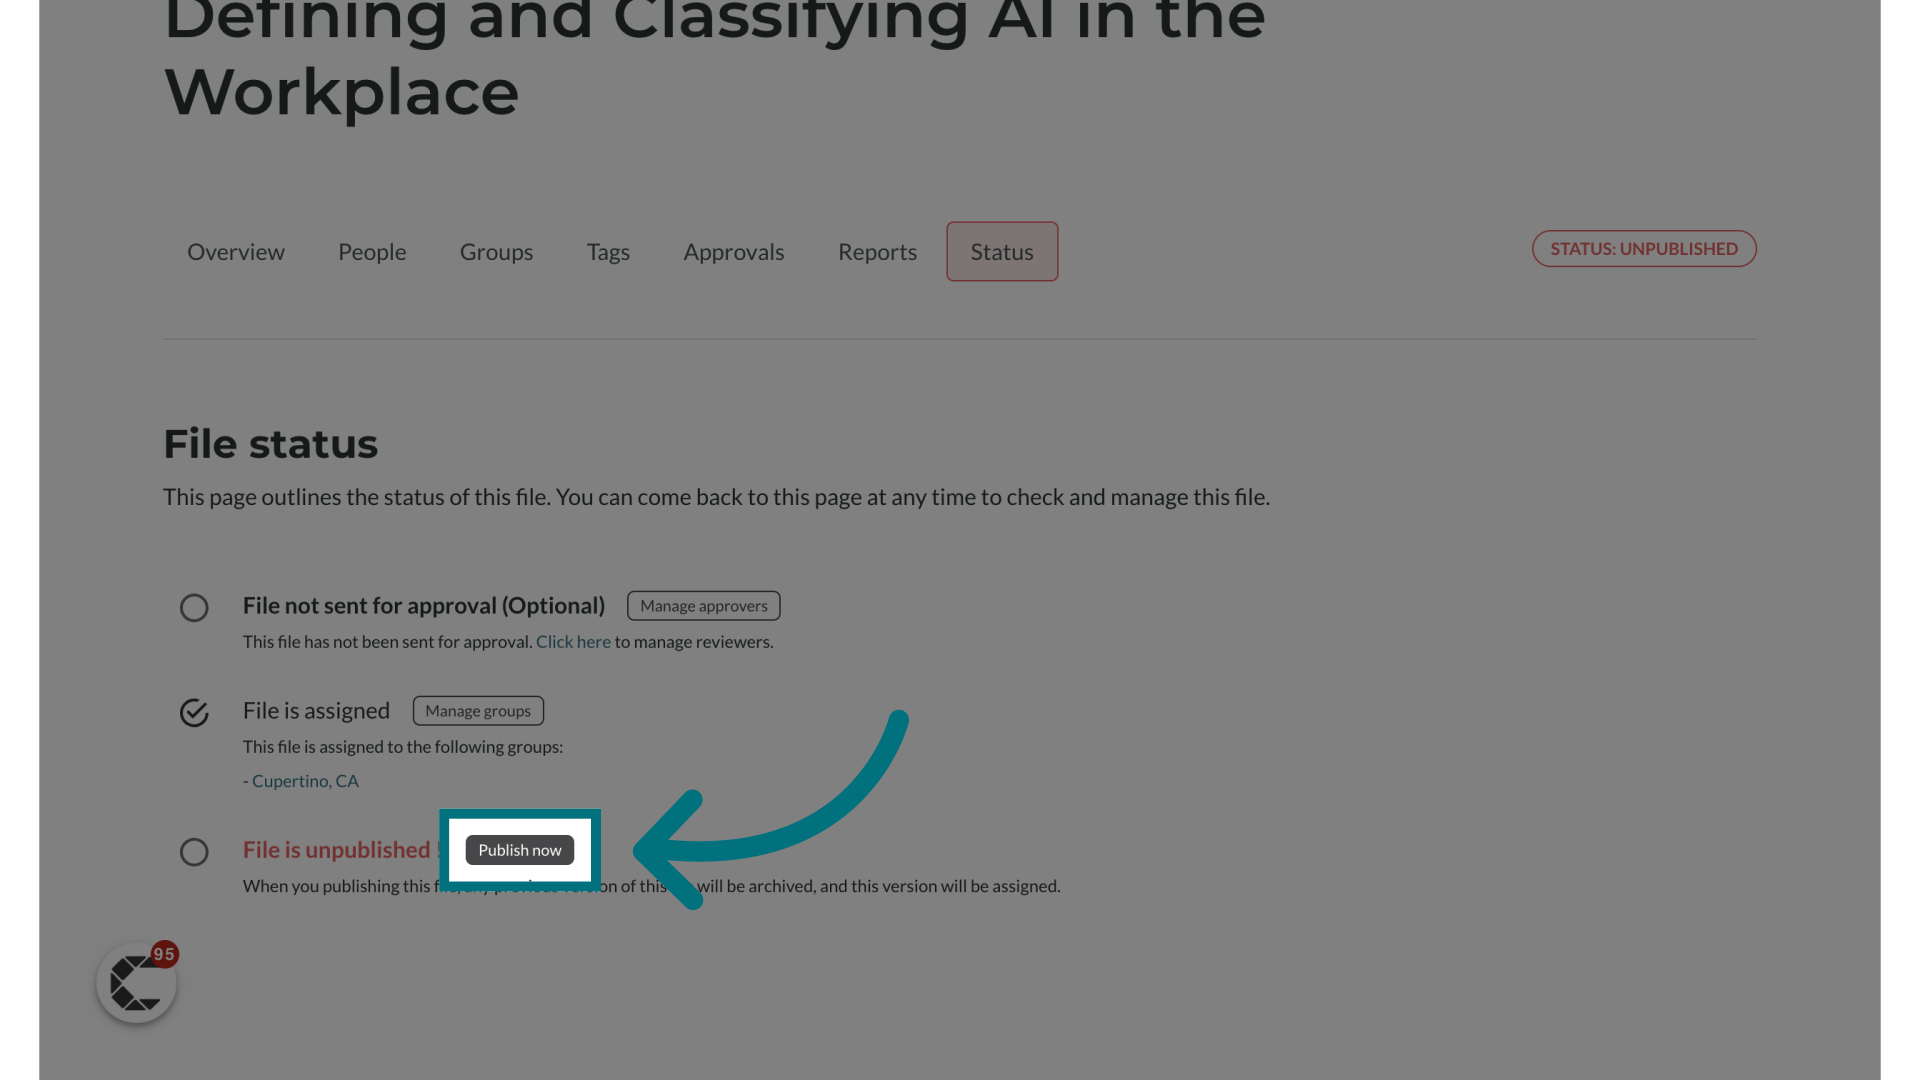
4. Click "Publish now"
- Once you have published a file the users will receive an email the next day notifying them that they have new tasks to complete
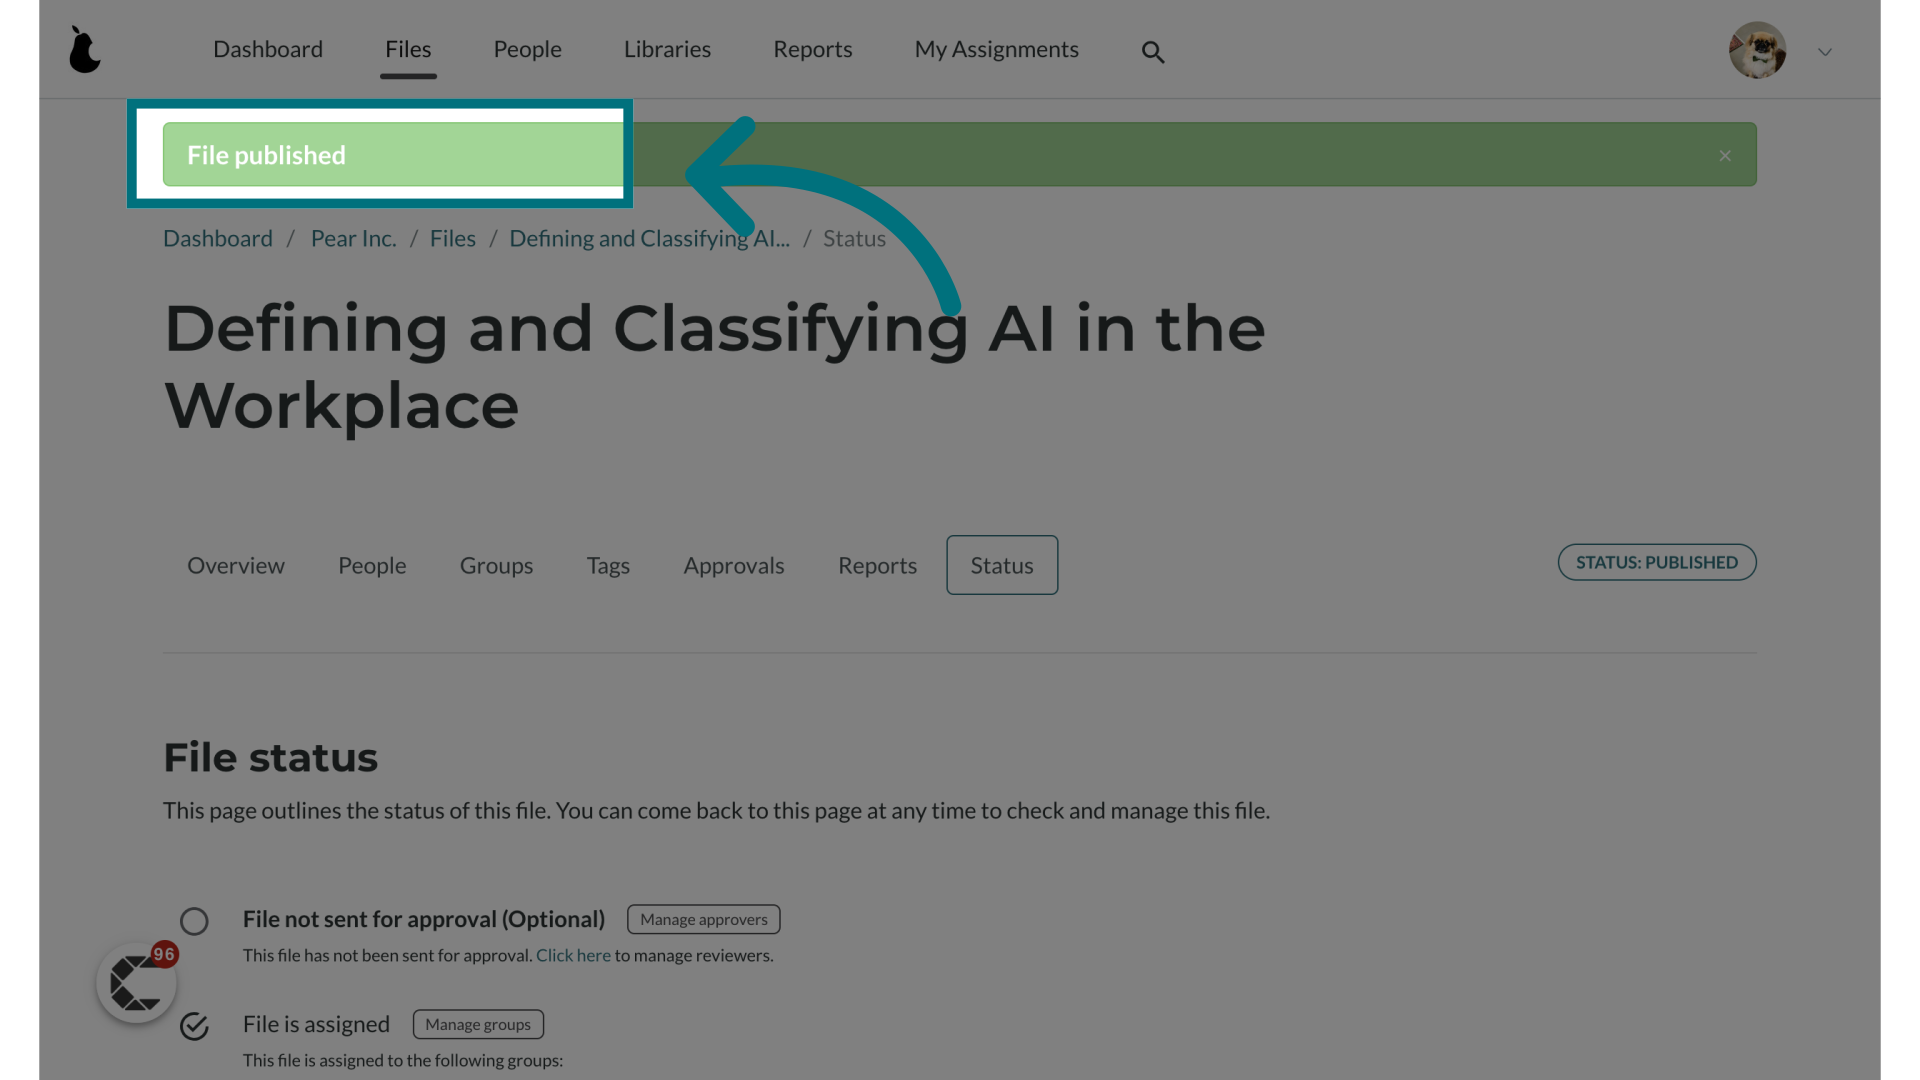
5. A notification banner will appear notifying you that the file has been successfully published
Was this article helpful?
That’s Great!
Thank you for your feedback
Sorry! We couldn't be helpful
Thank you for your feedback
Feedback sent
We appreciate your effort and will try to fix the article
