This guide will walk you through the process of creating, editing, and sharing a custom file report.
Video
Steps
Locating your files
1. Log in to Policy Passport
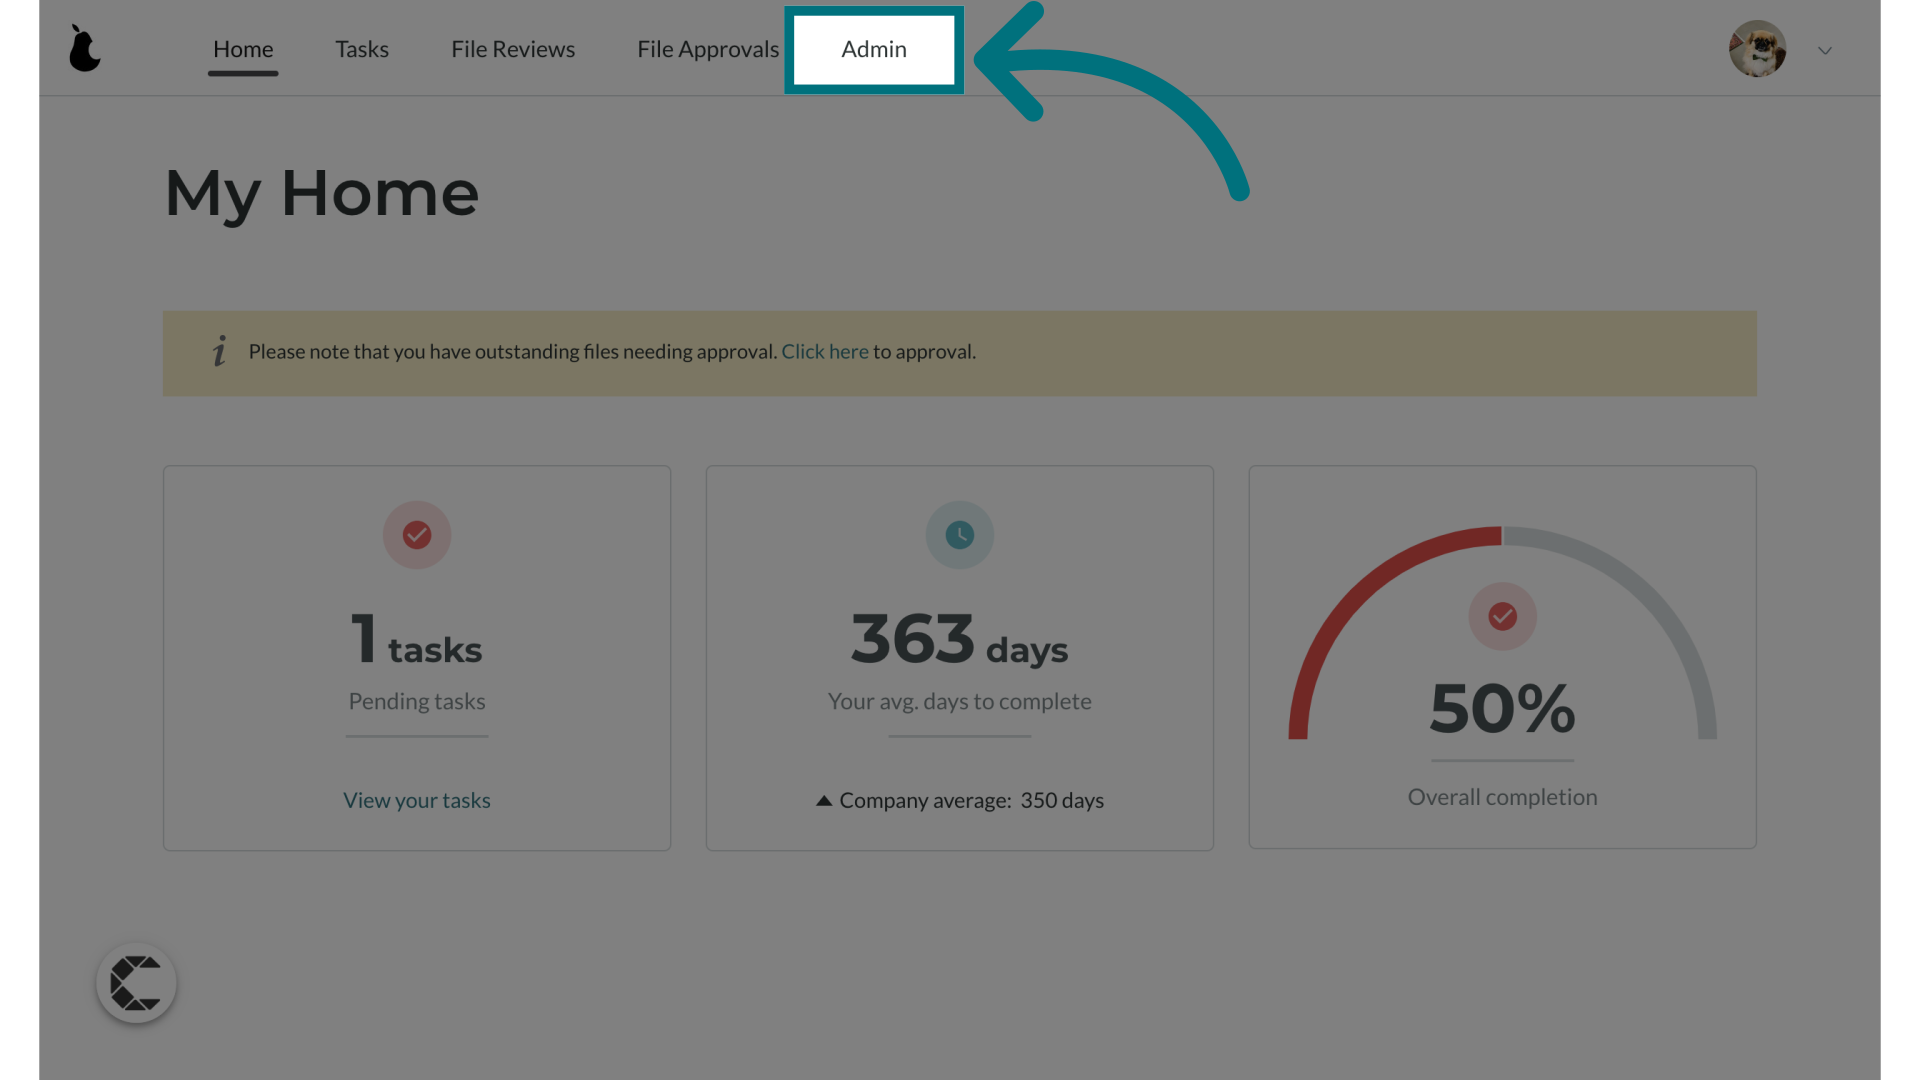
2. Click "Admin"
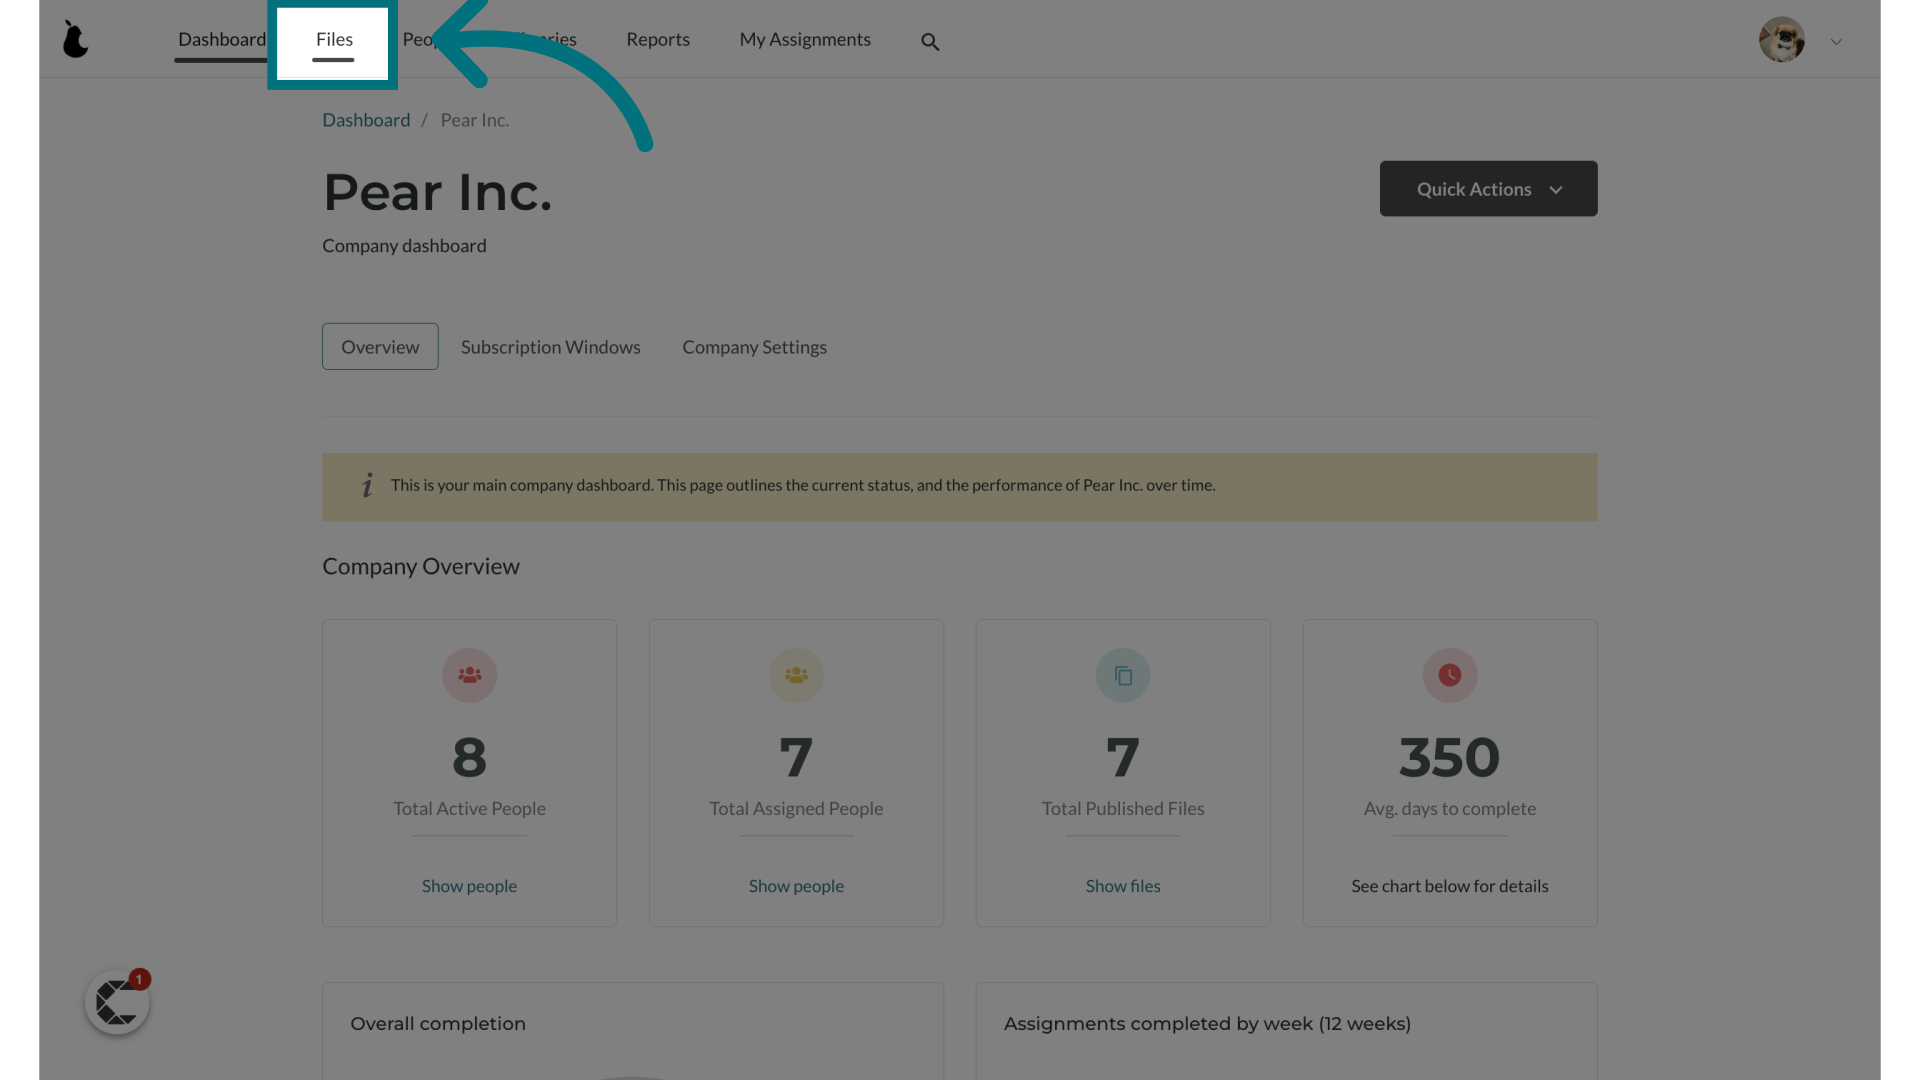
3. Click "Files"
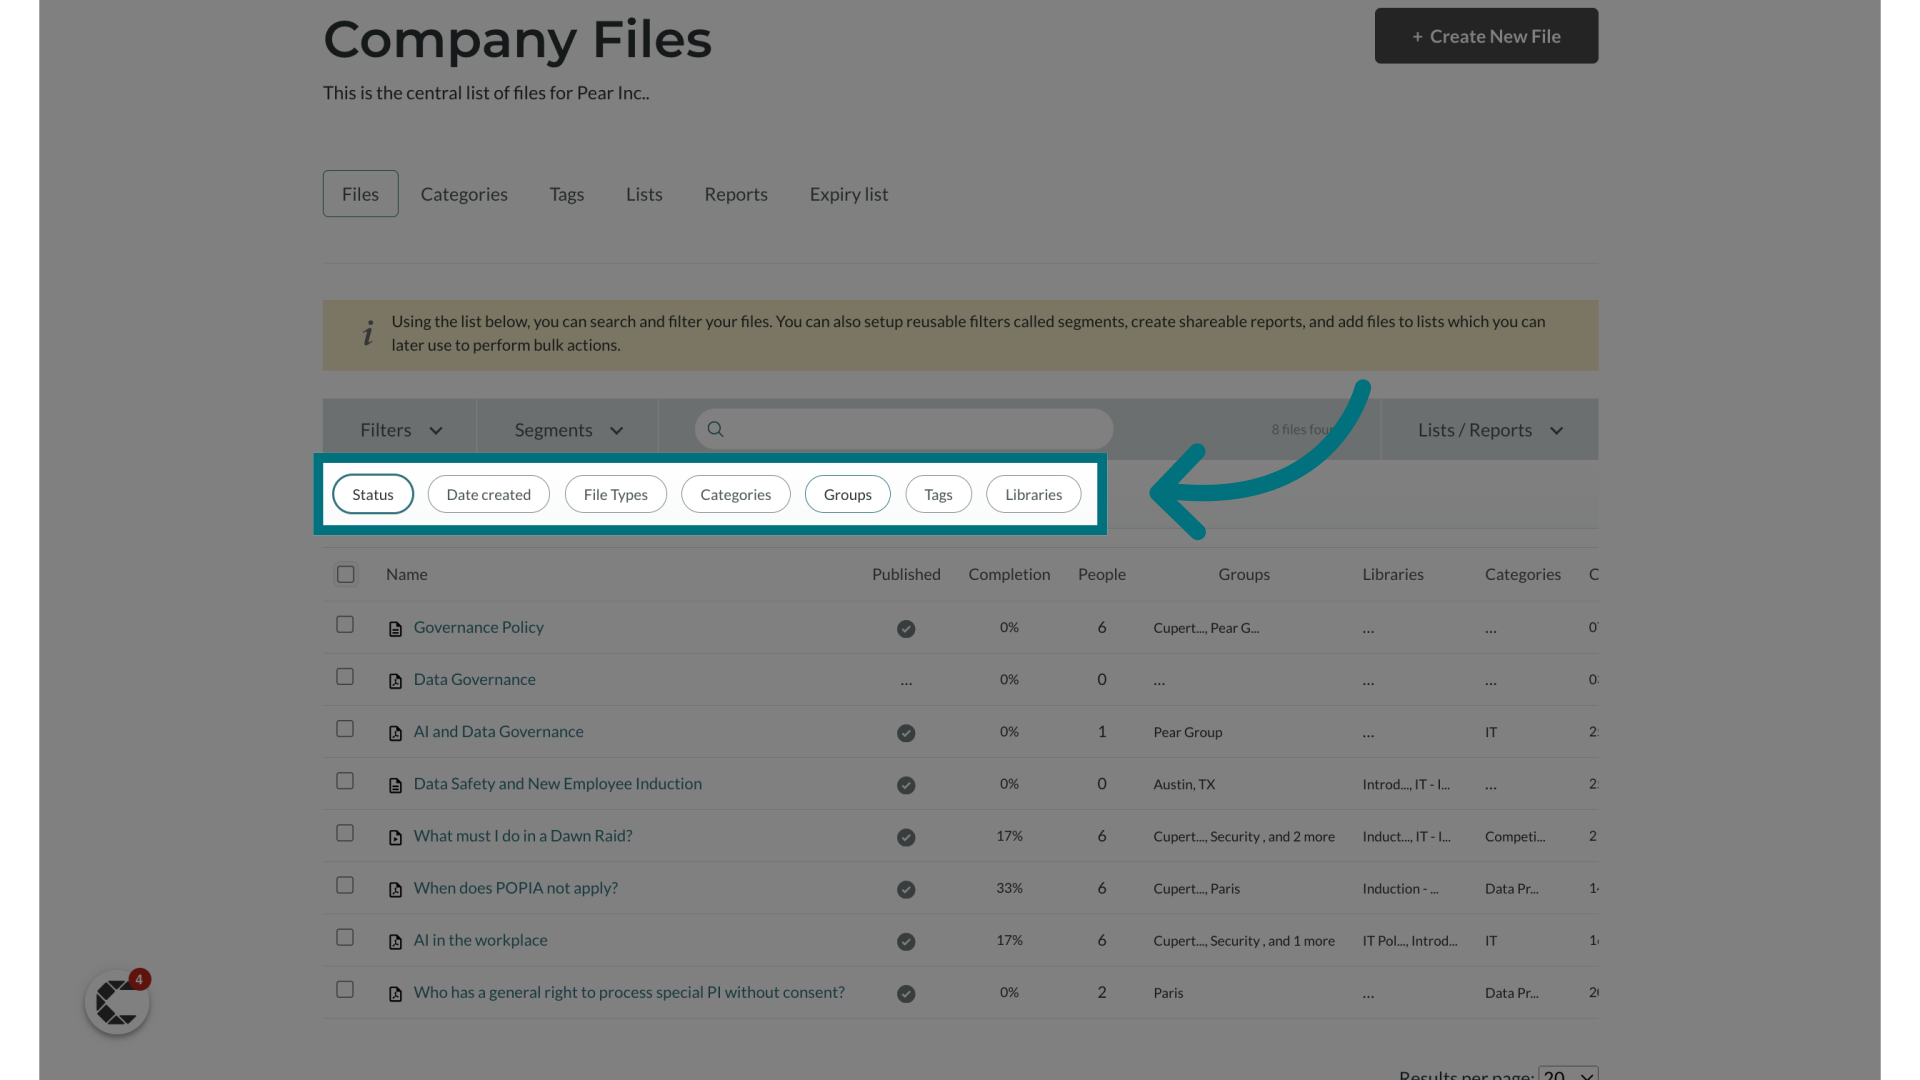
4. Filter your files
- To create a custom file report, you will need to apply filters unless you wish to include all of your files in the report.
- You can change the following filters:
- Status
- Published
- All
- Published
- Unpublished
- Active
- All
- Active
- Archived
- Assigned
- All
- Assigned
- Unassigned
- Feedback
- All
- Required
- Not required
- Acknowledgment
- All
- Required
- Not required
- Testing
- All
- Enabled
- Not enabled
- Published
- Date created (date range)
- The date a file was created
- Groups
- File types
- File
- Link
- Text
- Video
- Categories
- Tags
- Libraries
- Status
- Please note: By default, all files are included in the report if no filters are applied. Checking the box beside a file's name does not select it for the report. To include a specific subset of files in your report, kindly utilize the filters mentioned above.
Creating a report
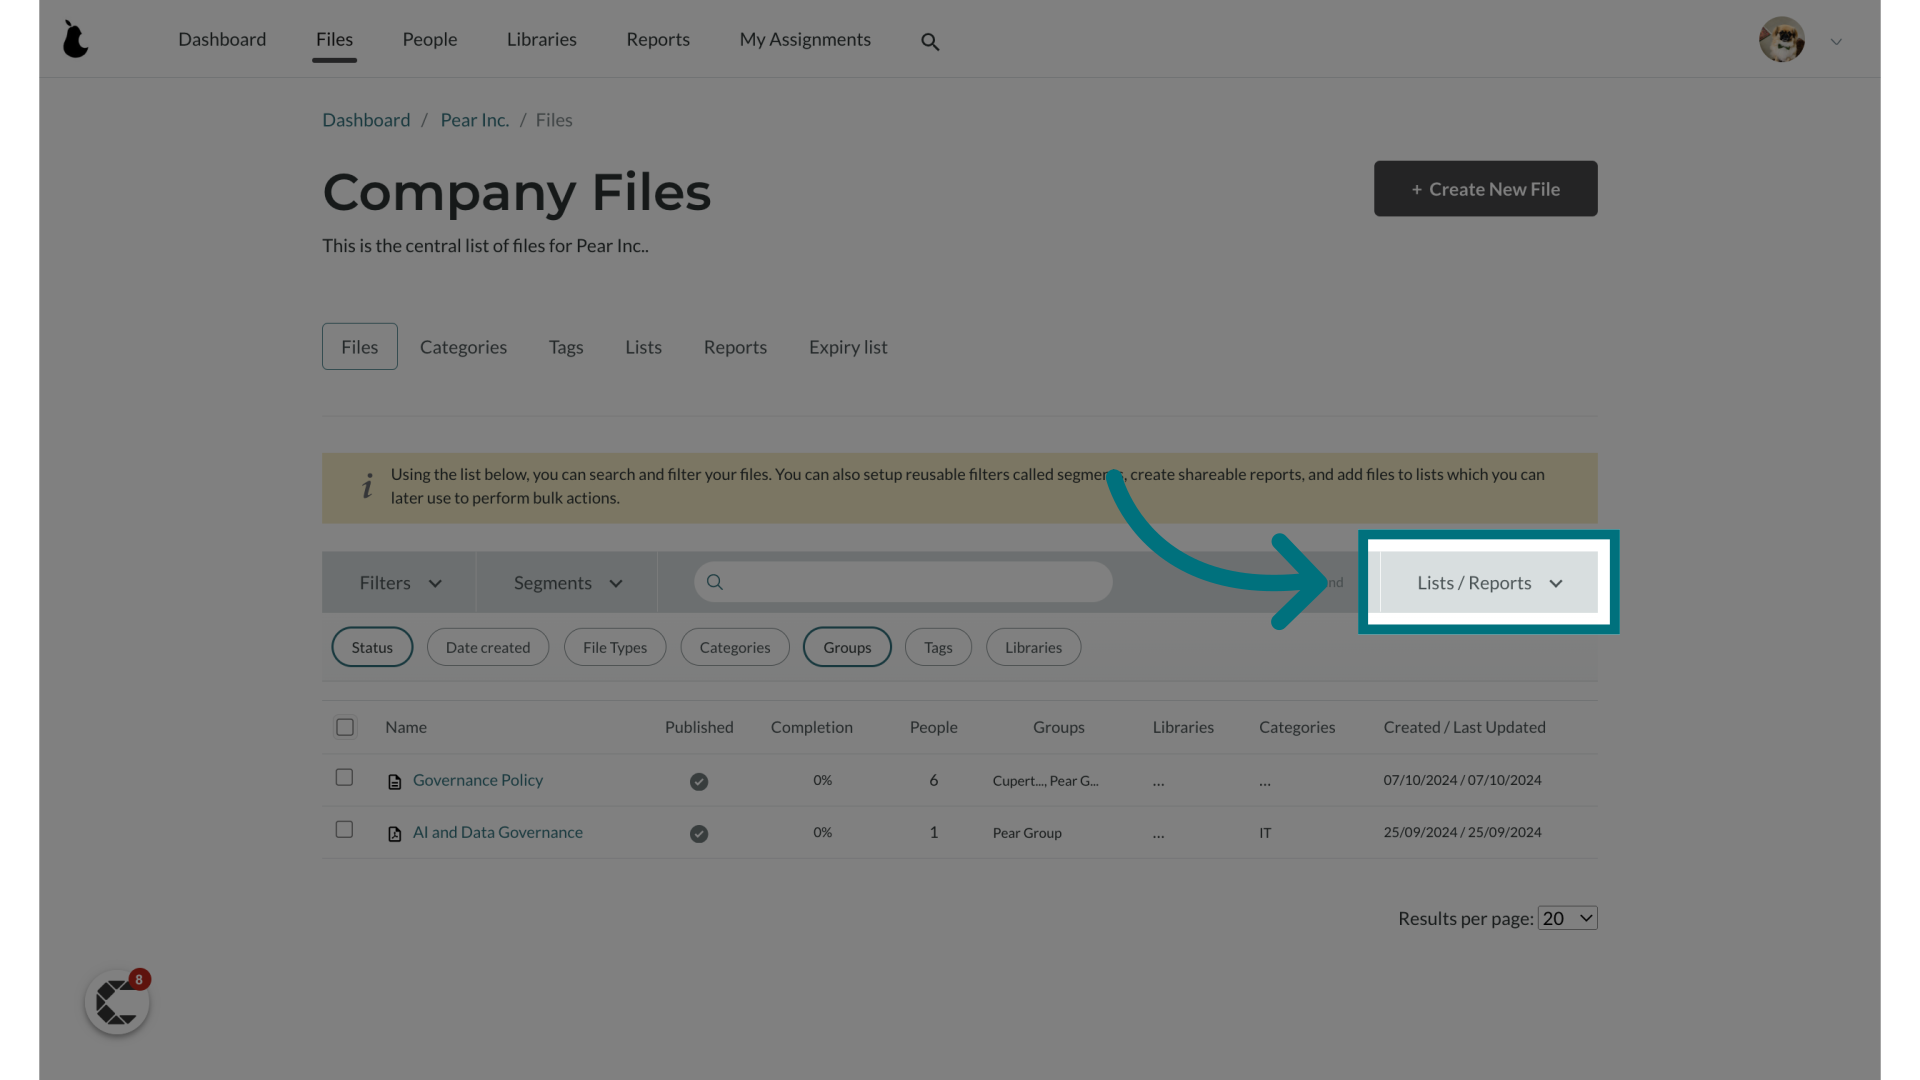
1. Click "Lists / Reports"
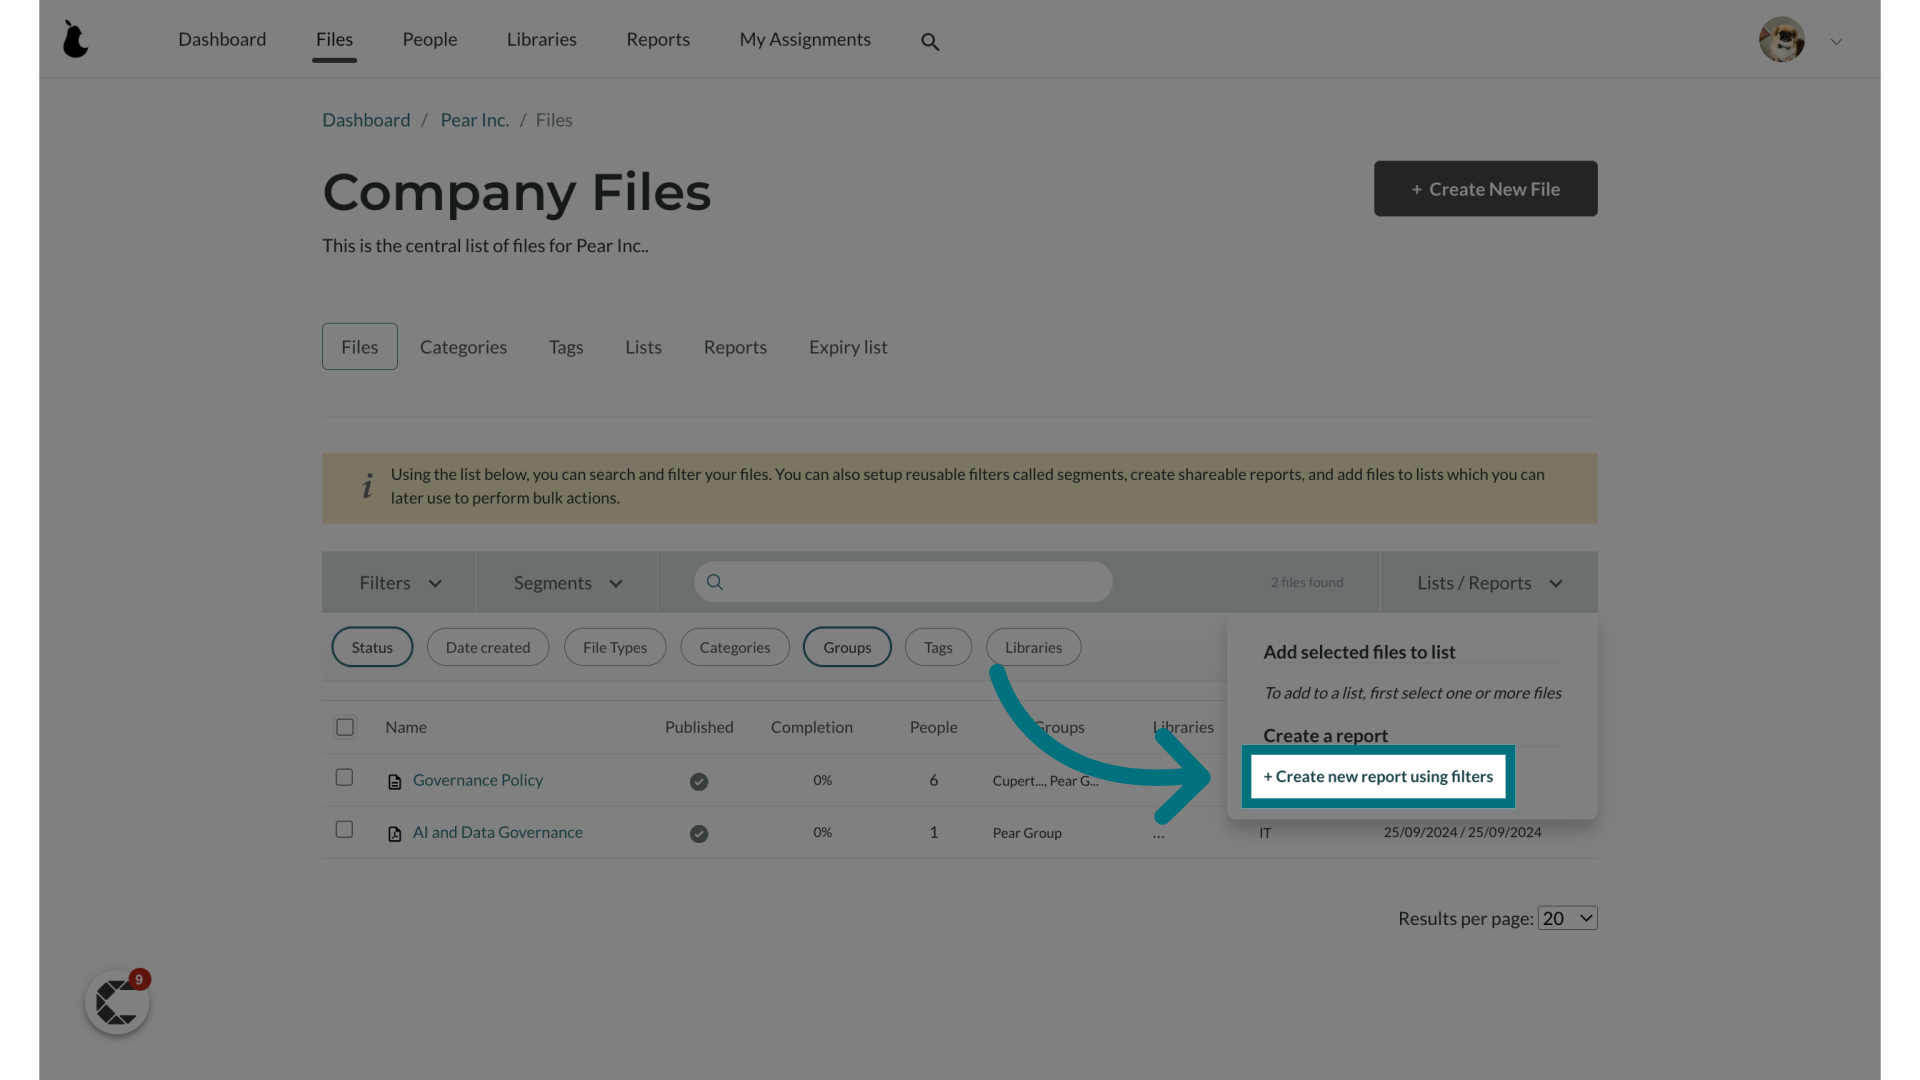
2. Click "+ Create a new report using filters"
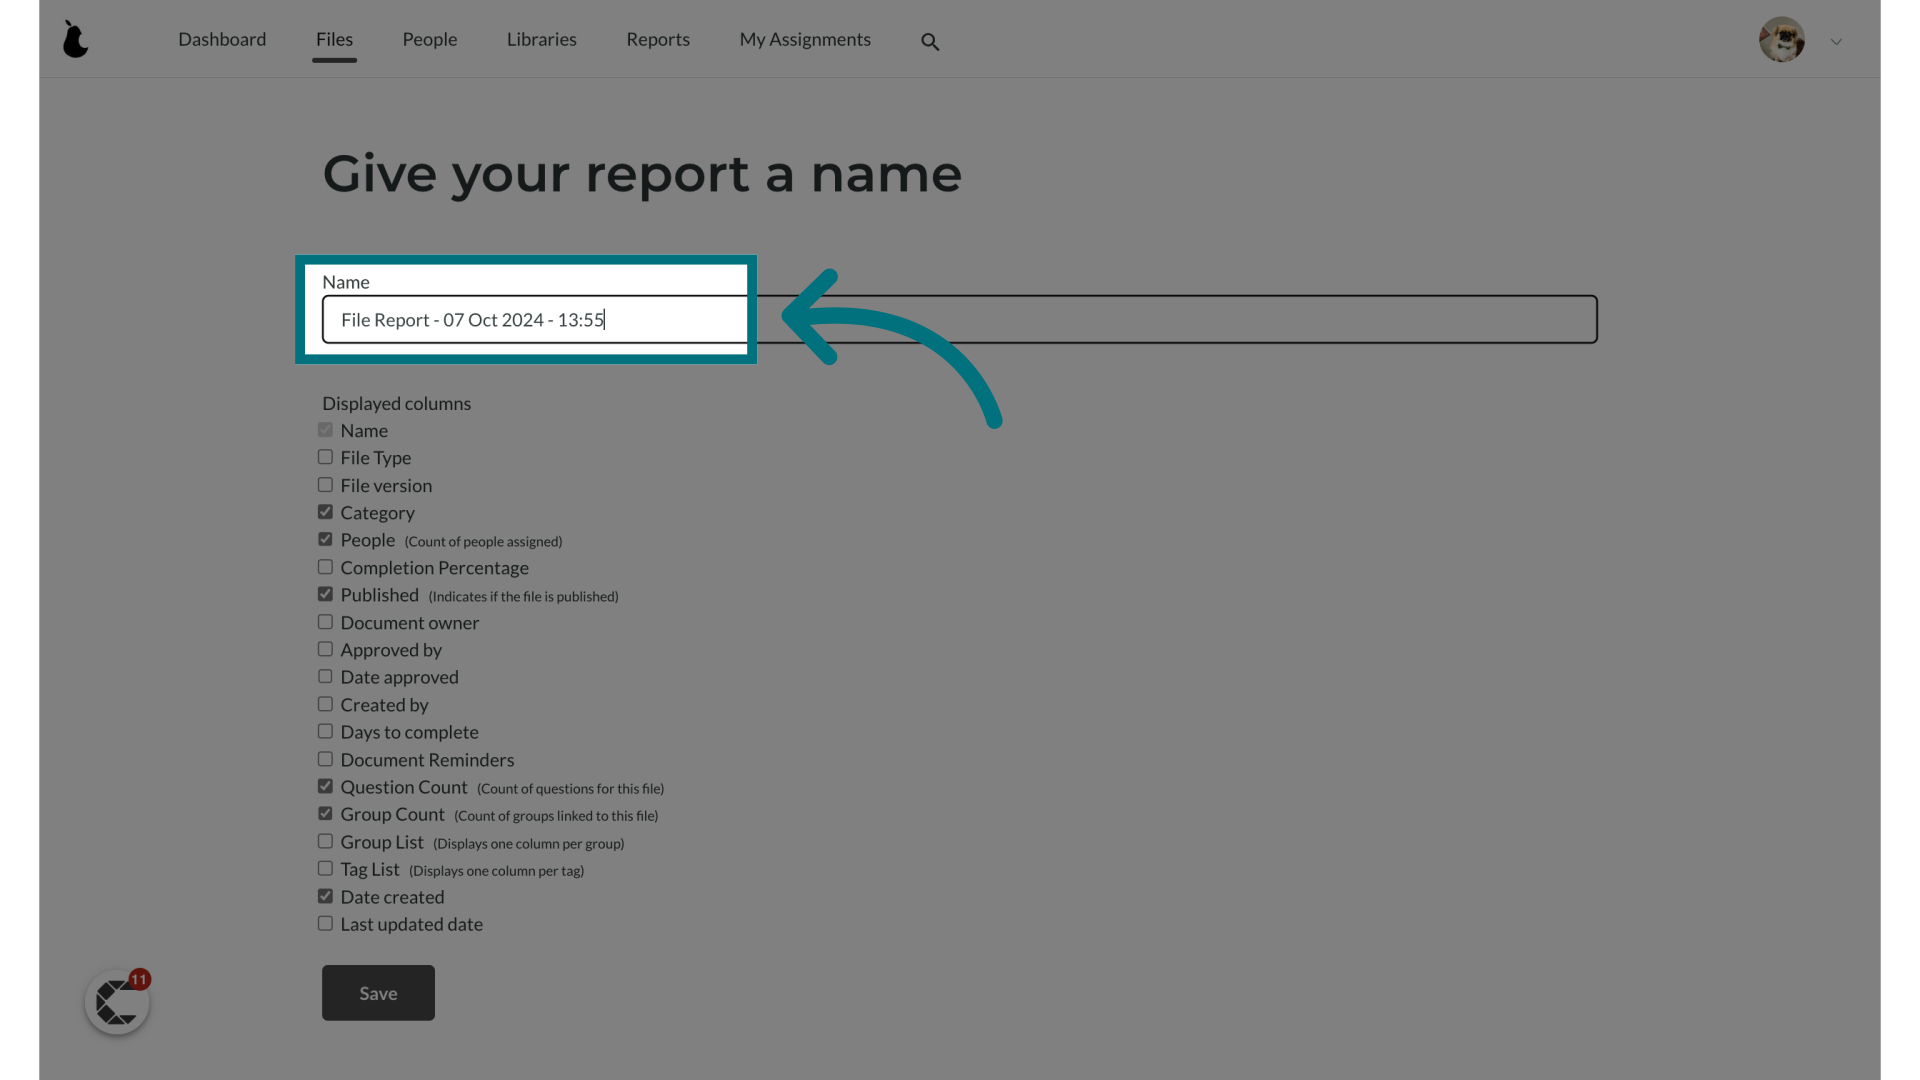
3. Rename your report
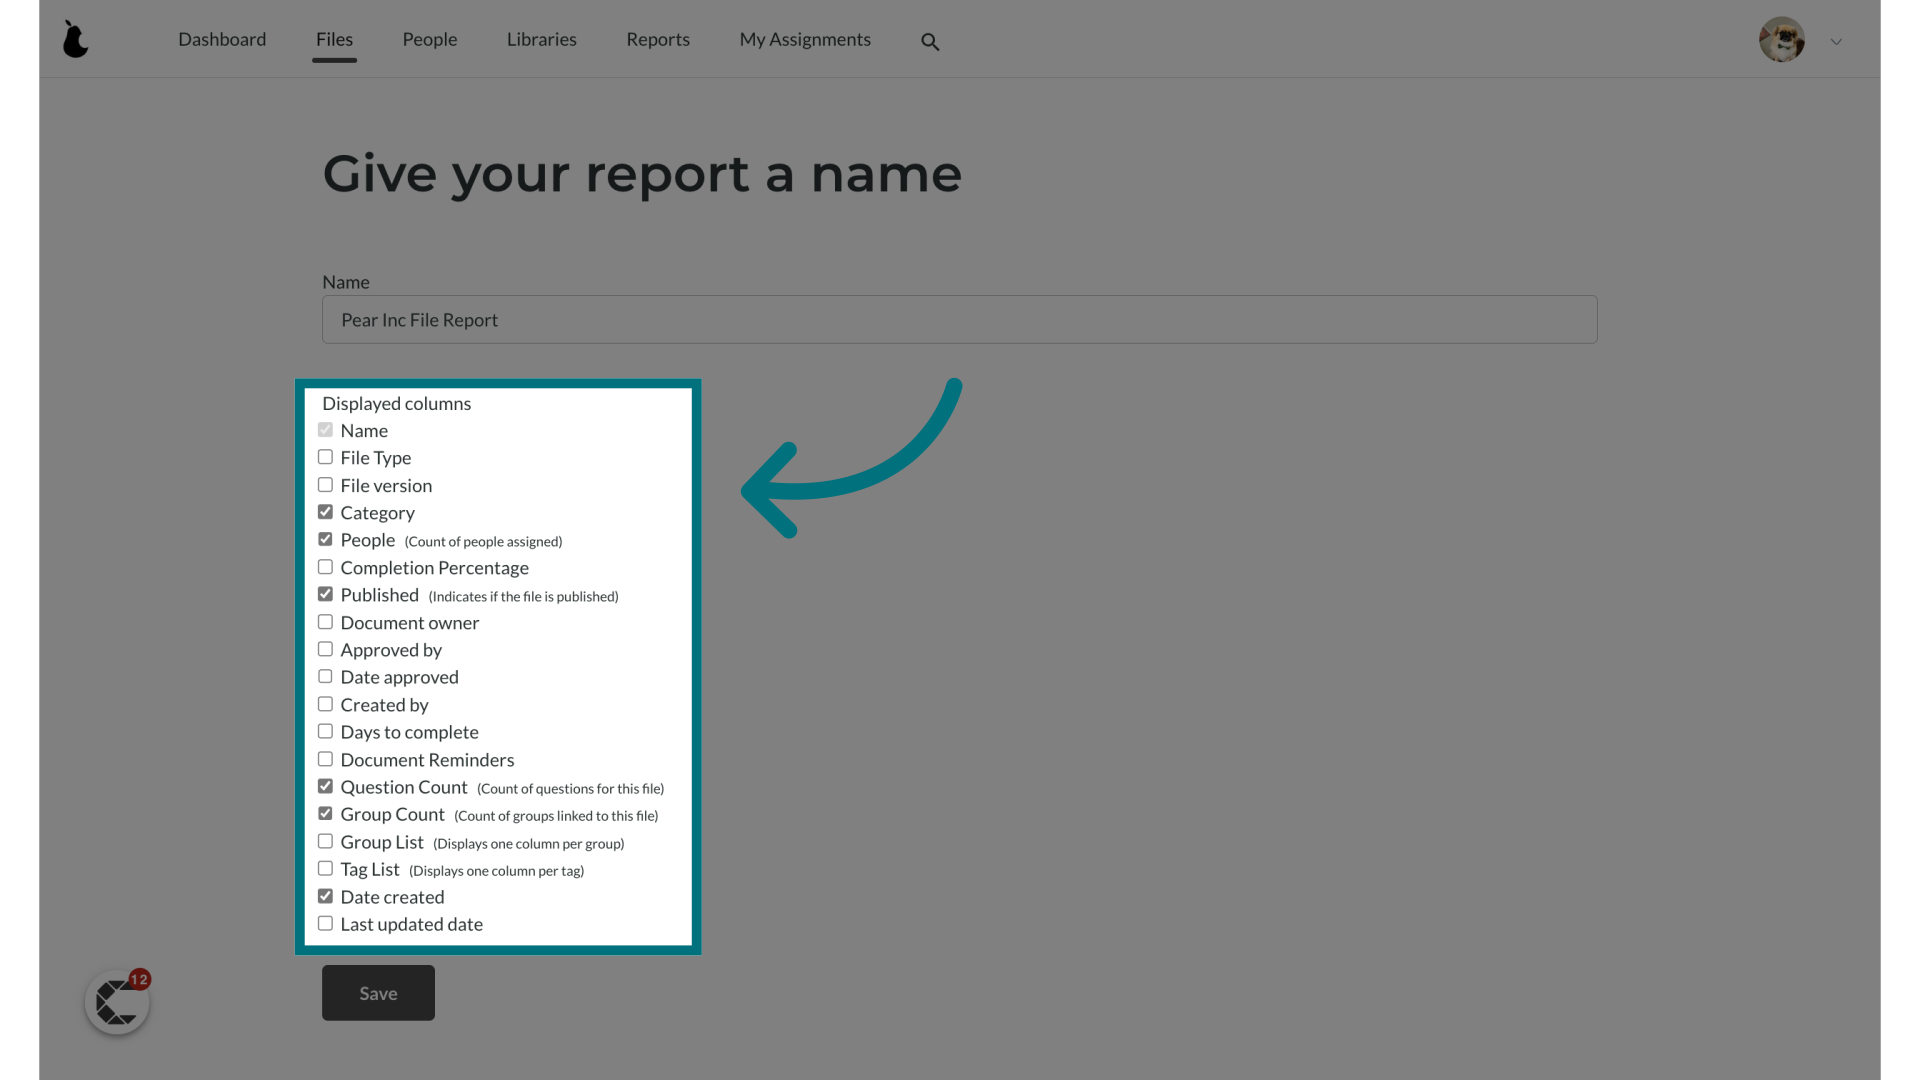
4. Tick the data you want to display in the report
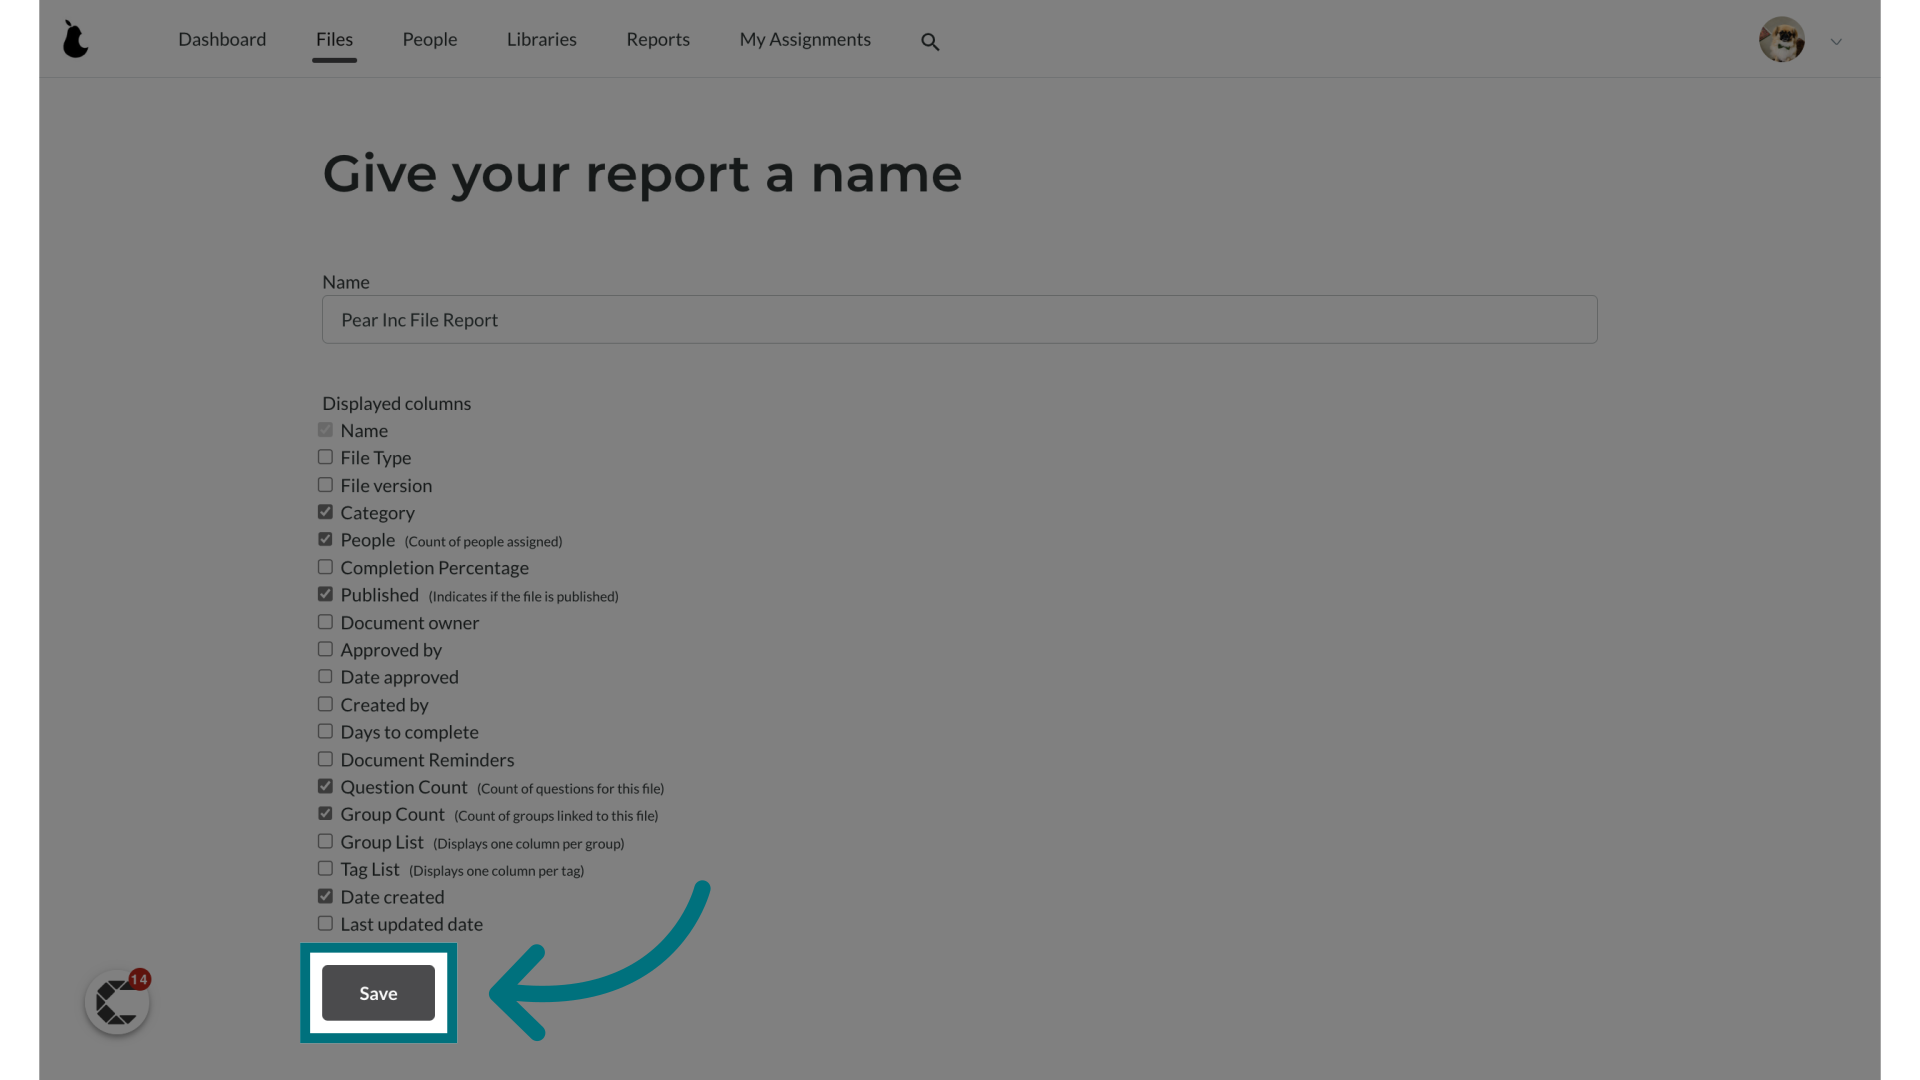
5. Click "Save"
Editing your report
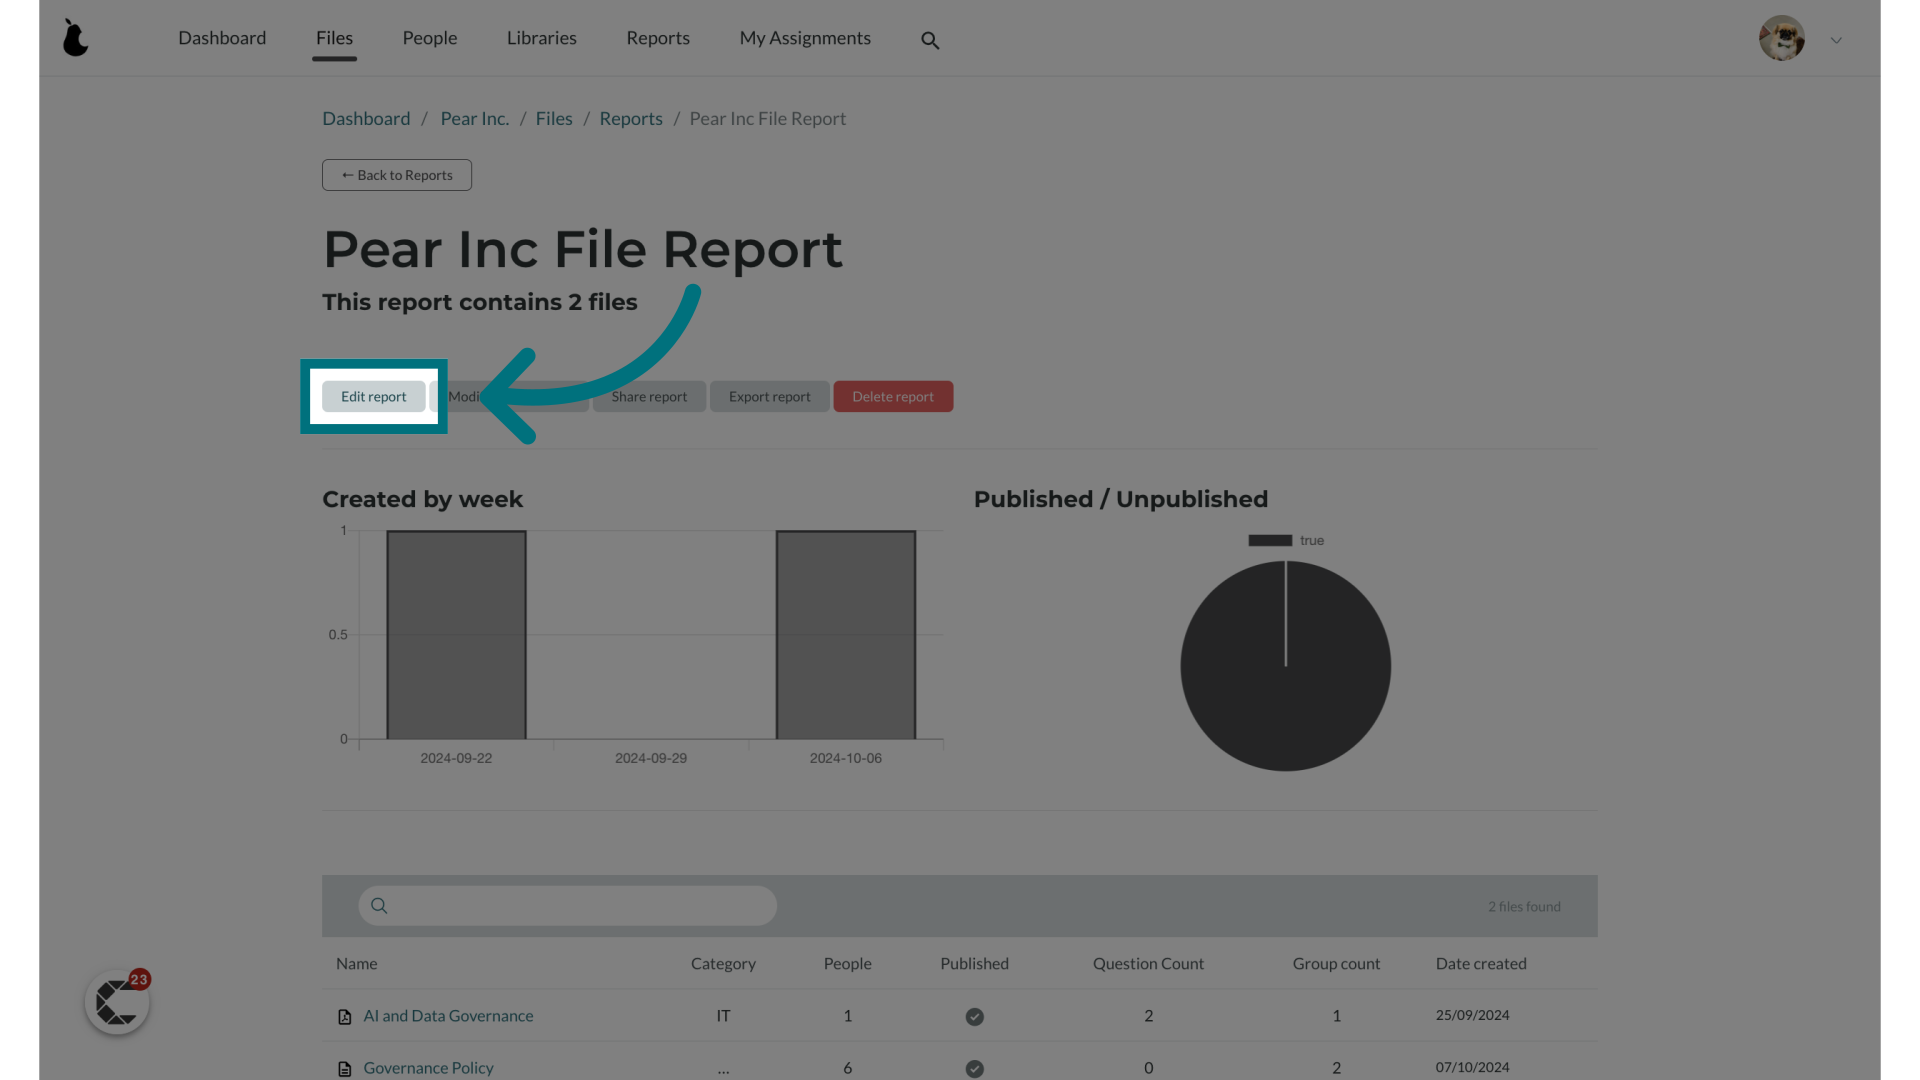
1. Click "Edit report"
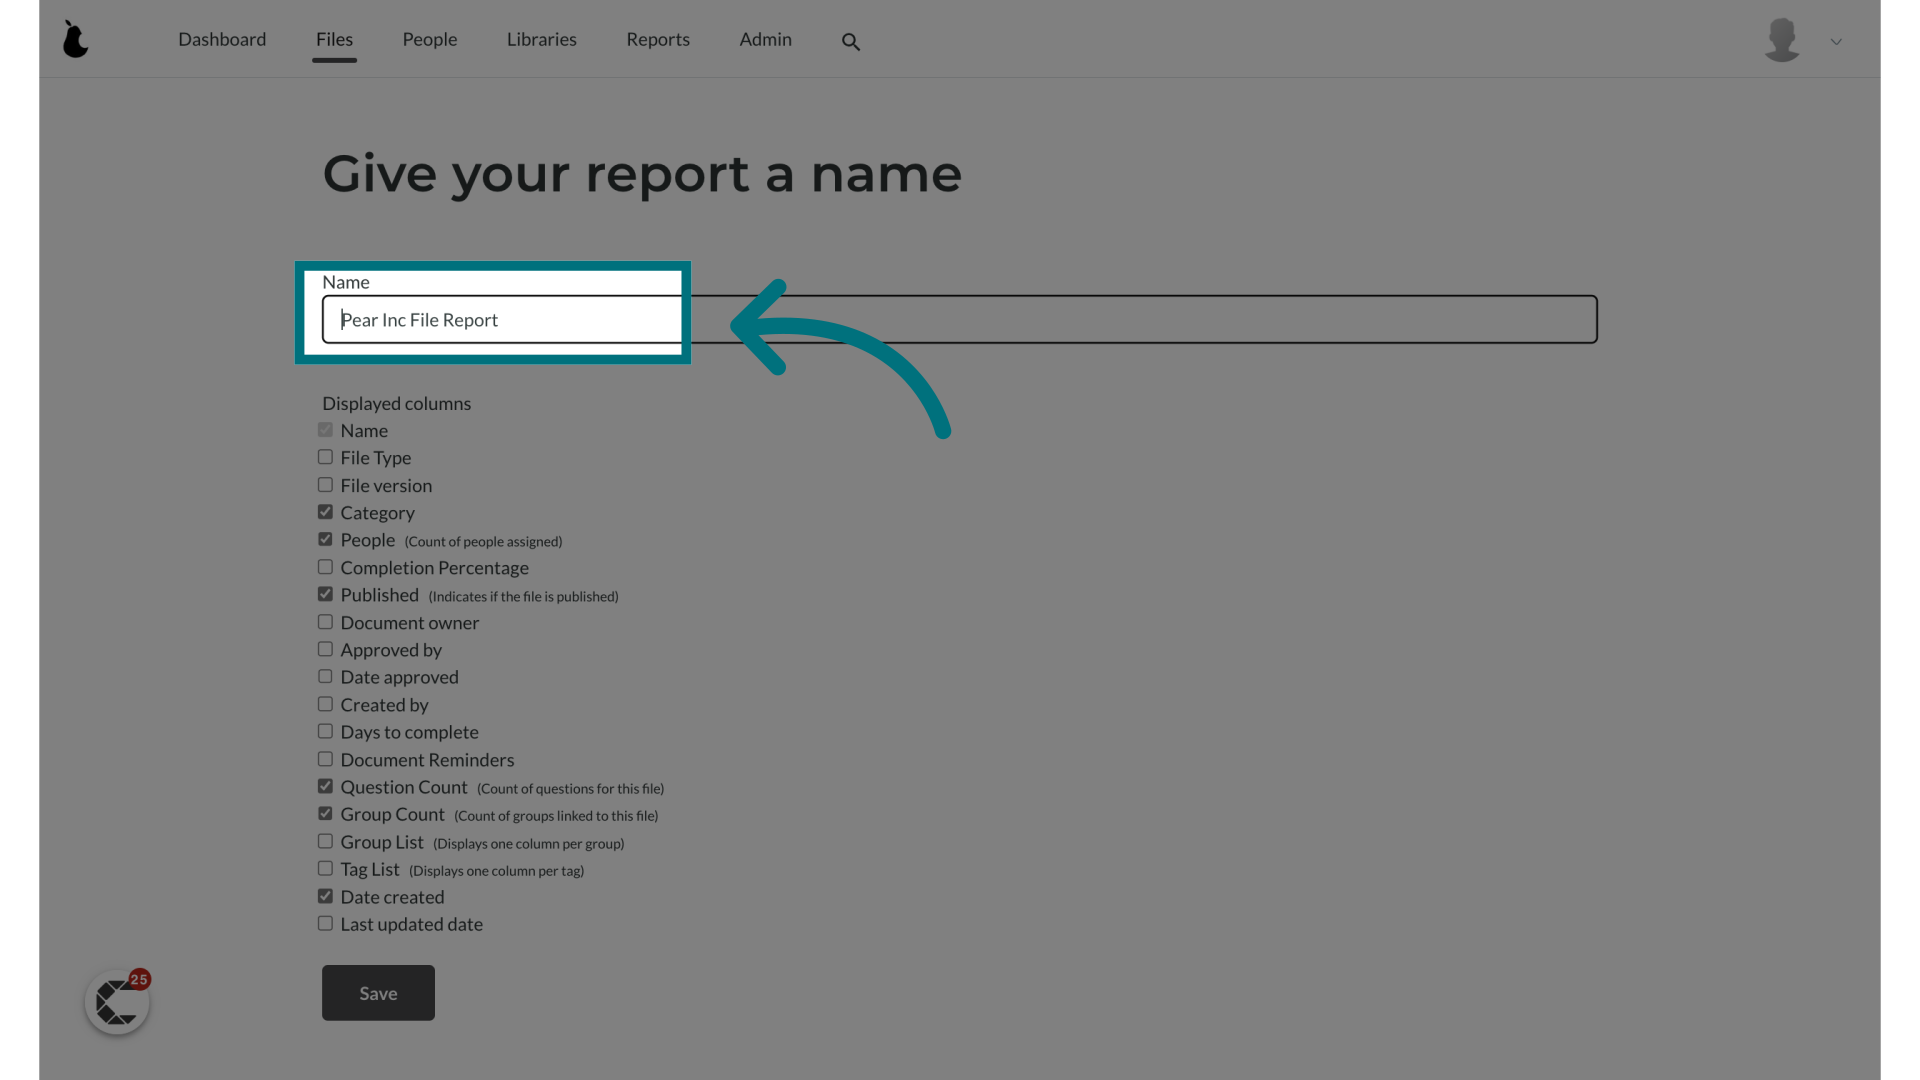
2. Here you can change the name of the report
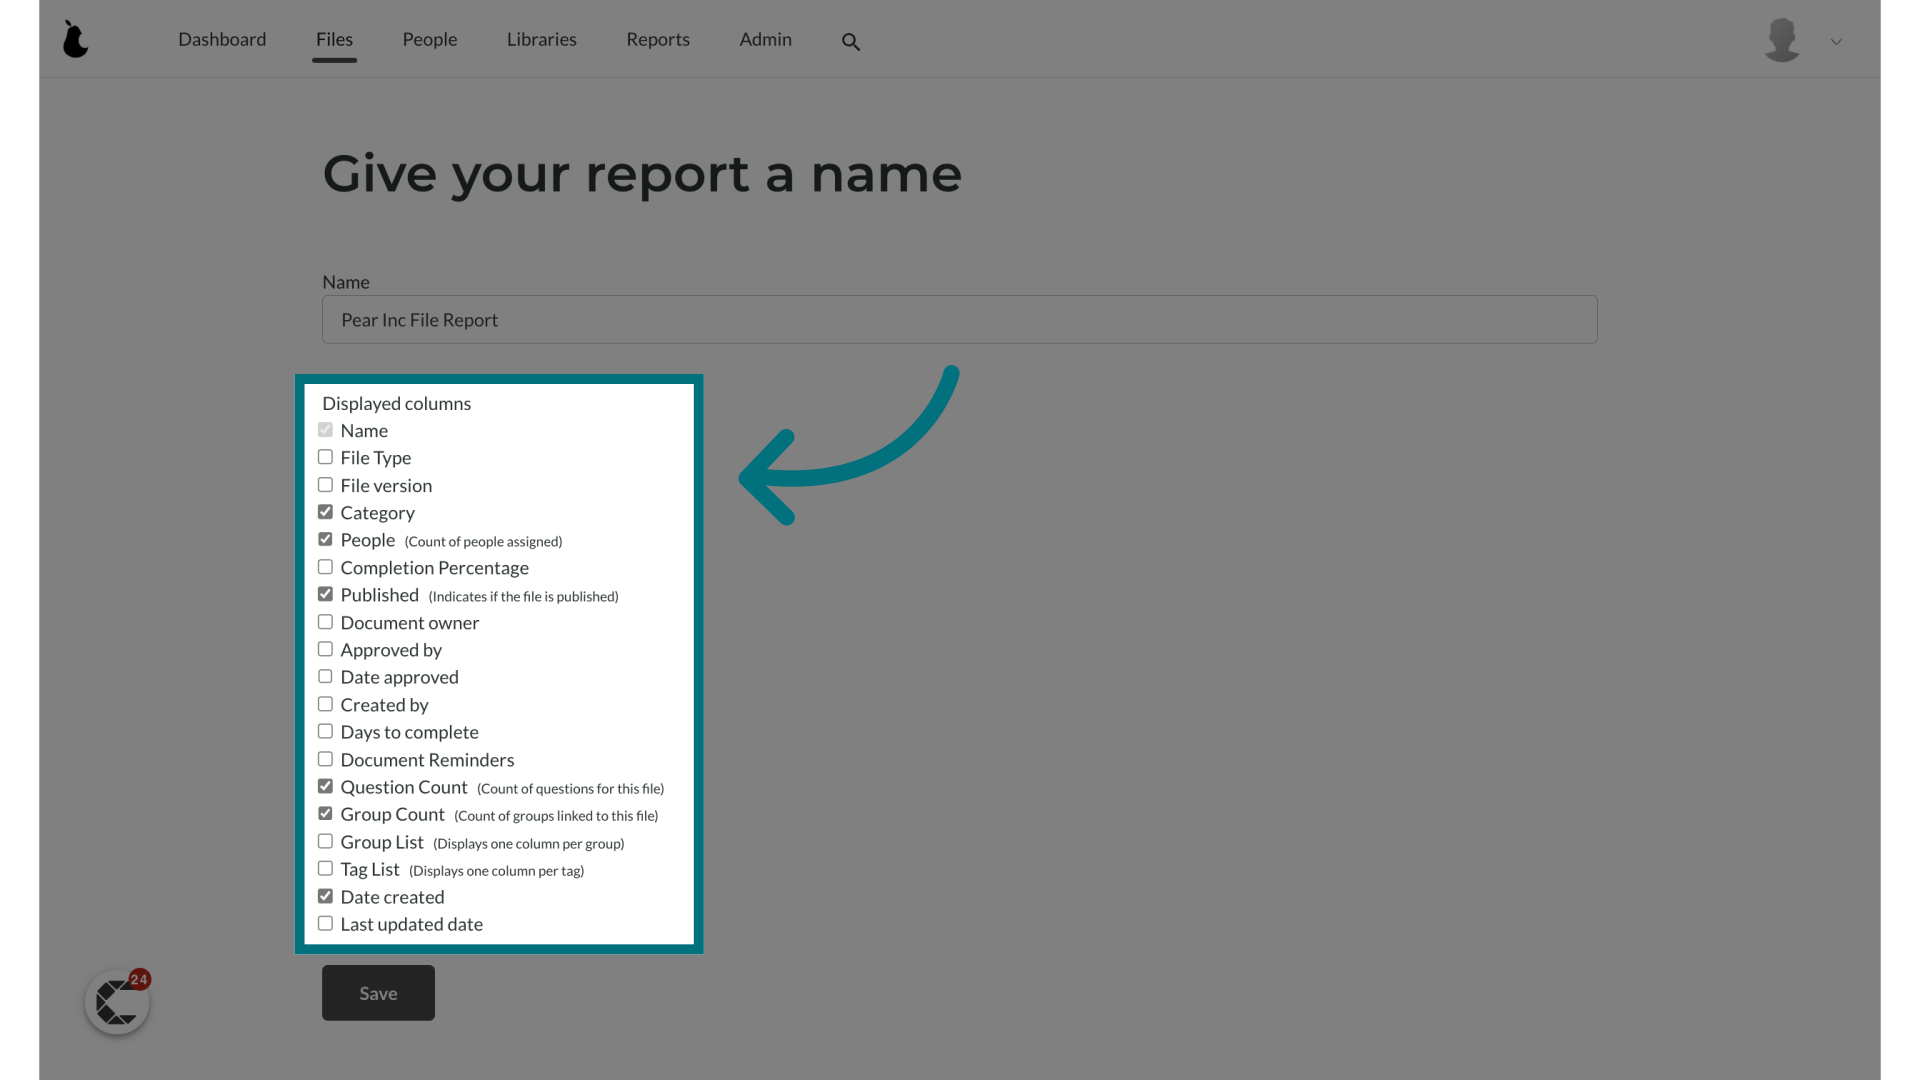
3. Here you can edit the detail displayed in the report
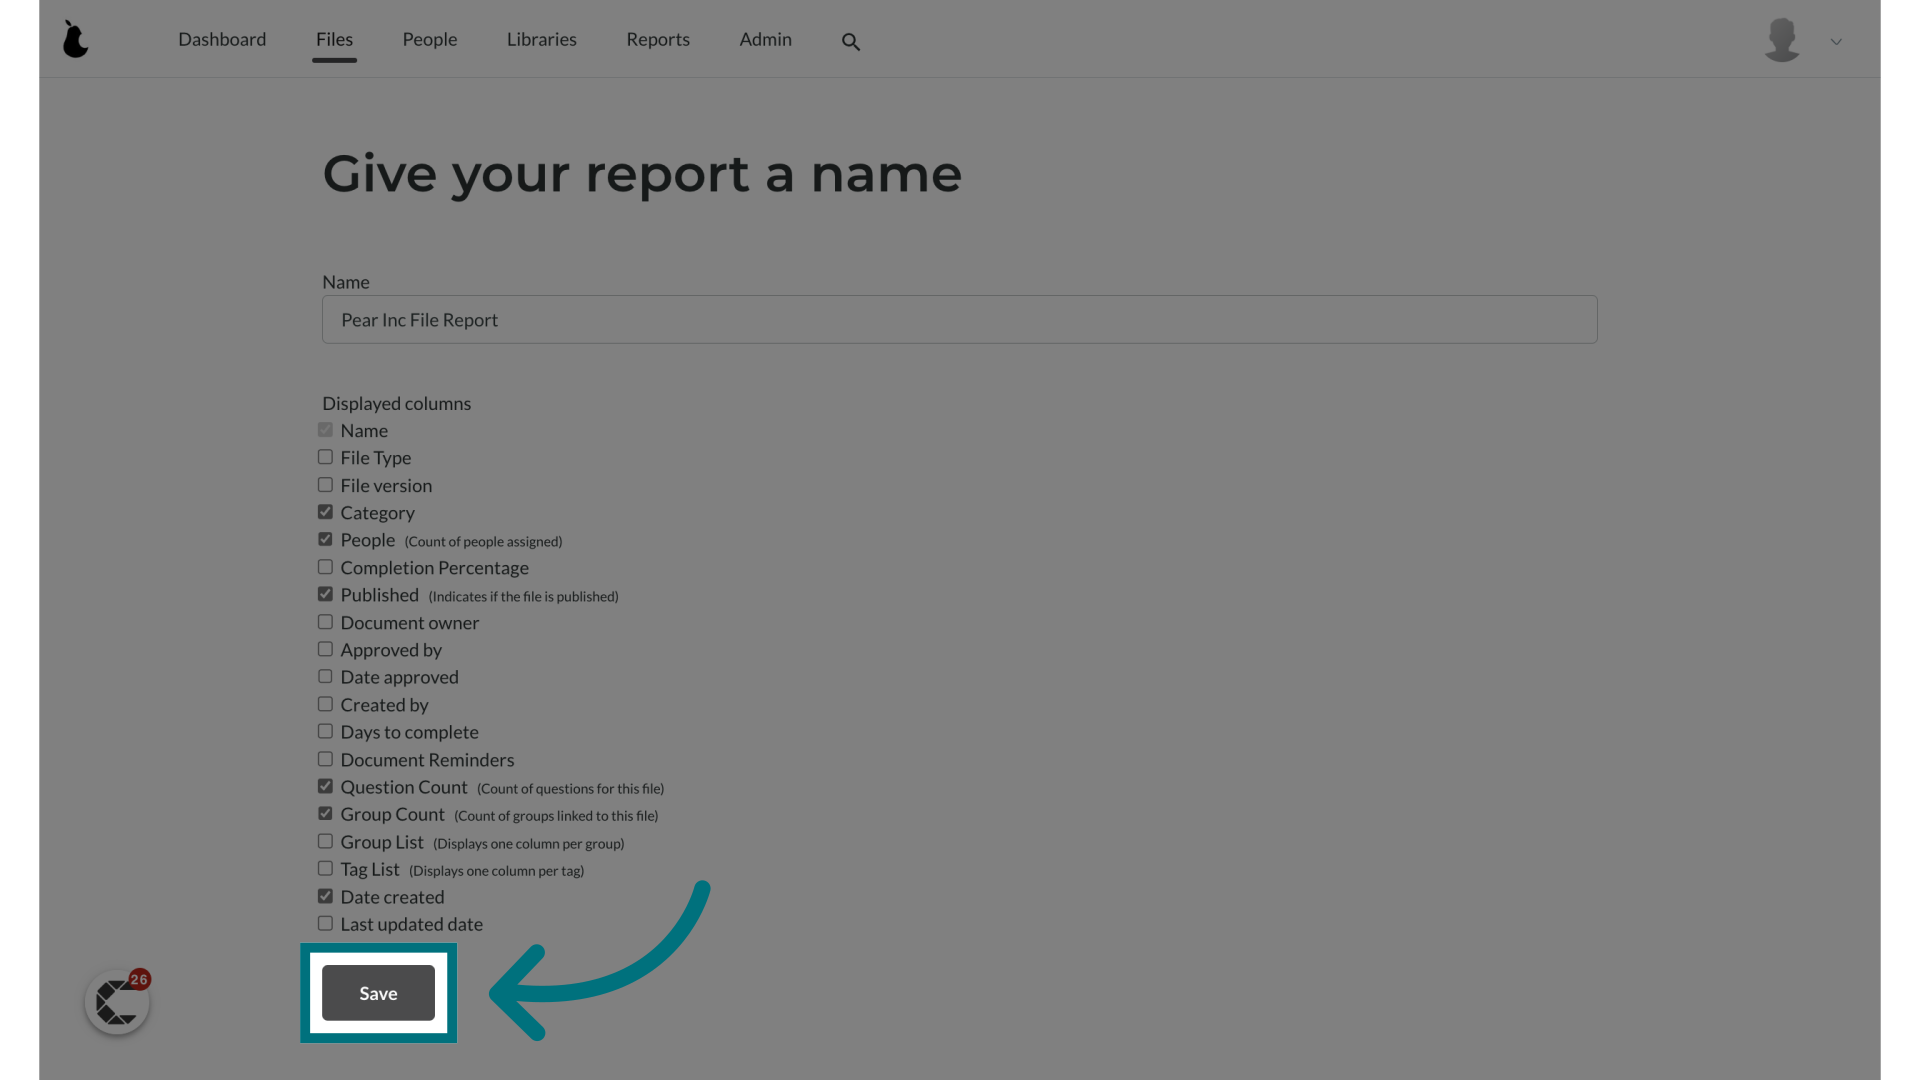
4. Click "Save"
Modifying the report filters
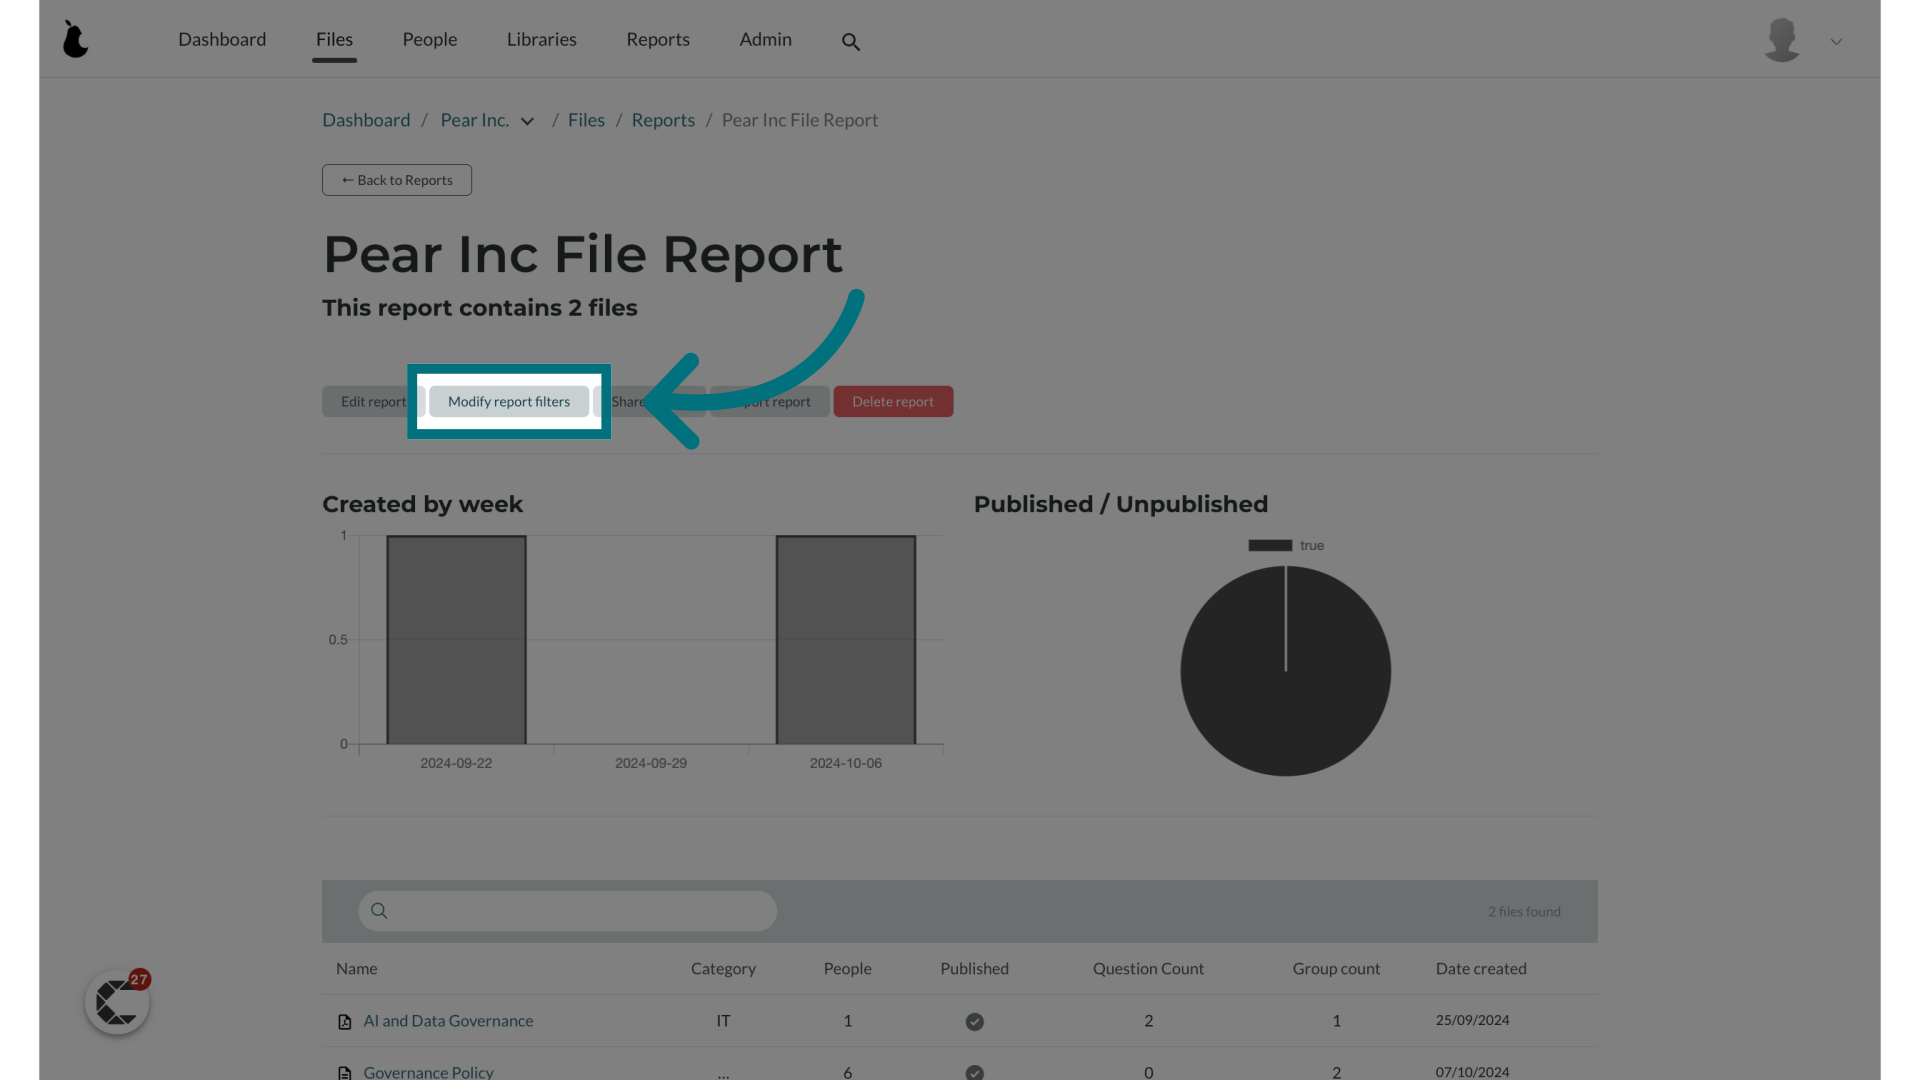
1. Click "Modify report filters"
- If you wish to change the filters to include or exclude users from the report, click on the "Modify report filters" button.
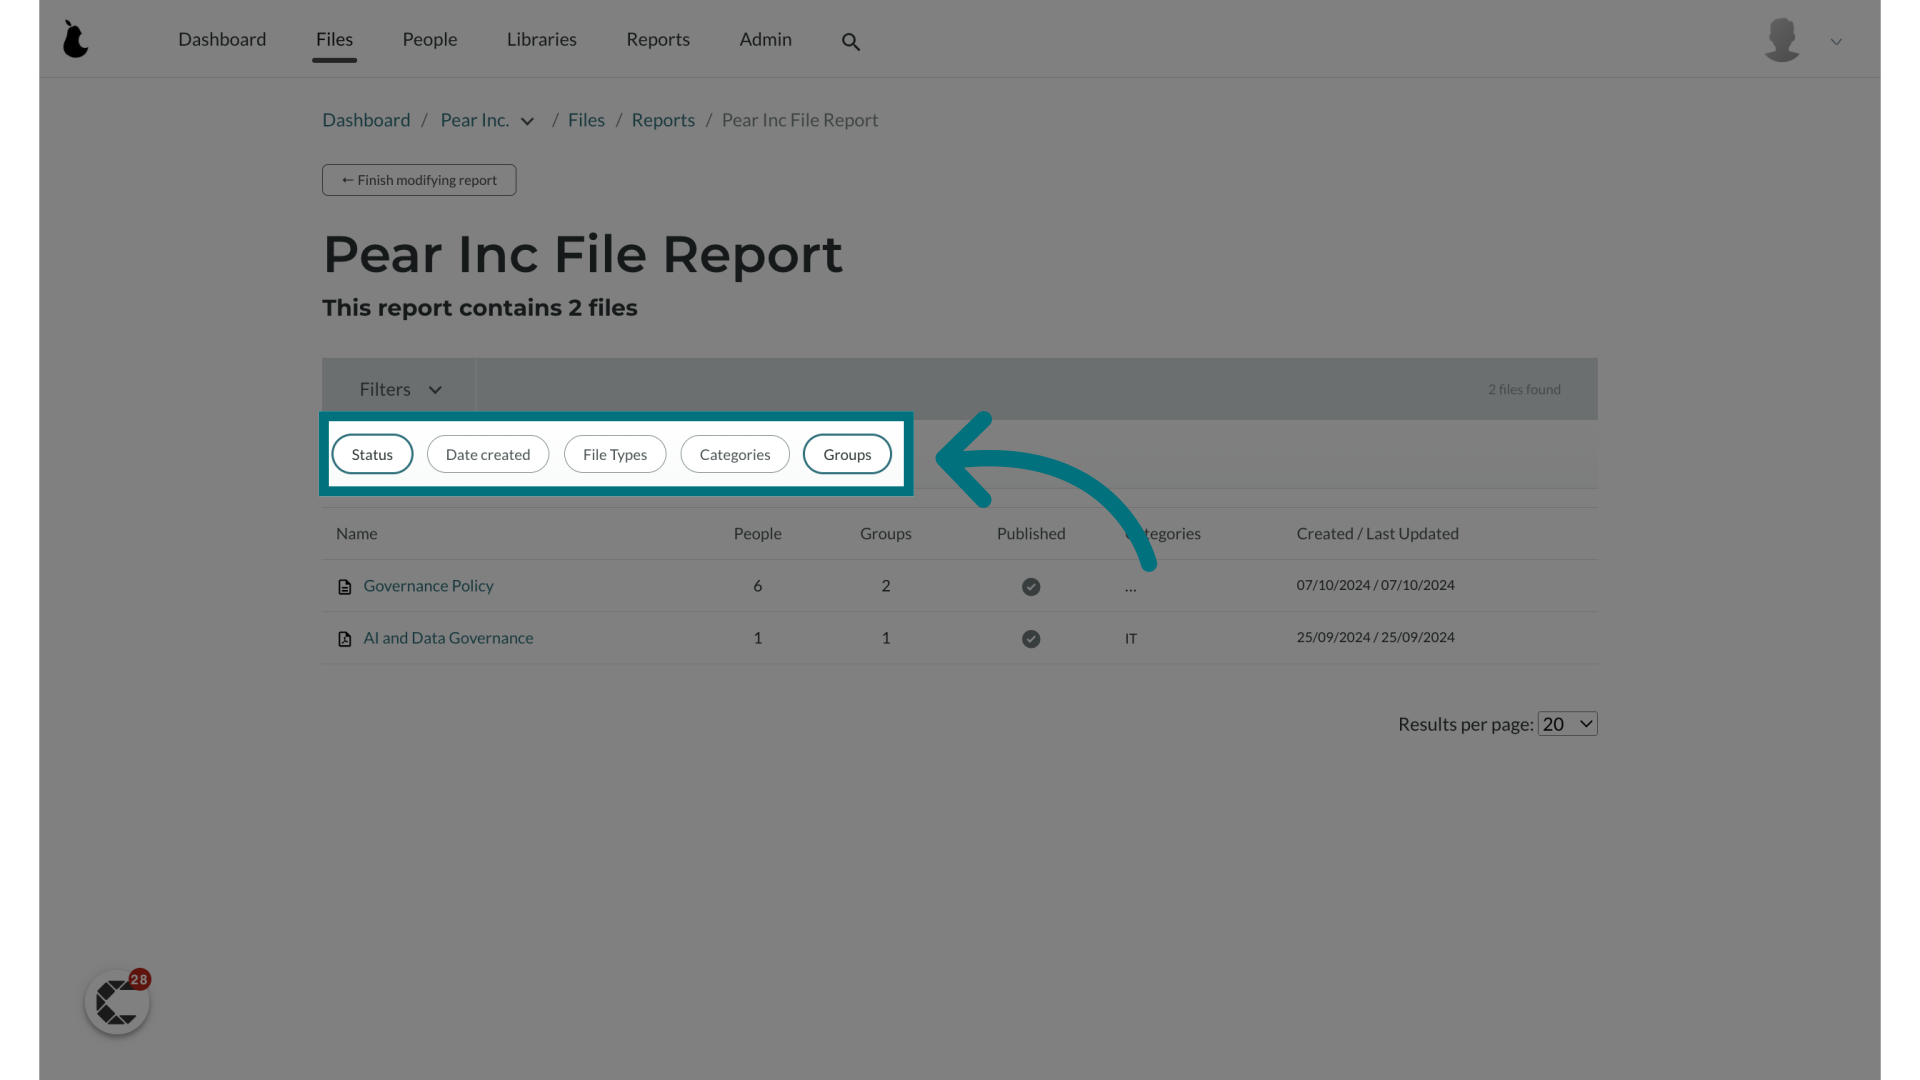
2. Use the filters here to add or remove files from the report
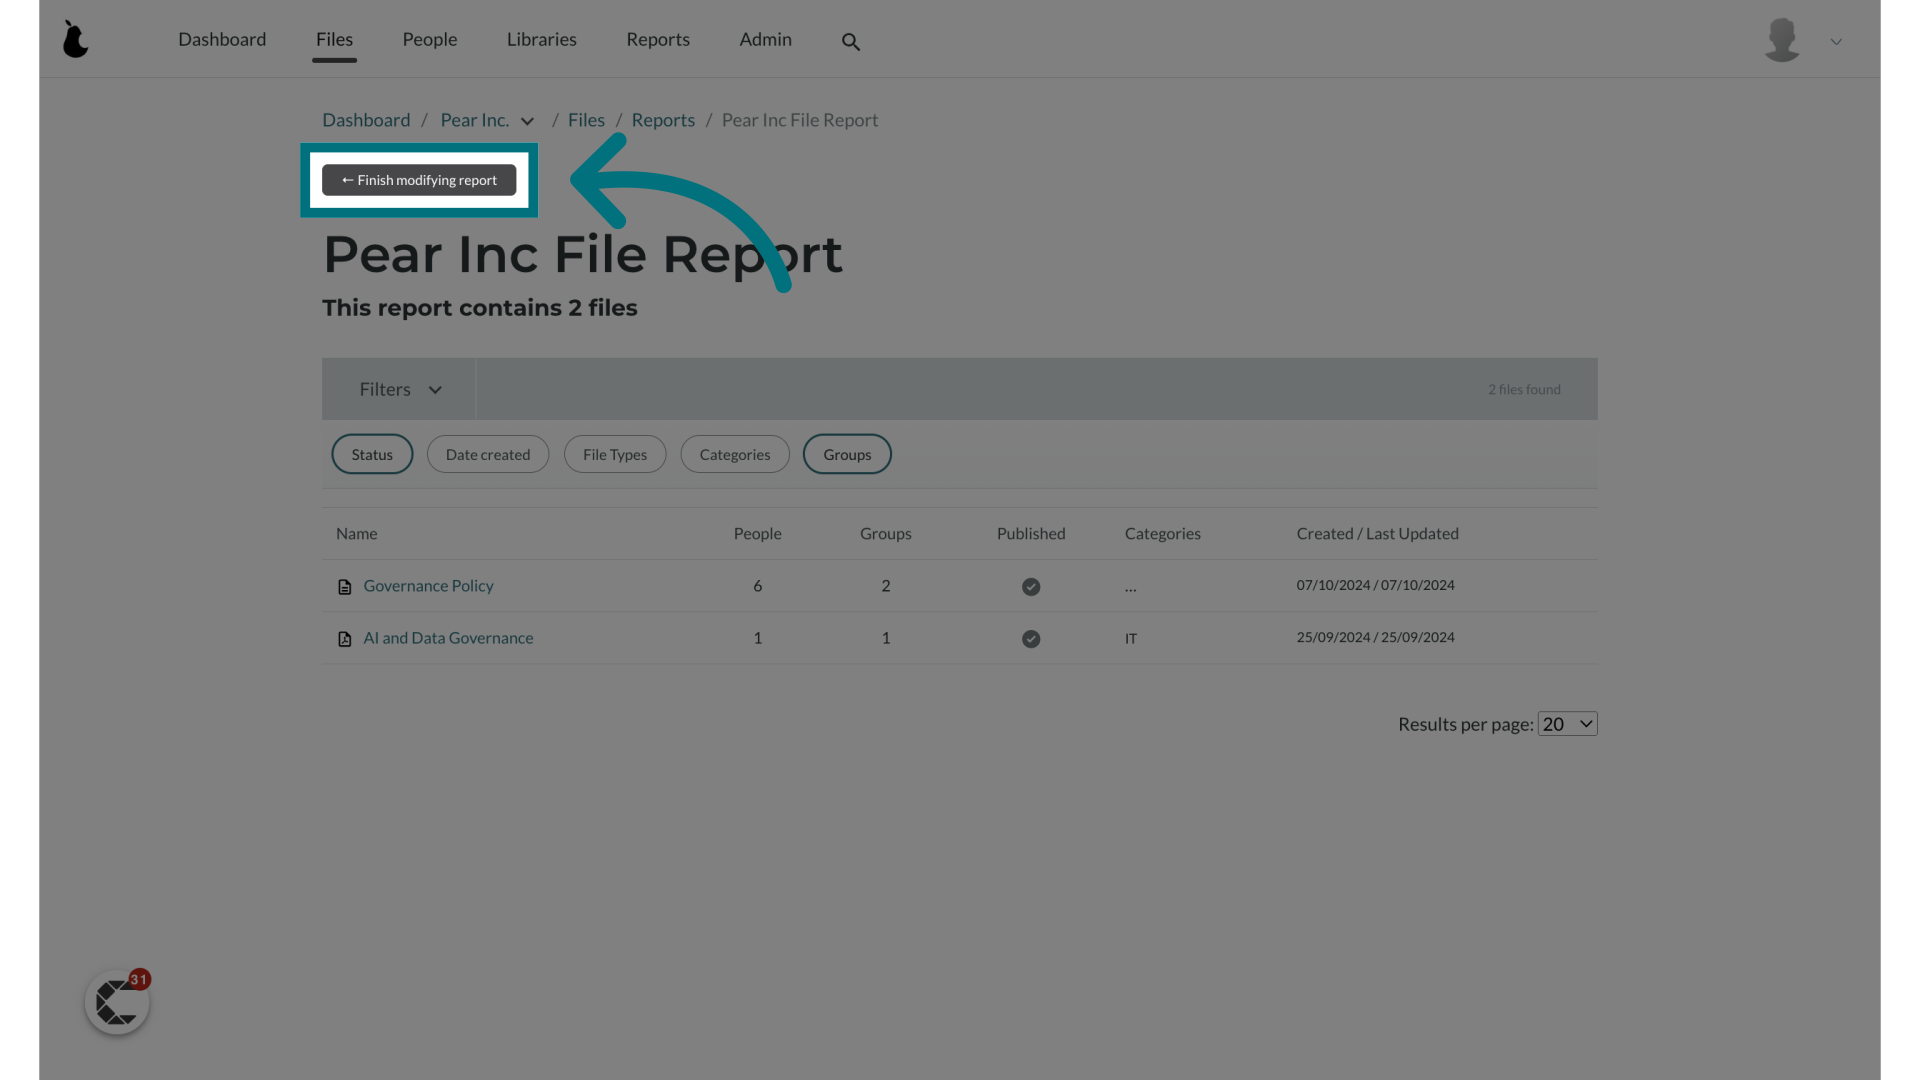
3. Click "← Finish modifying report"
Sharing your report
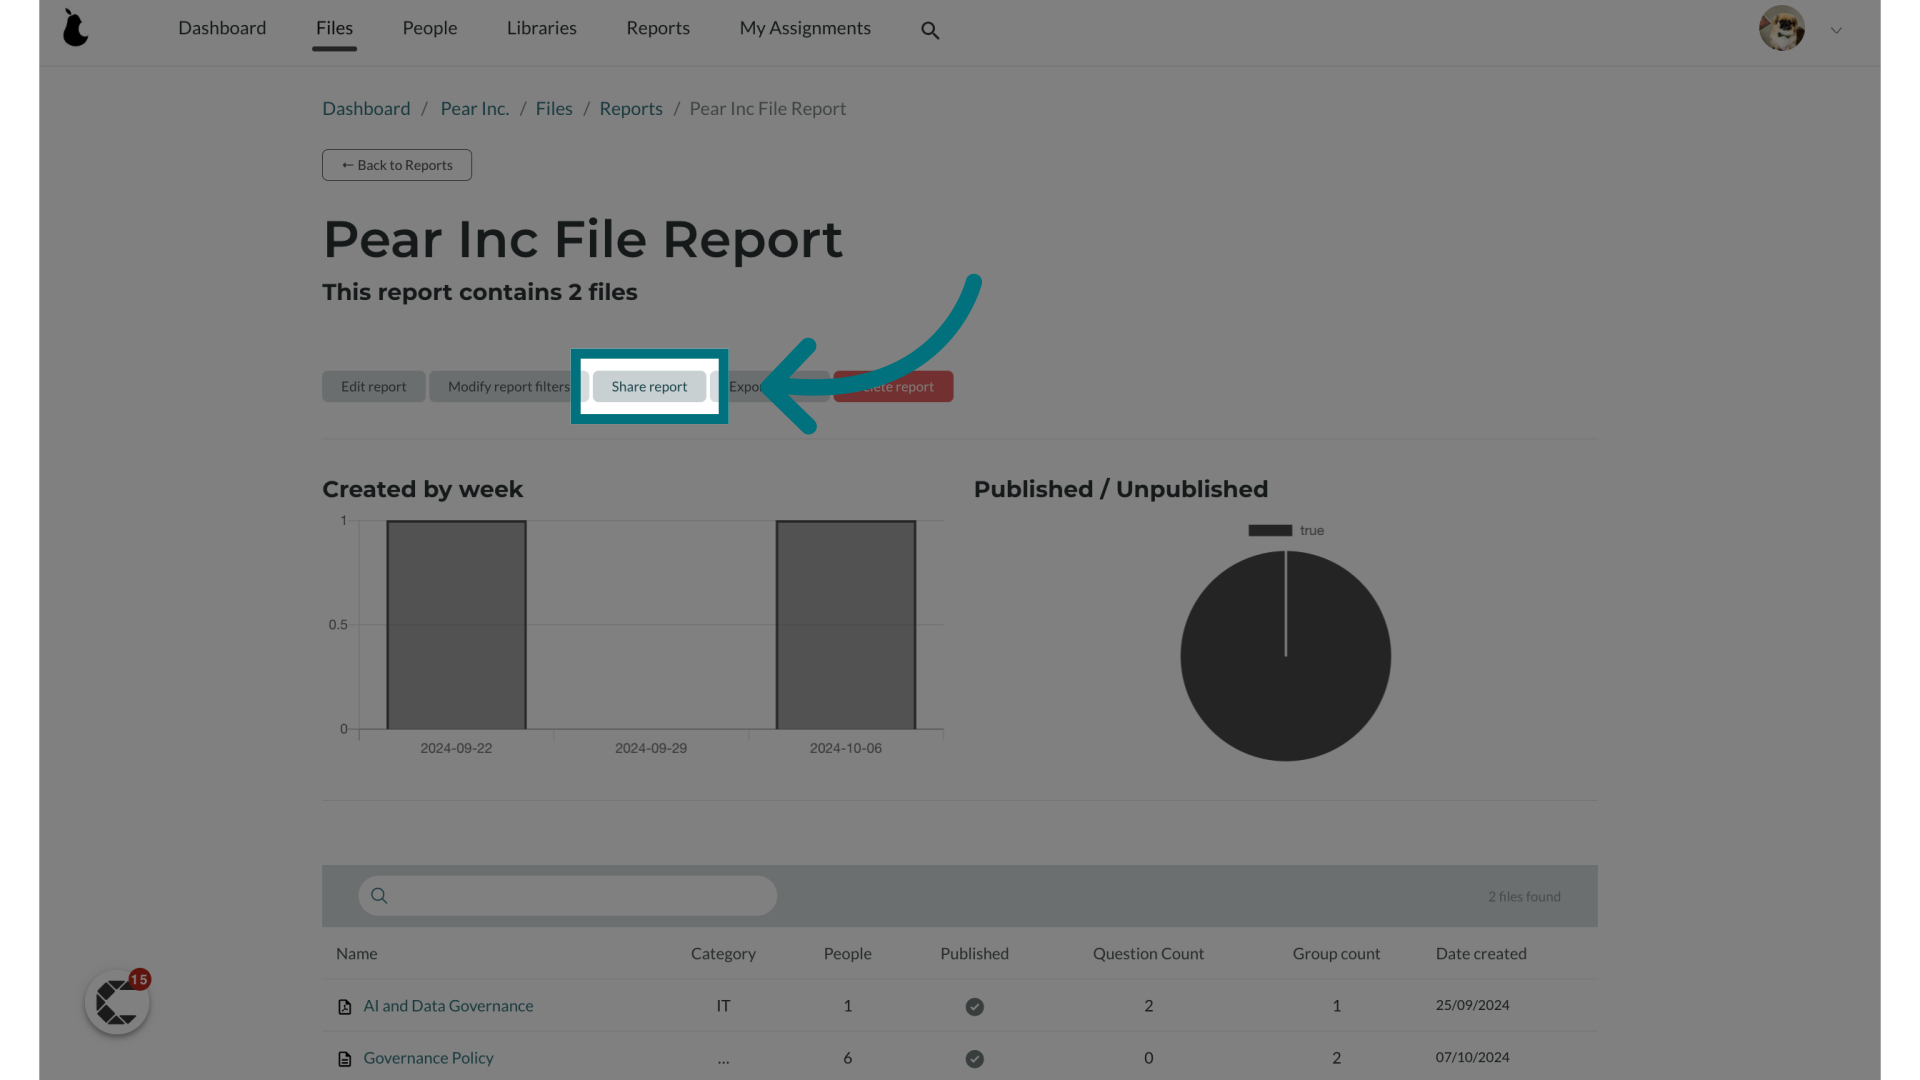
1. Click "Share Report"
- If you wish to share the report with users, click on the "Share report" button.
- Please note: You will only be able to share the report with users that are already within the Policy Passport system.
2. Provide the email address of the person you wish to share the report with
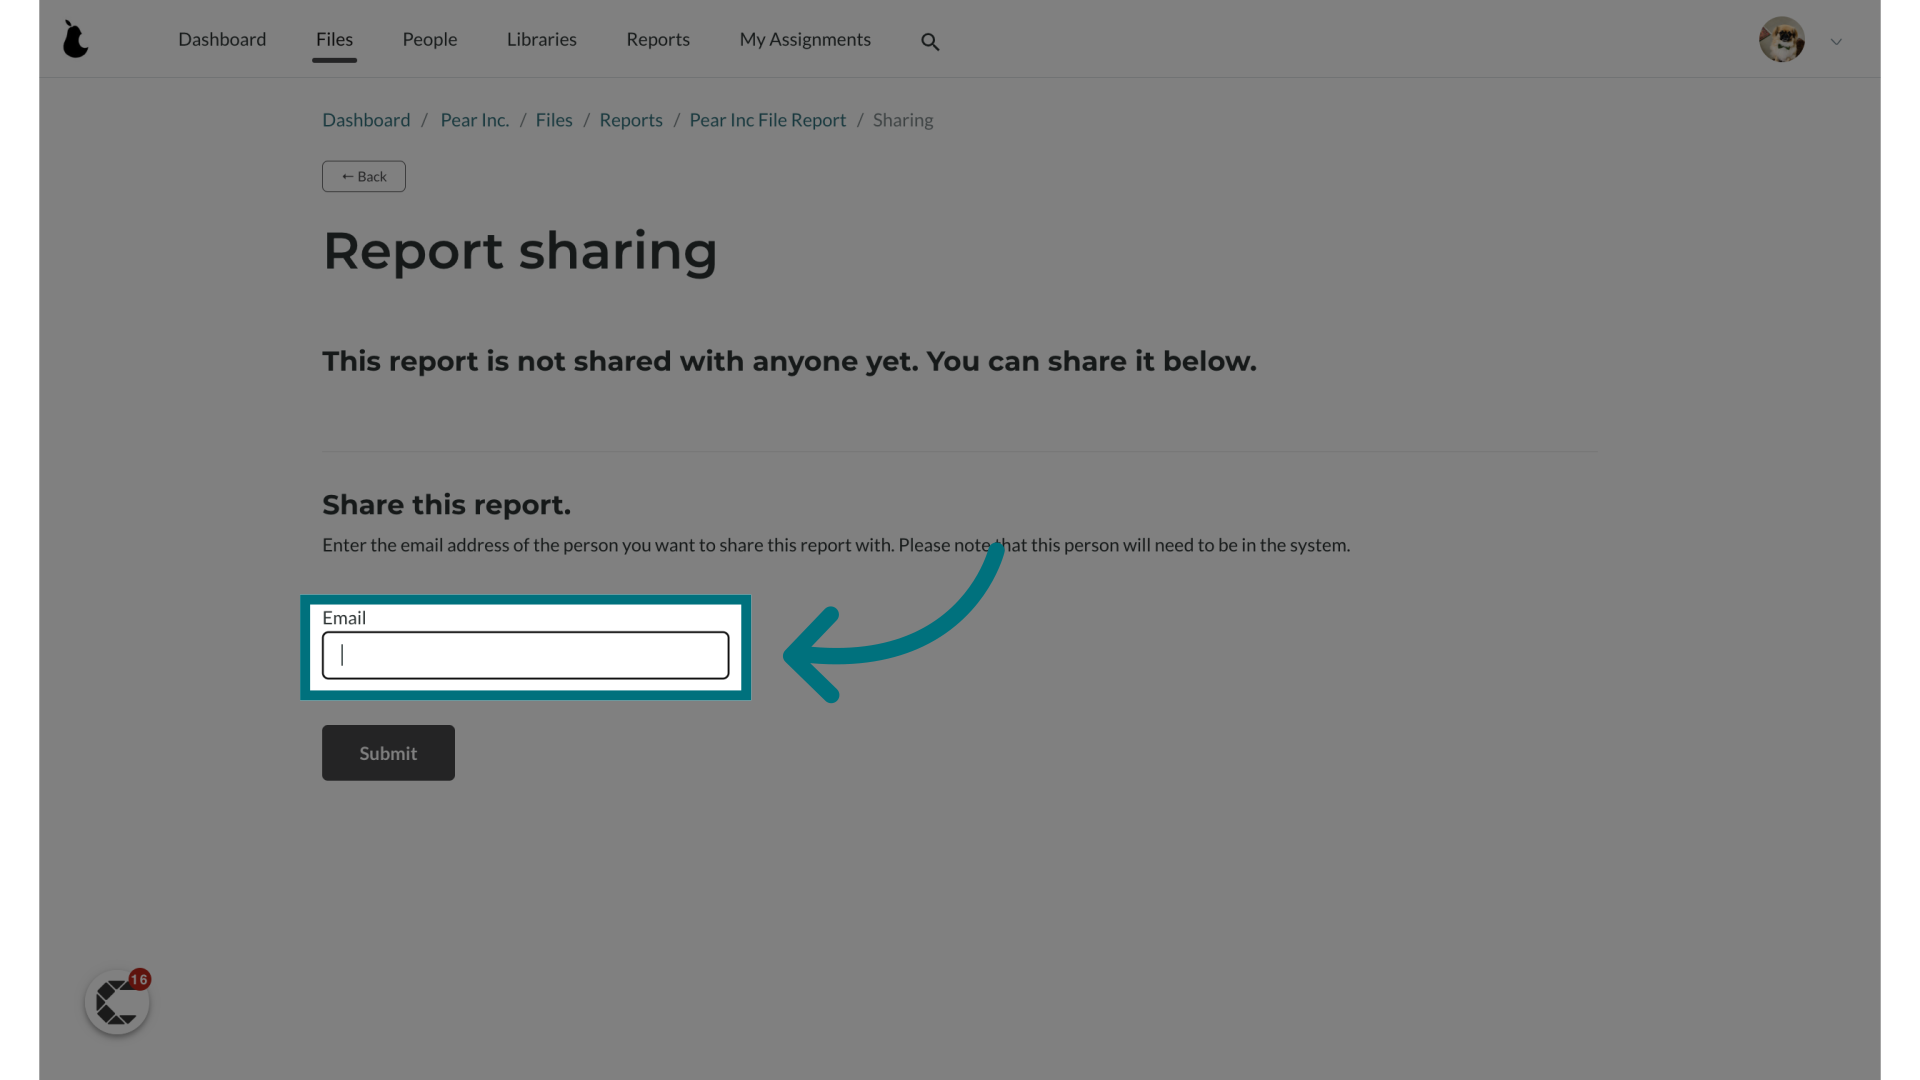
3. Click "Submit"
- You can repeat steps 2 and 3 to share the report with as many users as needed.
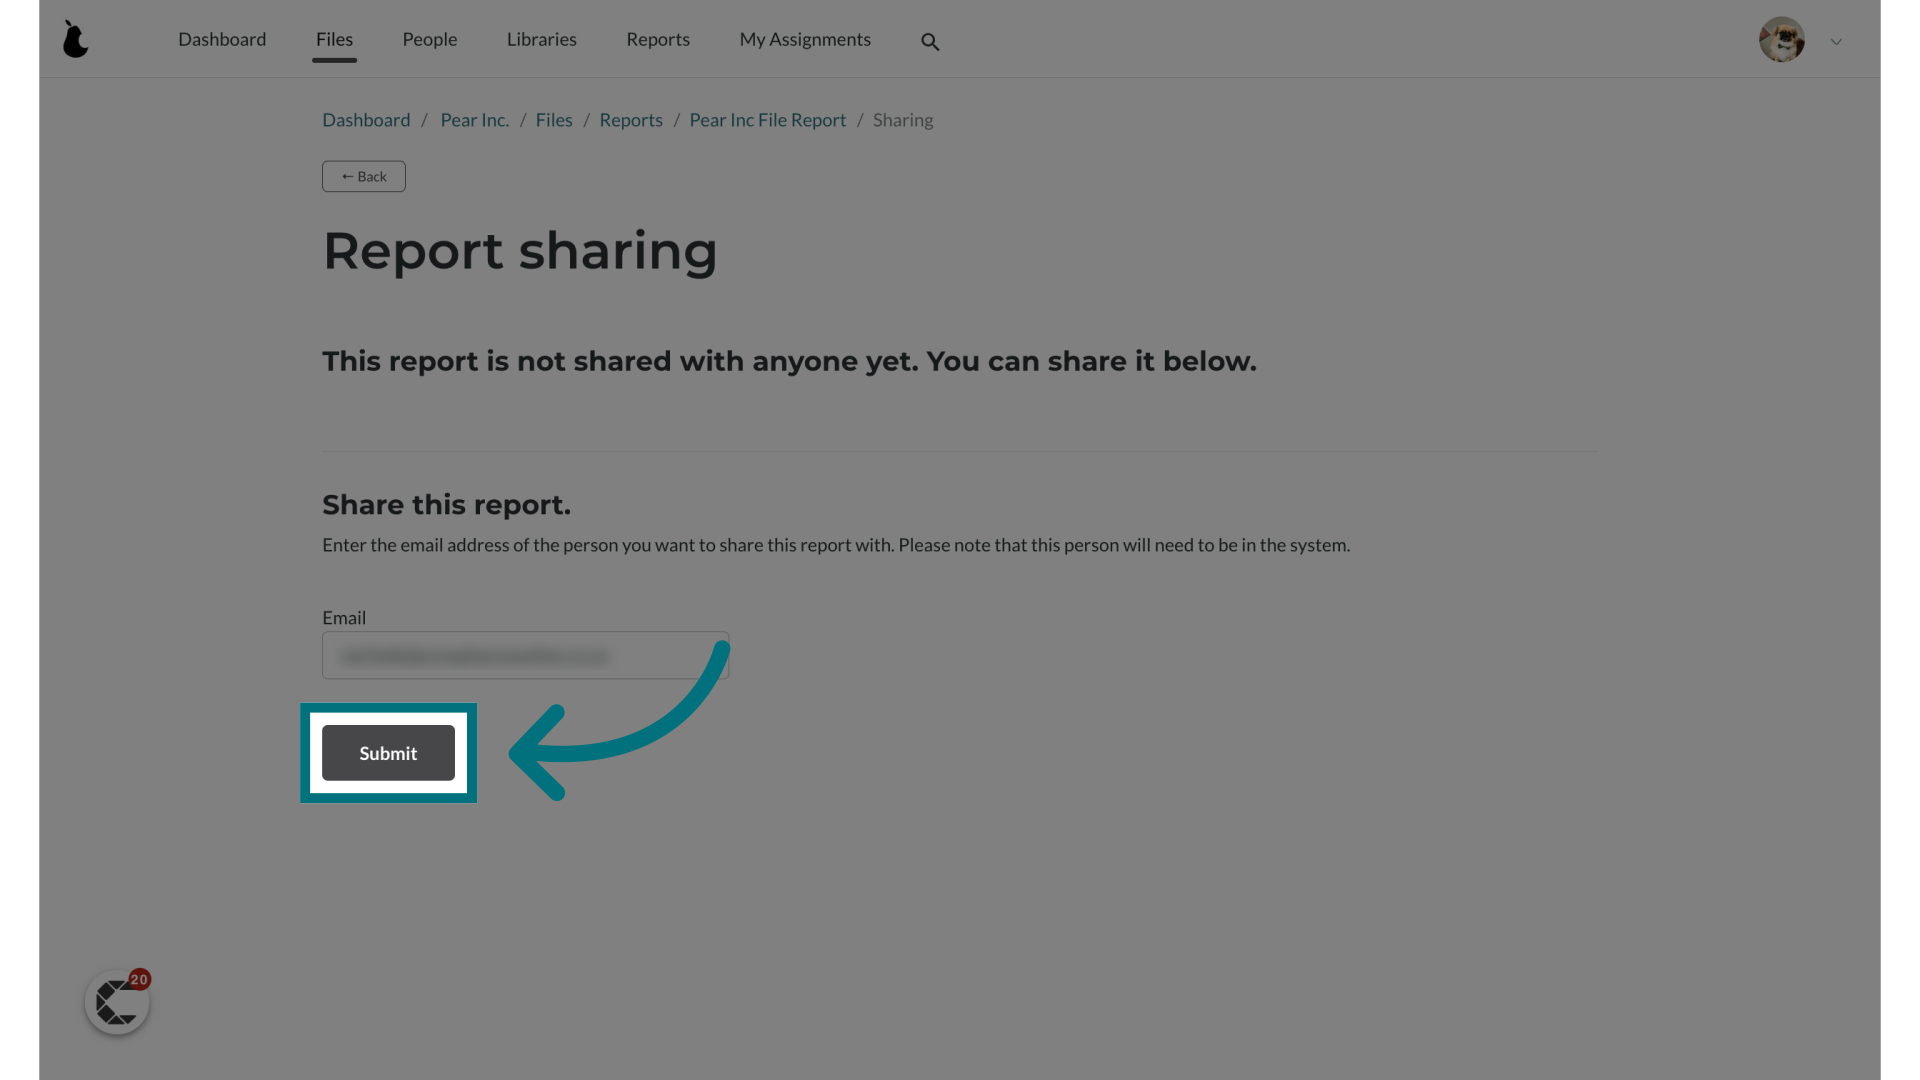
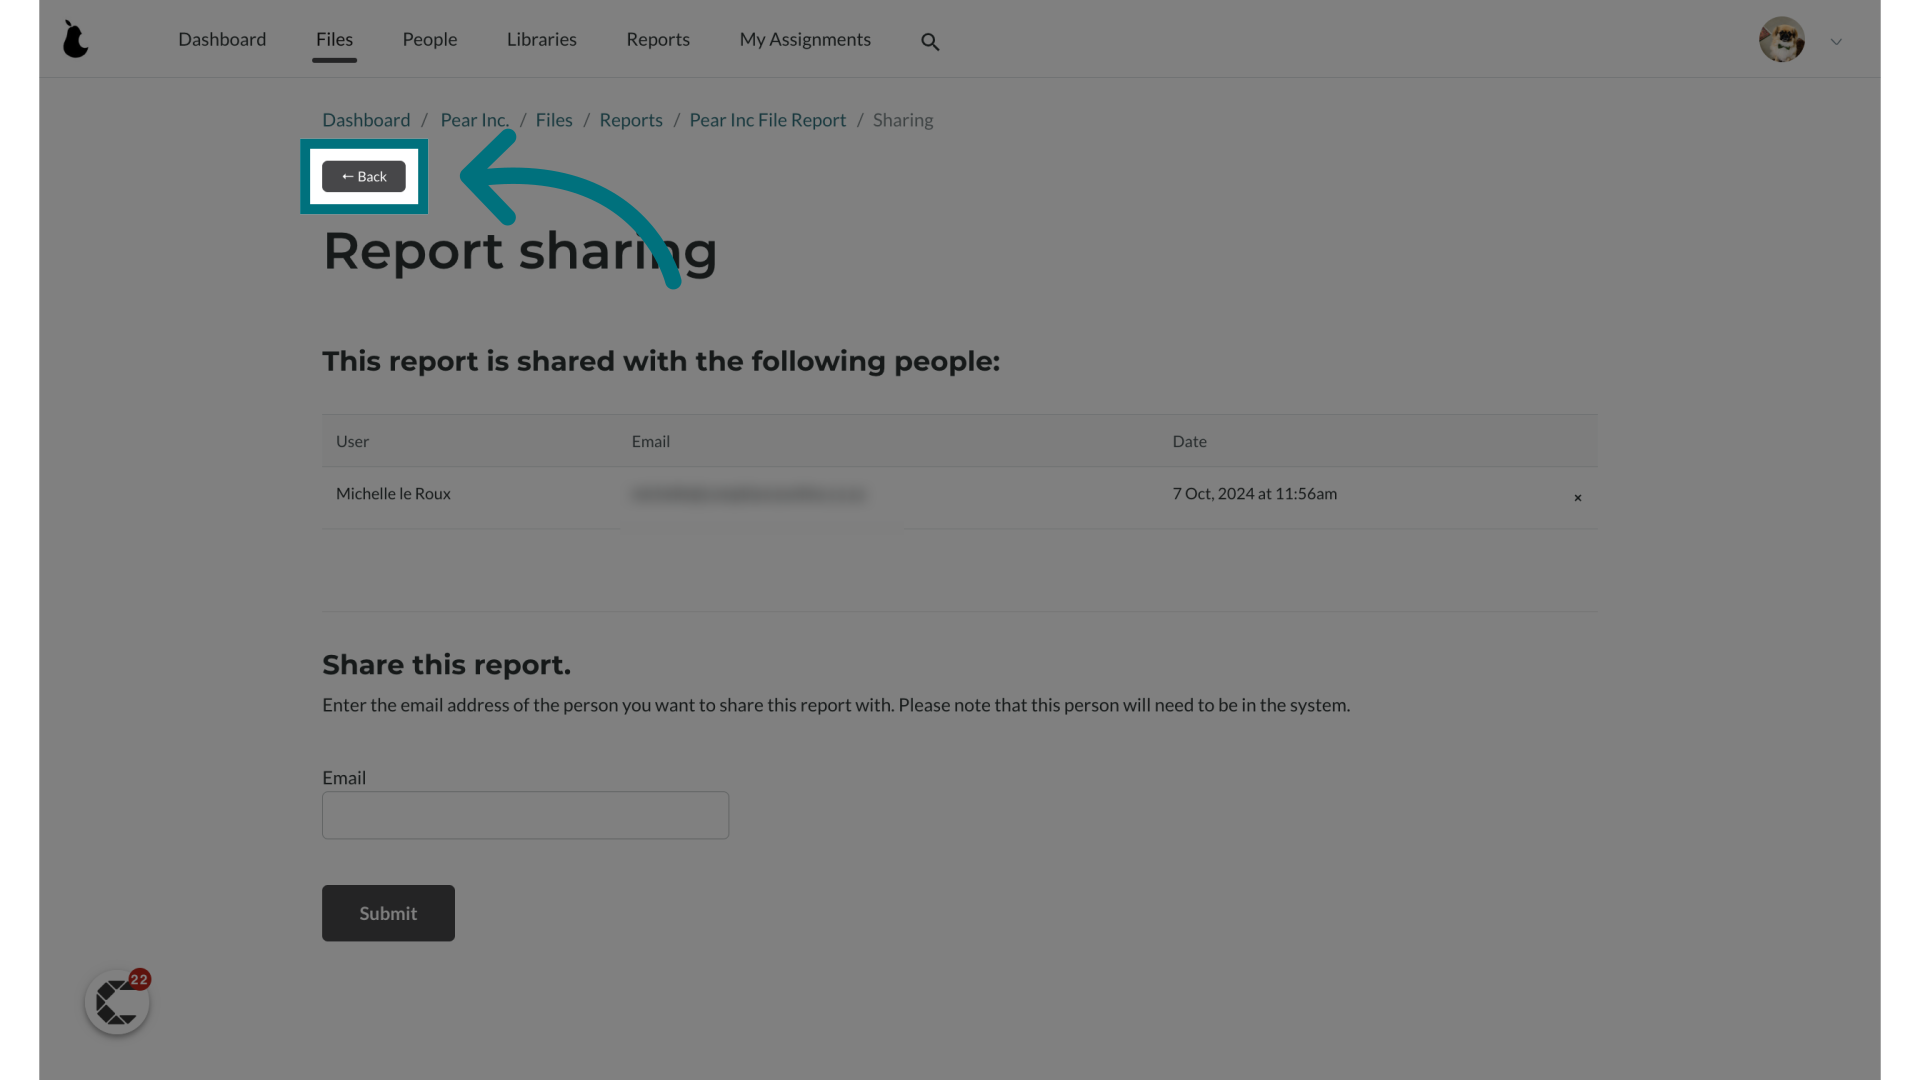
4. Here you'll find a list of individuals with whom this report is shared.
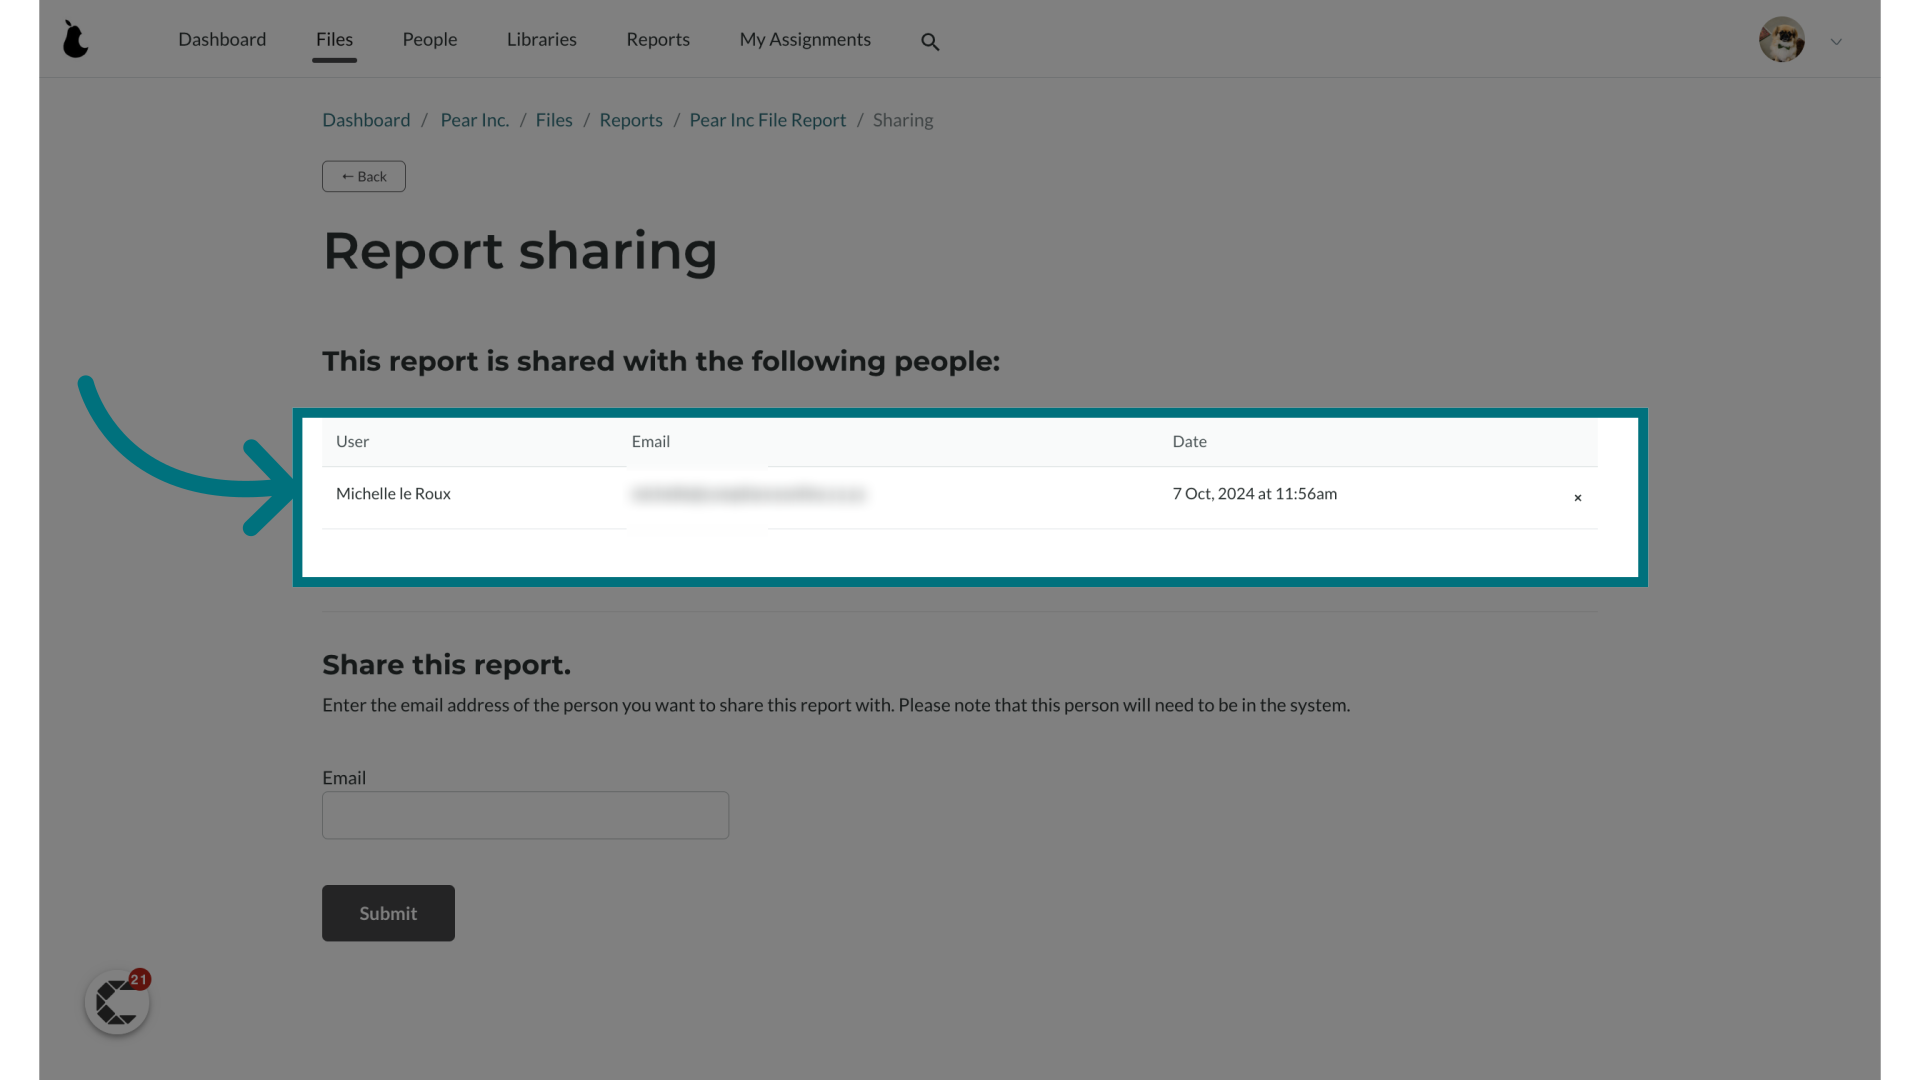
5. If you wish to stop sharing a report with a user, click on the cross next to their name
6. Click "← Back"
Exporting your report
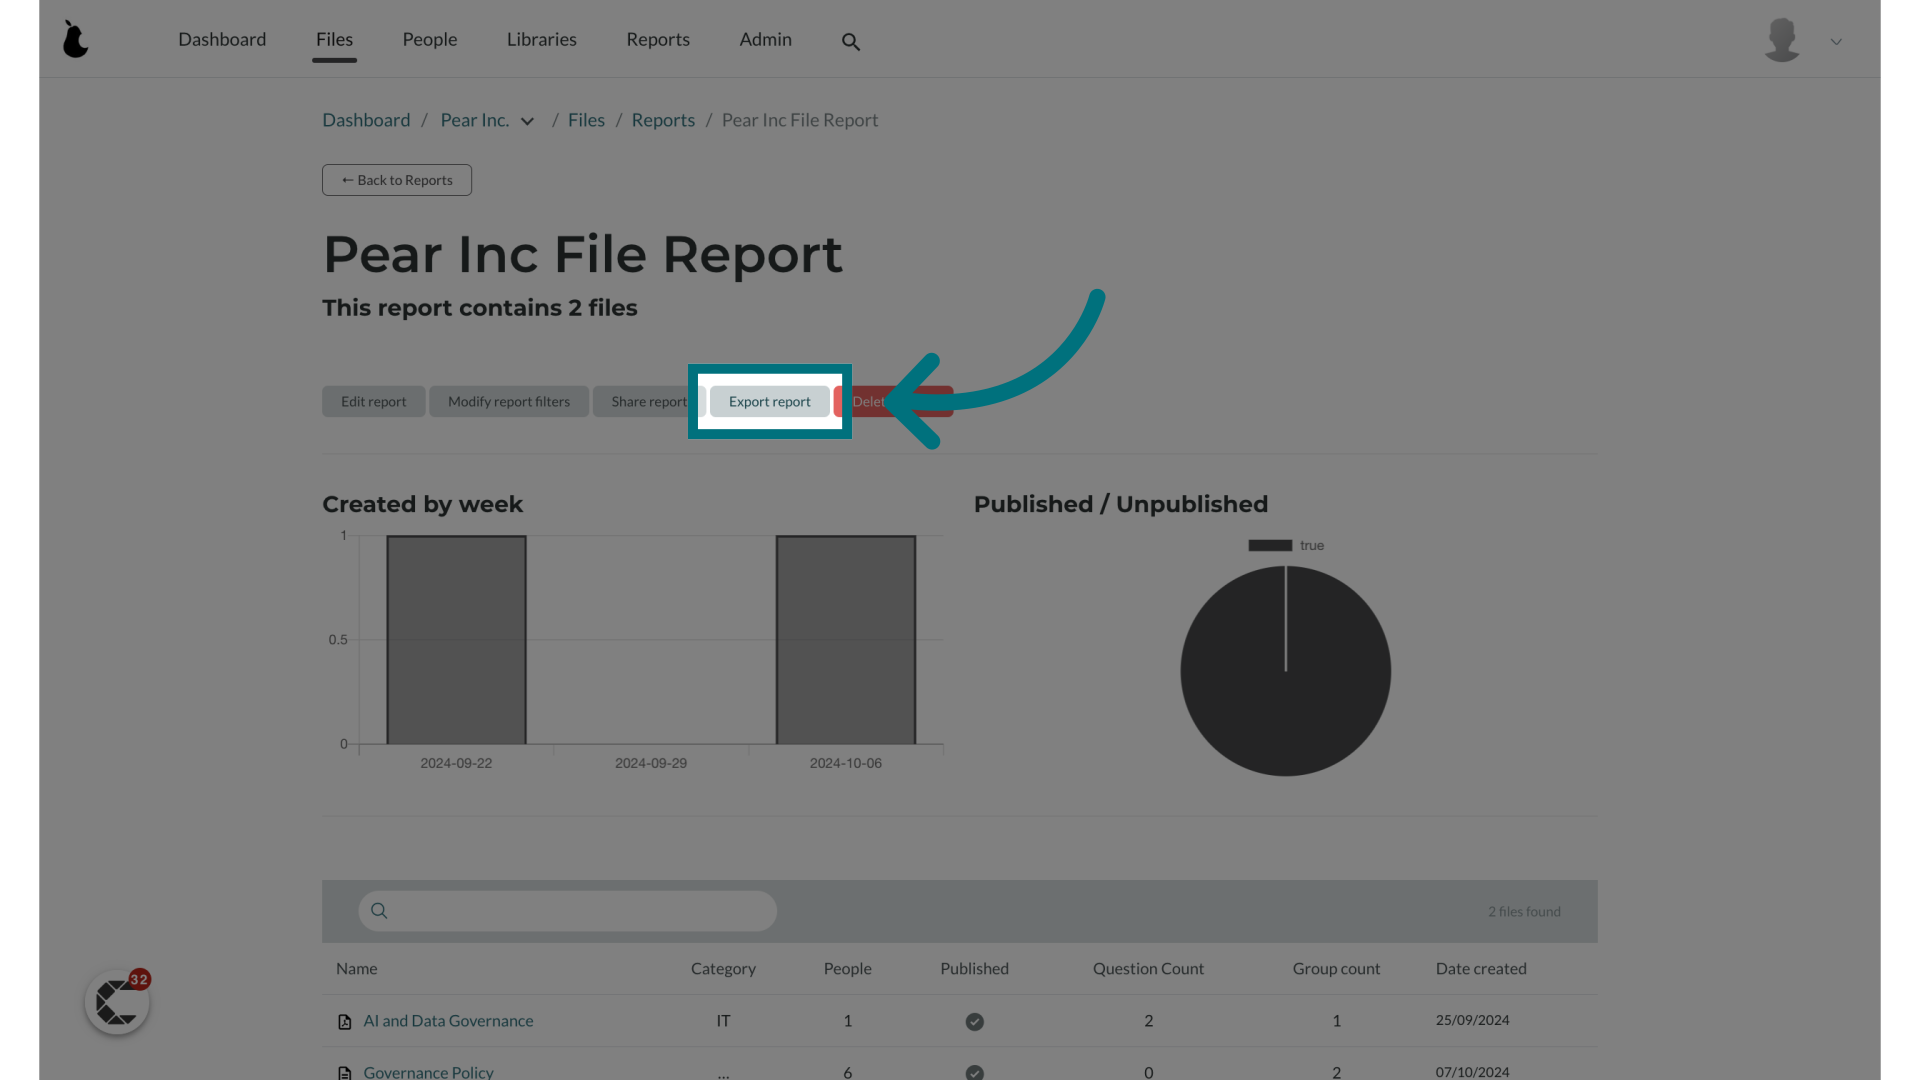
1. Click "Export report"
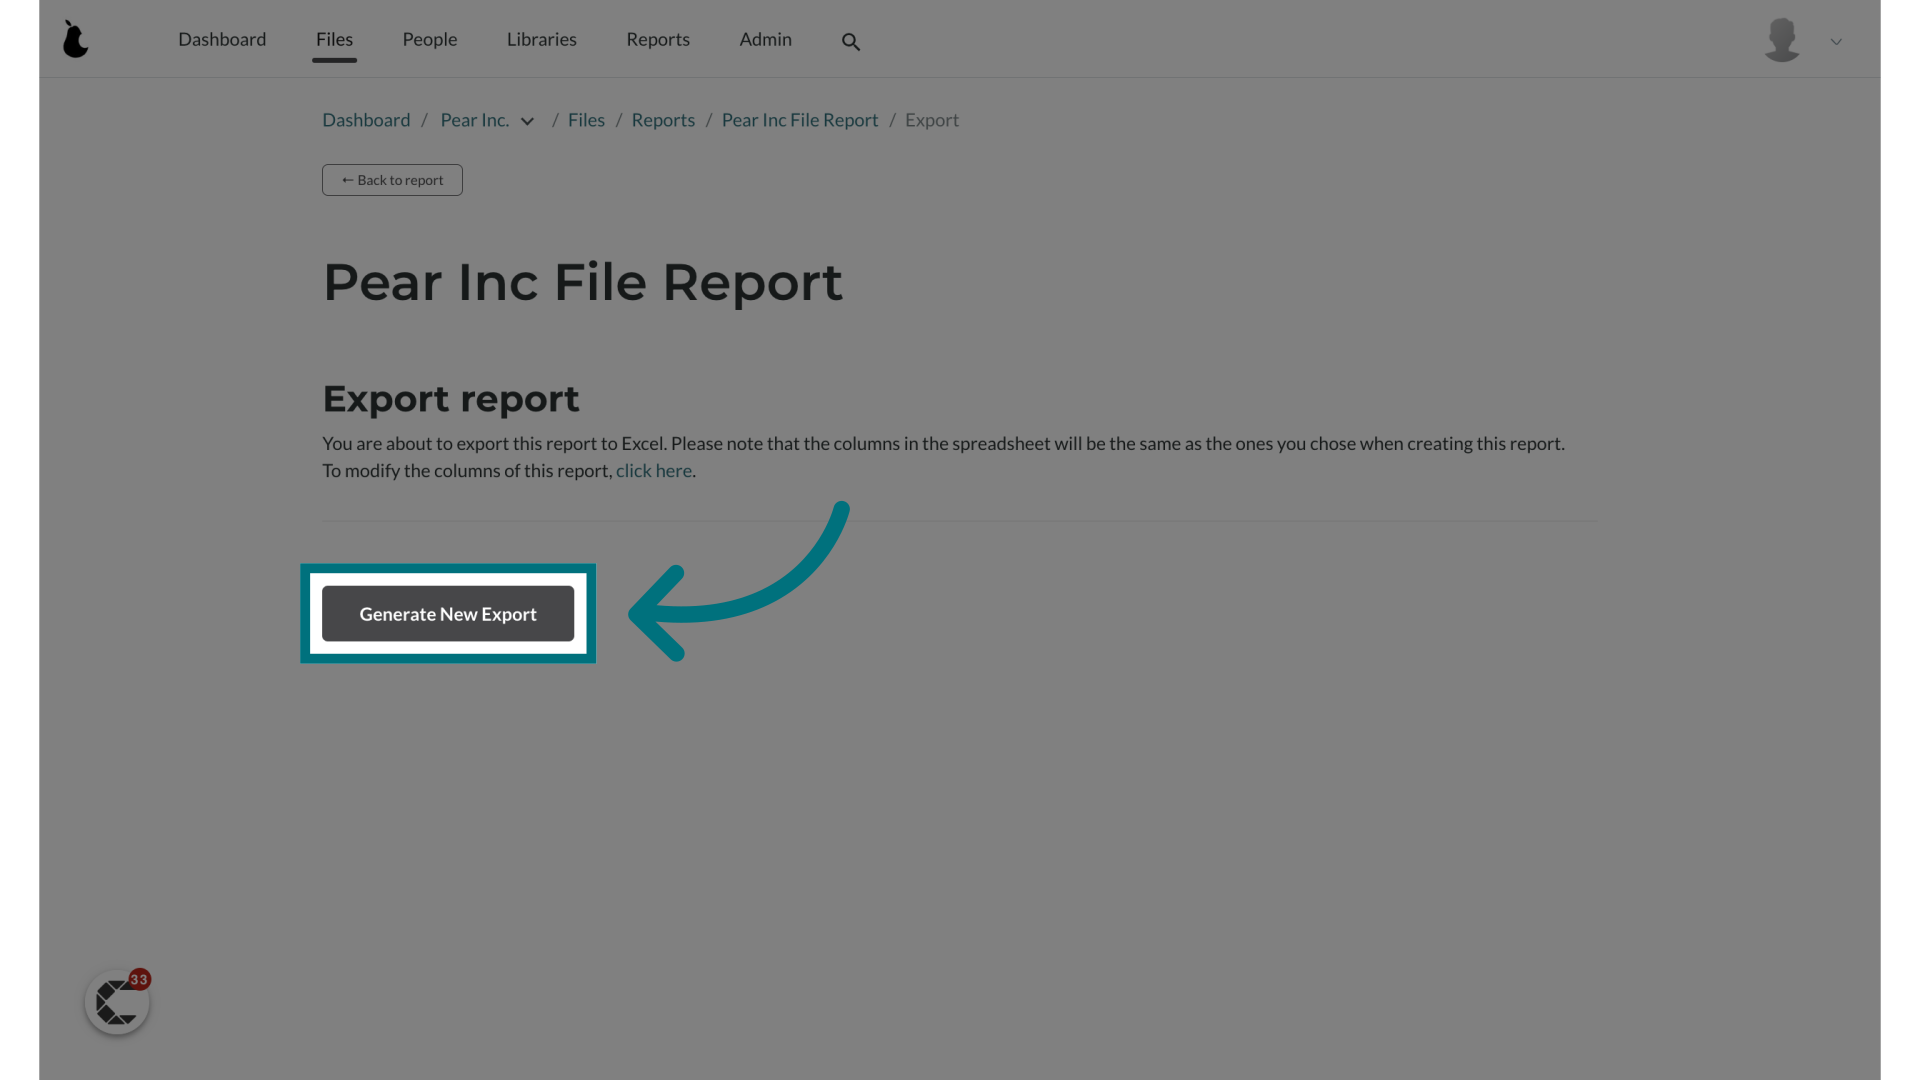
2. Click "Generate New Export"
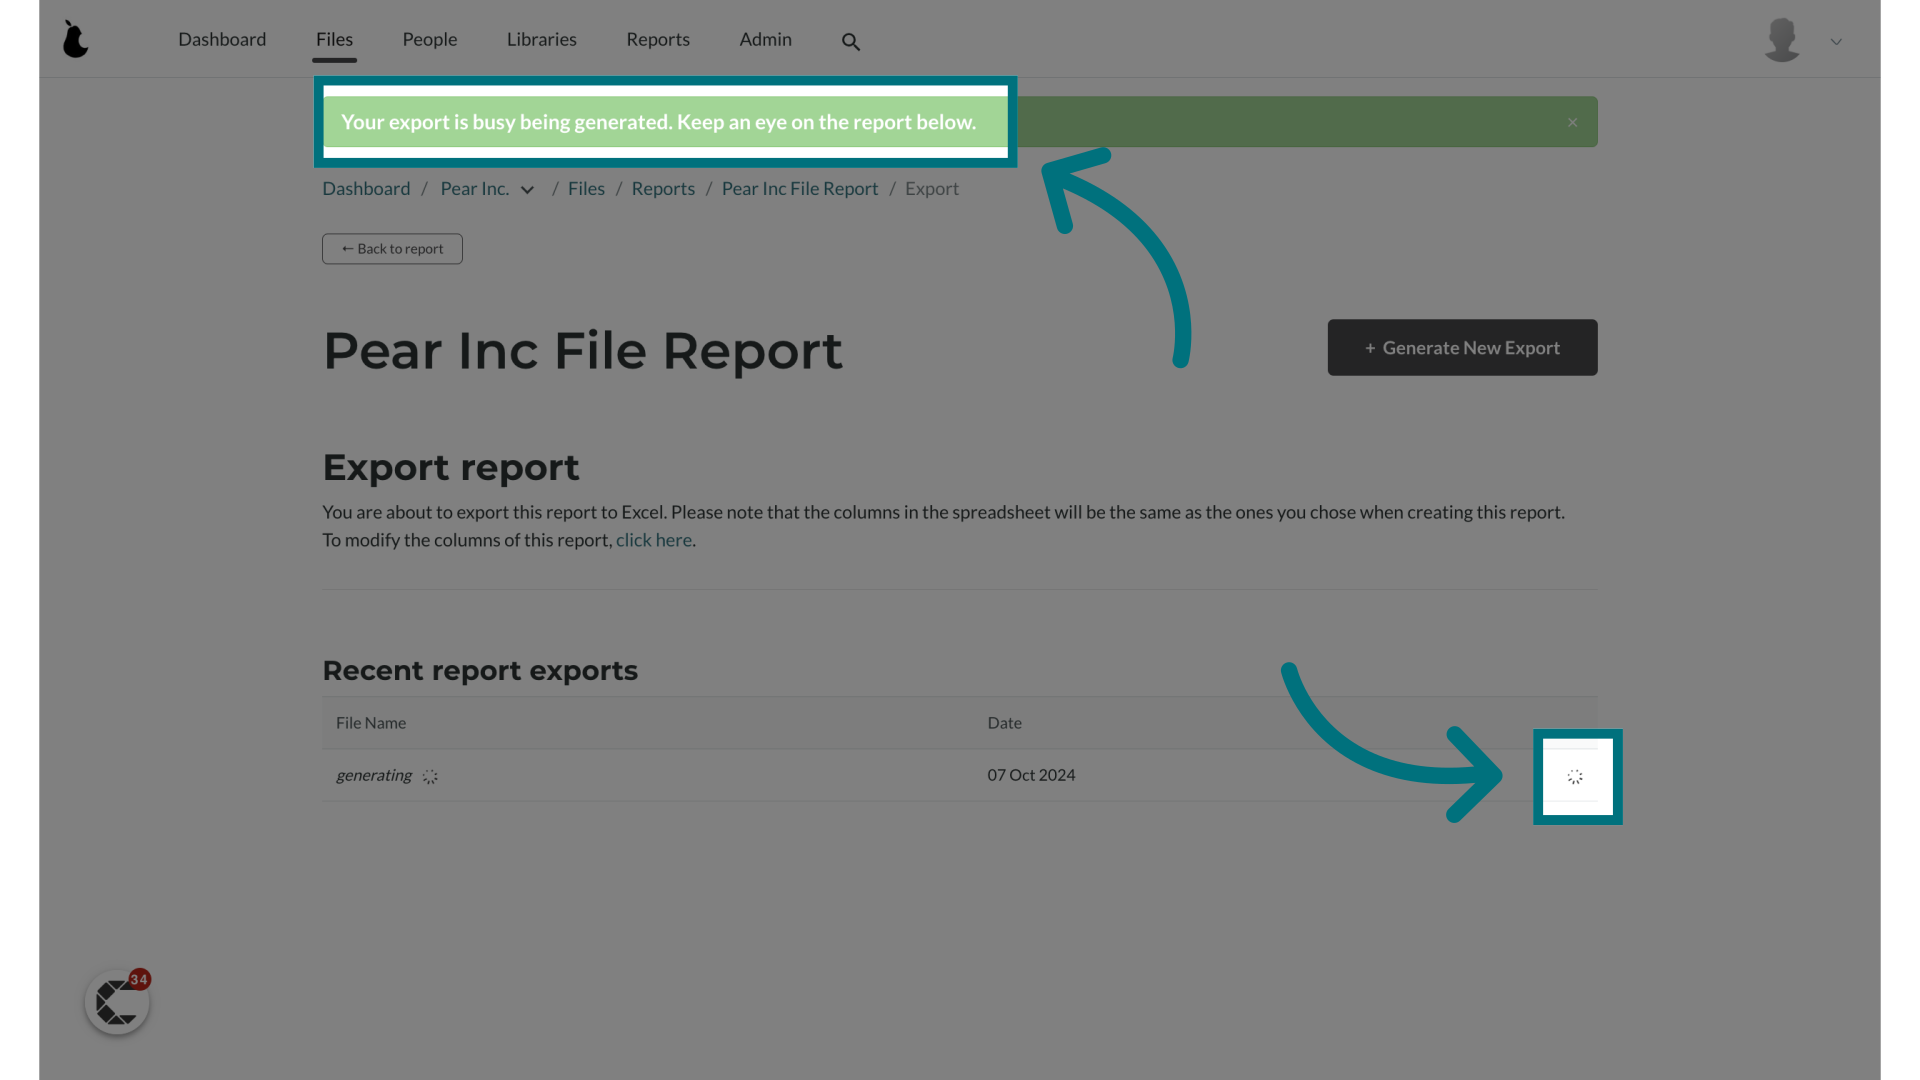
3. Wait for the report to finish generating
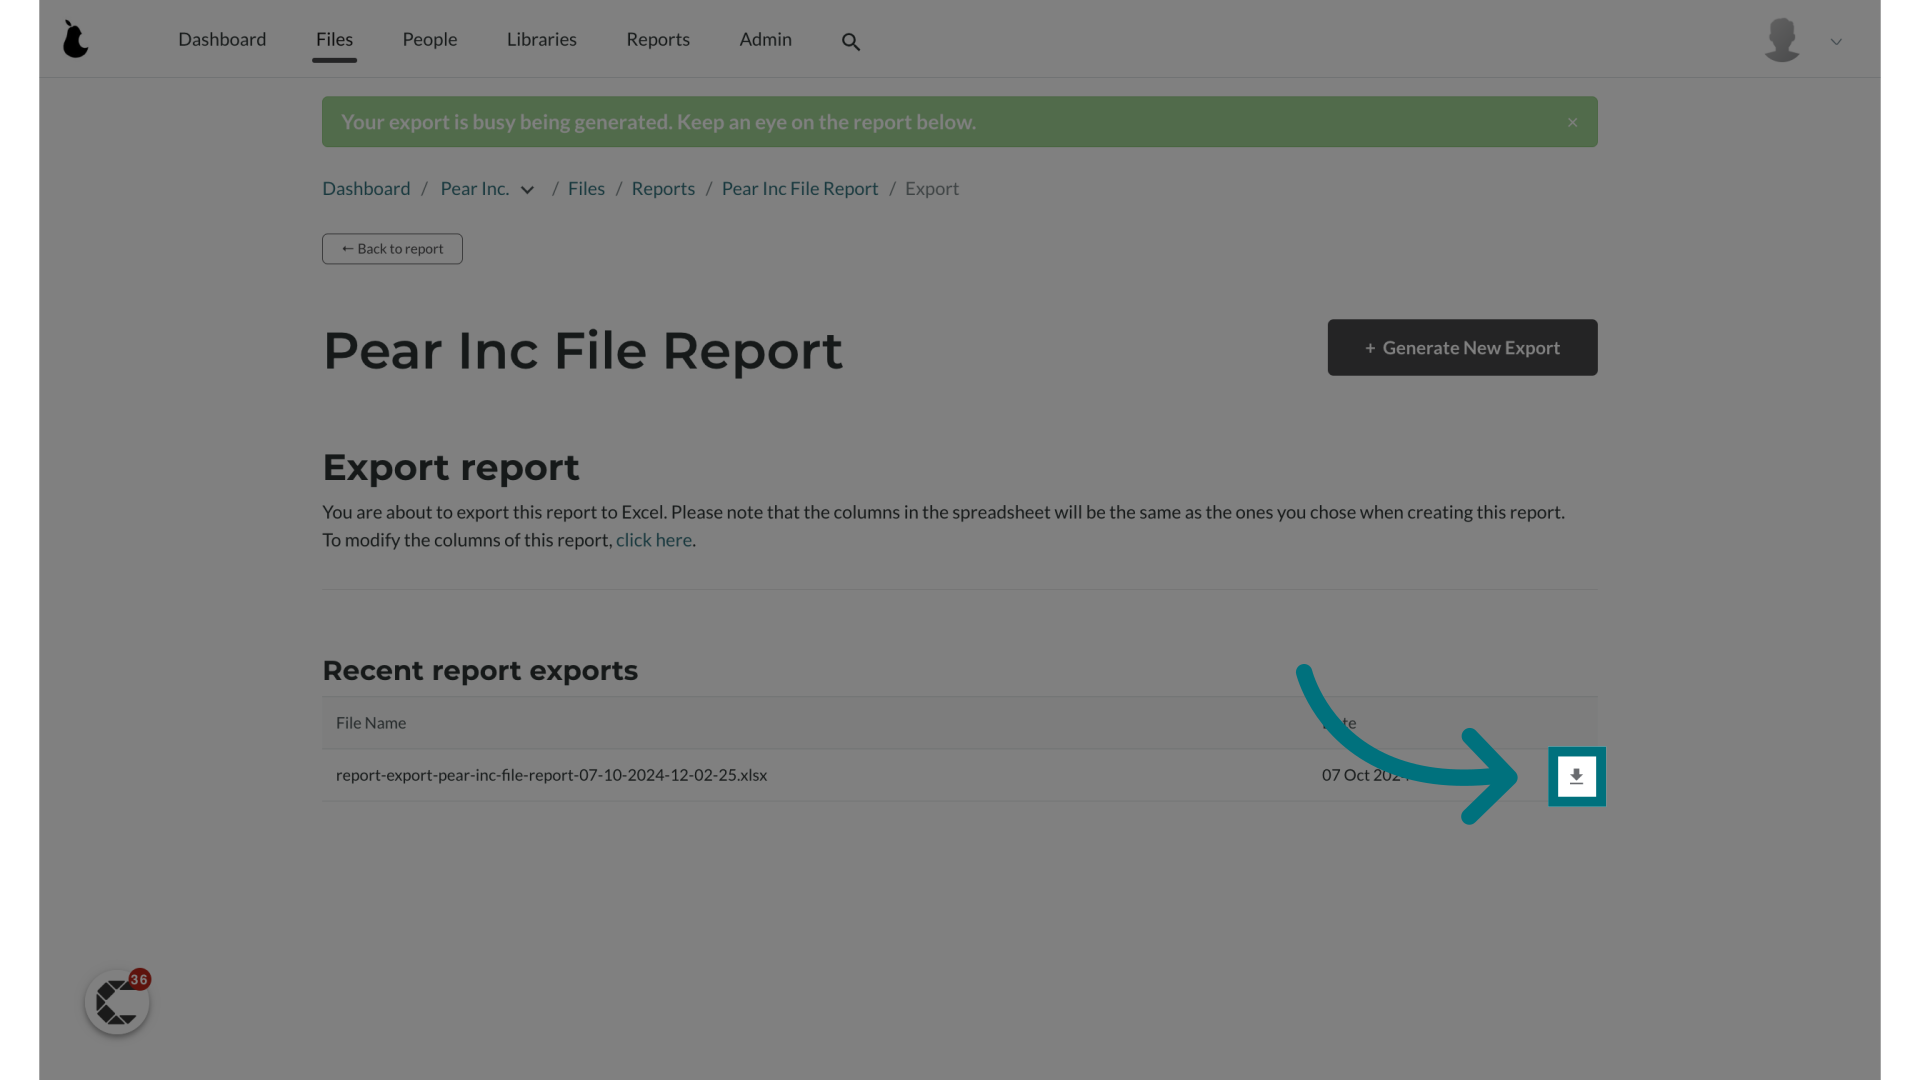
4. Download the report
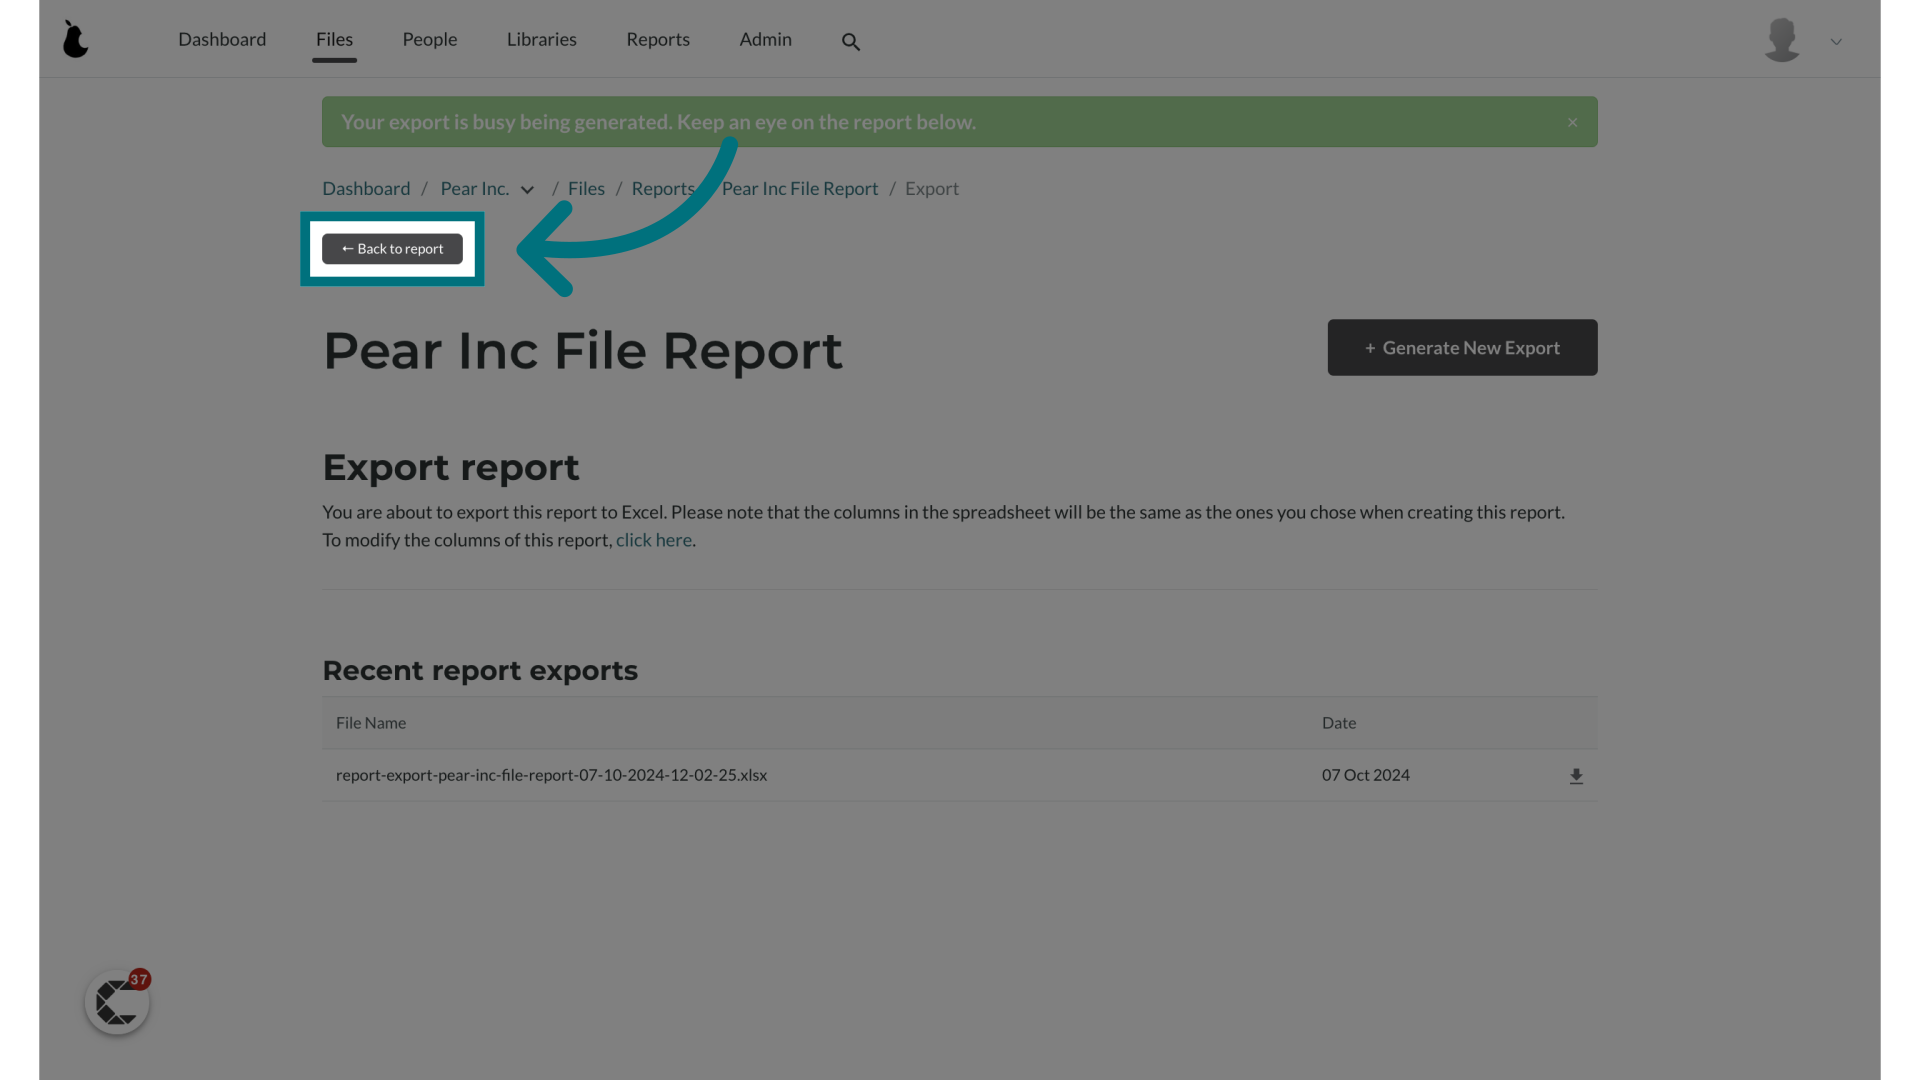
5. Click "← Back to report"
Deleting a report
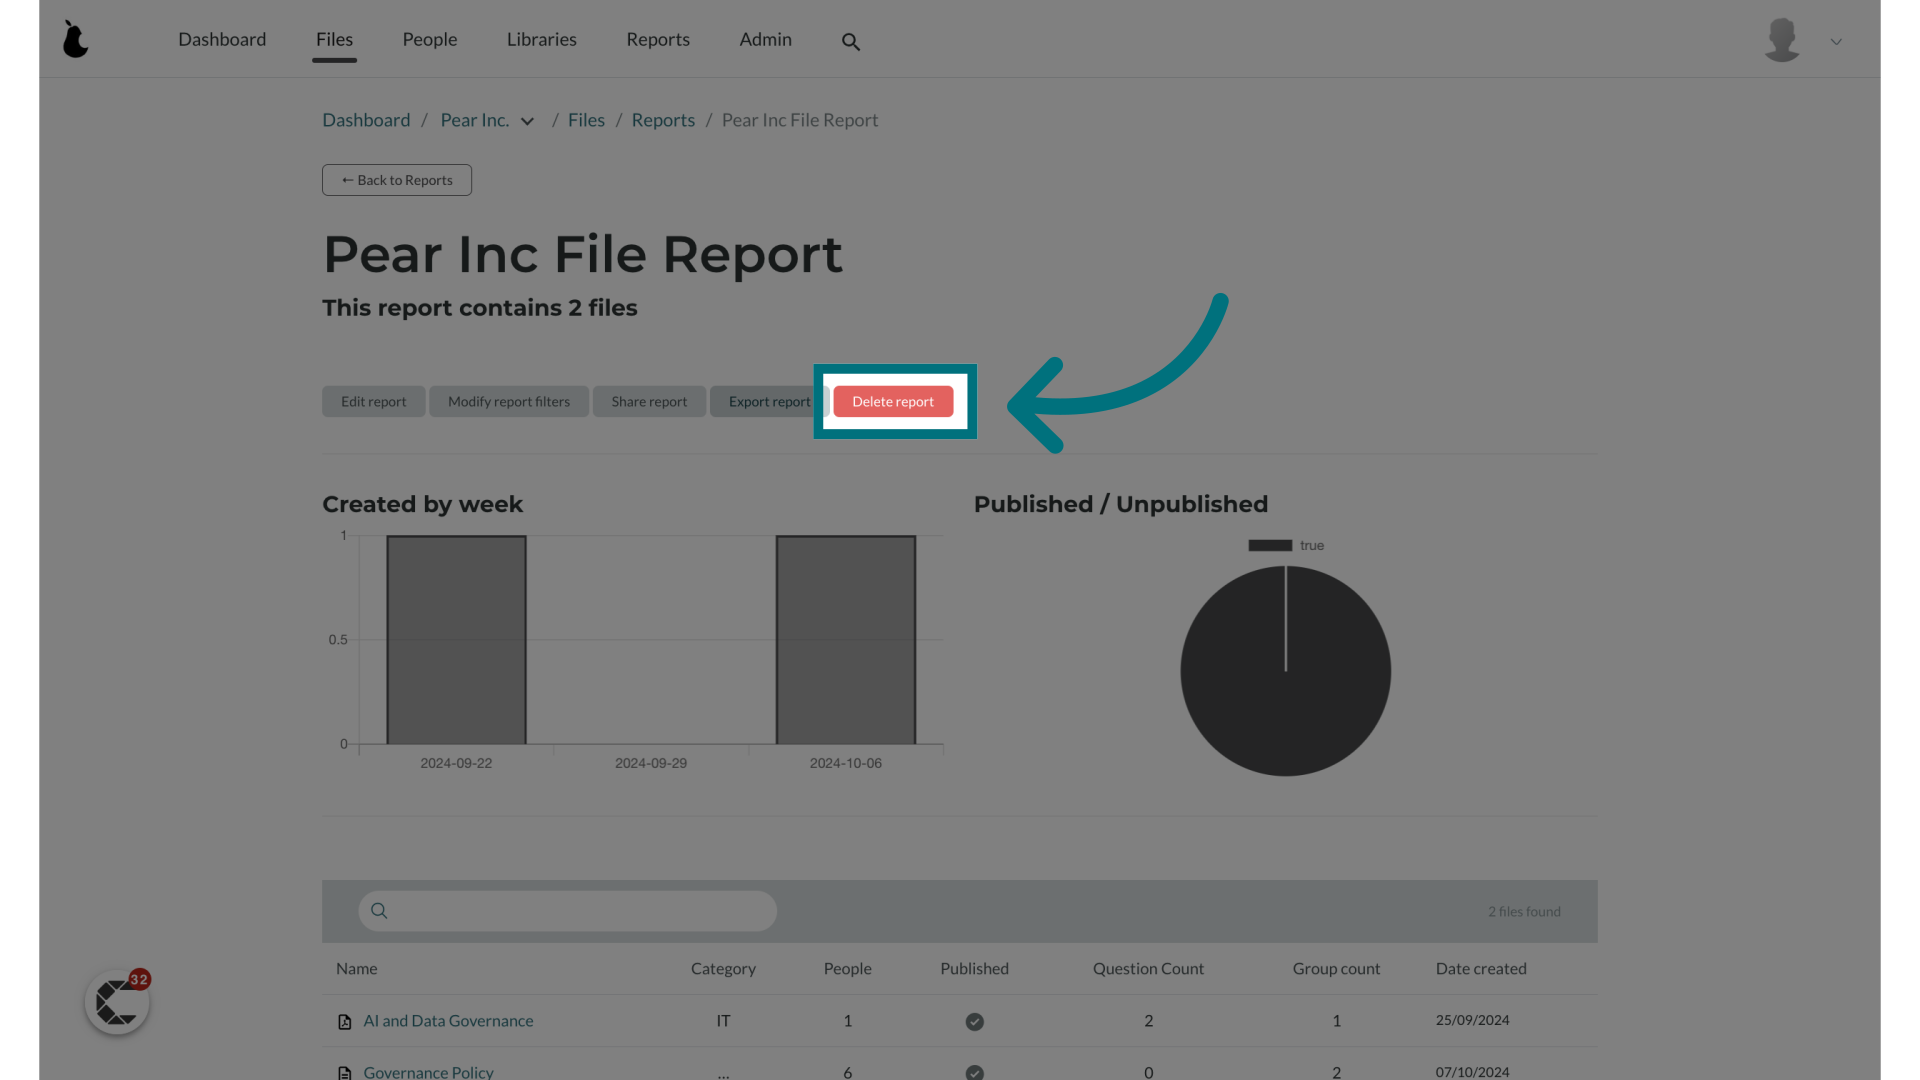
1. Click "Delete report"
How to access a report that has been shared with you
For detailed instructions on accessing & exporting a shared report, please refer to this help article: How do I access and export reports shared with me?
Was this article helpful?
That’s Great!
Thank you for your feedback
Sorry! We couldn't be helpful
Thank you for your feedback
Feedback sent
We appreciate your effort and will try to fix the article